Maps Properties
Each map has different settings. Learn about them below.
Once a map is added in the Tour Map, the Properties tab will populate with map settings. Each map has its own set of settings and options.
Map ID – Pano2VR will assign each map a unique ID. This will also appear in the Map properties of the Map element in the Skin Editor.
Title – Add a title for the Map.
Map Provider – Select a map provider. The default maps provided are OpenStreetMap, Mapbox, and Google Maps. You can also choose a different tiles provider with the Custom option. Depending on which option you choose here, you will get a set of more fields that pertain to the chosen provider.
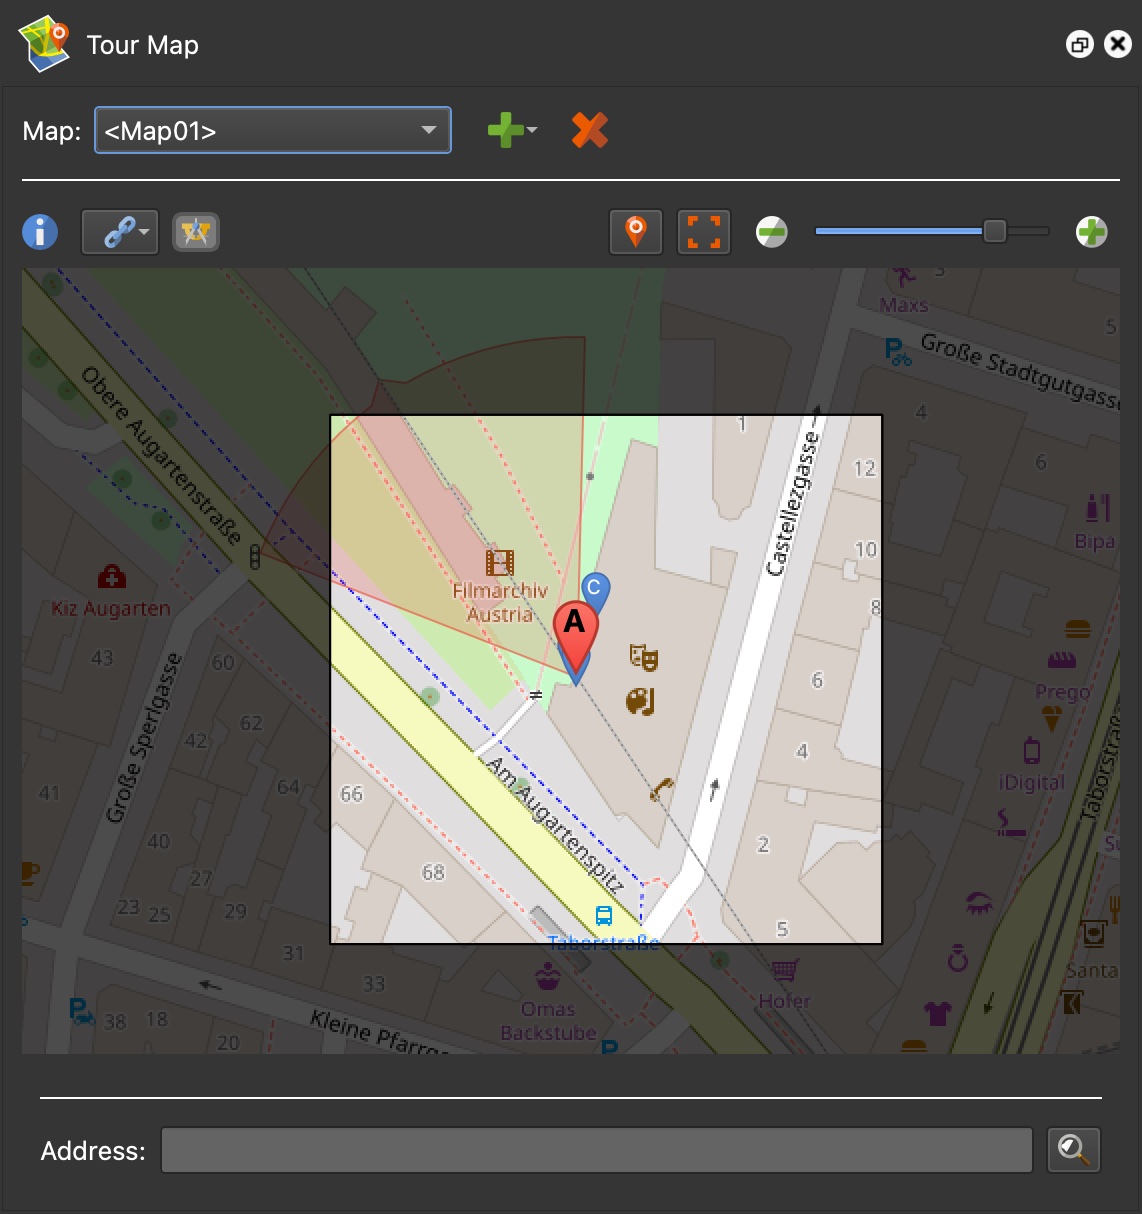
Map Limits – Limit how far one can move within a map. This helps prevent users from losing their spot in the map. To clear the limits, click the red X.
To create limits:
- Click the red Map Pin. When you do this, the Tour Map will flash blue. This indicates that the map is ready to have limits drawn.
- In the Tour Map, drag over the area of the map that should be limited. The mouse cursor will be a crosshair. And the area that shows how far one can move within the map is highlighted while the rest is darkened.
- Adjust the borders of the limits by dragging them.
OpenStreetMap
Maps Style – Choose from Streets or Terrain for the map style.
Google Maps
Google API Key – Add your maps API key. If you use Google Maps, you will need an API key and you may be charged for the usage. Learn more. Adding the API key here will store the key per project, rather than per skin.
Map Style – Choose the map style: Street, Hybrid, Terrain, Satellite. Choose from a single-layer map or a multilayered map. When Multilayered is selected, a table appears where you can choose to add the different Google map styles, or add a custom URL template for other types of layers.
Google Custom Style Code – Styles can be created using the Google Maps Platform Styling Wizard. When you’re done, click Finish in the wizard and copy the JSON code into this field.
Mapbox
Access Token – Mapbox requires an access token. Add it here.
Single Layer or Multilayered – Choose to have a map with a single layer or with multiple layers. Multilayered will open a table to add map styles and Style URLs
Open the Mapbox Studio by clicking the globe button.
Custom
Use Custom to add custom map tiles. For example, Stamen makes some interesting tiles, including a watercolor tiled map.
Single Layer – Choose to have a map with a single layer and add the map URL Template. You can also set the Maximum Zoom.
Multilayered – Multilayered will open a table to add Style URLs for each layer and add maximum zoom to each layer.