Embedded Video
Learn how to embed videos into panoramas which allows for a seamless integration of live-action video in a still panorama.
An embedded video differs from a pinned video in that an embedded video is blended in to the image and a pinned video is “attached” to the image. Embedded video when compared to a full 360º video, has the advantage of producing smaller file sizes.
When taking the 360º panorama image, record a regular, flat video as well. Try to keep the action in the center where there is lens distortion. You will need an image editor that supports video as well. In the tutorial, we use Photoshop to blend the video and image.
Extract a Patch Image
- Add the panorama to a Pano2VR project.
- Set the default view to the portion of the panorama that will have the video.
- Add a patch over the area where the video will be. Make it a little larger than video area, to make it easier to blend the edges.
- Extract an image patch. Use PSD to have the patch open in your default editor for PSD files. We are using Photoshop in our example.
Match the Patch Image and Video
The next step is to line up the video with the patch image.
- In Photoshop (or other editor), drag in the video, creating a second layer with the patch image as the background layer and the video above the patch image.
- Select the Transform tool.
- Change the opacity of the video layer to make it easier to see the patch image under it.
- Resize the video layer to best match the patch image. It won’t be a perfect match if different cameras were used. In our example files, the video was captured with a phone camera, so the distortion is different from the patch image. Try using the Warp Tool to do fine distortion correction.
Create a Looping Video
If your video is like our example, a fountain/running water, then it makes sense to put this video on loop to give the appearance constant water flow.
If your video is non-repetitive, like a person speaking, then it makes more sense to simply edit the beginning and ending of the video clip so when the video does repeat it is seamless. You will not need to edit the clip like we have in the following instructions.
Still in Photoshop:
- Go to Window > Timeline and create Video Timeline.
- Set the video layer’s opacity back to 100%.
- Trim the video as necessary to capture the best portion. In our example, we cut the video where there was minimal camera movement. This will create a new video track.
- Cut the video at about 2 seconds in from the end. Then move that region to the front of the video clip. Now the video will loop, but edit in the middle will jump.
- Use a dissolve to tidy this edit. Click the video transition button in the video timeline and choose Cross Fade.
The video clips are now visible as two layers in a Video Group.
Blend the Video into the Patch Image
Now we add a mask to blend in the video to the patch. This removes the area outside of the video area and lets the patch image show through.
Still in Photoshop:
- Select the Video Group.
- Add a layer mask.
- Adjust the brush to have low harshness and begin to mask out the area around the video. Tip: Alt-click the mask layer to see the entire mask and then use the Bucket tool to mask out the area. (See the video tutorial at about 9:25.)
It’s now obvious that the image and video have different color spaces. We can fix this using an adjustment layer. Still in Photoshop:
- Add an Adjustment Layer.
- Select, Exposure. Make sure to limit the adjustment just to the layer directly below. Adjust the Gamma Correction slider.
- Change the color temperature if needed. For our example, we are using another adjustment layer, Photo Filter, to change the video’s color temperature.
Export to Video
- File > Export > Render Video.
- For size, make sure the video size is under 1080px and divisible by 16. This will will make the video device-friendly.
- Render.
Convert to Pinned Video
Go to back to Pano2VR:
- Select the original patch.
- In the patch’s parameters, click Convert to Pinned Video and then select the looping video you just created.
- In the Pinned Video parameters, add audio if needed. We used Directional Rectangular.
- Add a Web Output and generate the project.
Adding an image mask
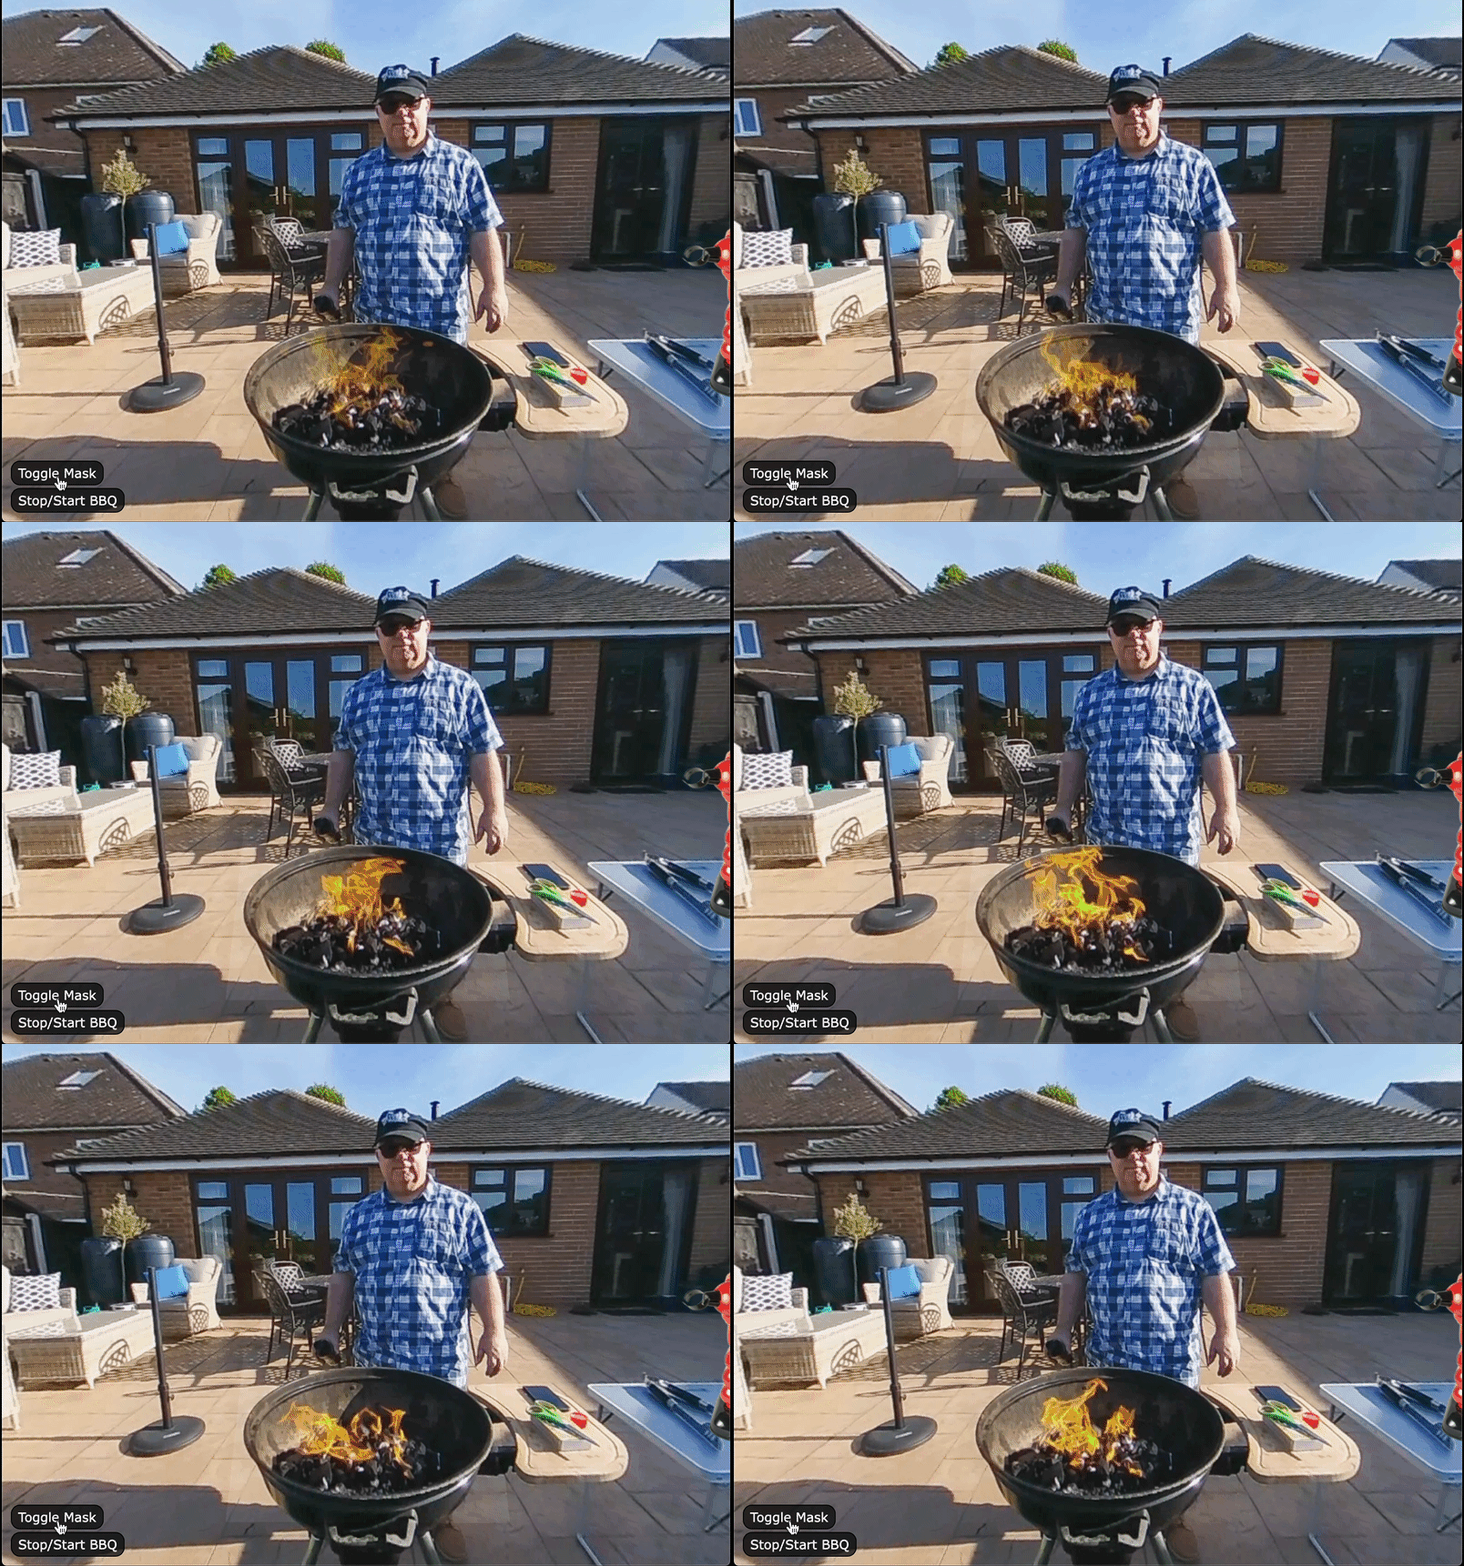
Sometimes the edges of the video are visible in the panorama. This is usually caused by the differences in the color spaces that images and videos use. Adjusting Gamma can help, but on high contrast scenes it might not be enough. Adding an image mask to the patched area will help eliminate the video’s edges. You can see an example here.
The following steps mimic the steps in the video tutorial above but add a few extra steps that are needed for masking. Masking helps the video match the panorama. You can either have Pano2VR generate the mask or you can create a mask in your photo editor for more precision.
Using the mask generated by Pano2VR:
- Extract the patch.
- In your editor of choice, add the video clip and transform and edit as needed.
- Back in Pano2VR, find the original patch and convert it to a pinned video.
- Select the video you created in Step 2.
- In the video’s properties, click the Generate Image Mask button for Image Mask File.
- In the dialog that appears, define the amount of feathering.
- Save and export the project.
If you need a more precise mask, create your own using the following steps.
Creating a mask in Photoshop (or any editor that supports a video layer):
-
Extract the patch.
-
Copy that patch in List View.
-
In Photoshop (or your editor of choice), add the video and the original patch image to the video timeline.
-
Add a mask to the video layer. Paint out the unnecessary parts, as in the video above.
-
Export the video with the mask.
-
Then drag the mask from the video layer to the image patch layer.
-
Invert the mask using Control-I or Command-I.
-
Hide the video layer.
-
Export the image patch out as PNG.
-
In Pano2VR, select the top patch and convert it to a pinned video. Then in the Patch properties, choose the masked video as the patch.
-
Select the second patch and covert it to a pinned image. Change its file to the inverted patch (the image with the inverted mask).
-
Save and export the project.
These steps are shown in the video below at about 34:00.
Webinar – Embedding Video
Take a deeper dive into the workflow of embedded videos with this webinar (with Project Files) recorded in October 2020. You’ll find project files to work with on the webinar page.