Working with Large Images and Projects
Pano2VR can handle very large tours and very large images (gigapixels) very well. There are just a few tweaks you will need to do to make the process easier.
Tell Pano2VR how to handle large projects.
Open the Settings/Preferences and open the Advanced tab and do the following:
- Deselect Load all images immediately
- Select Unload images to save memory
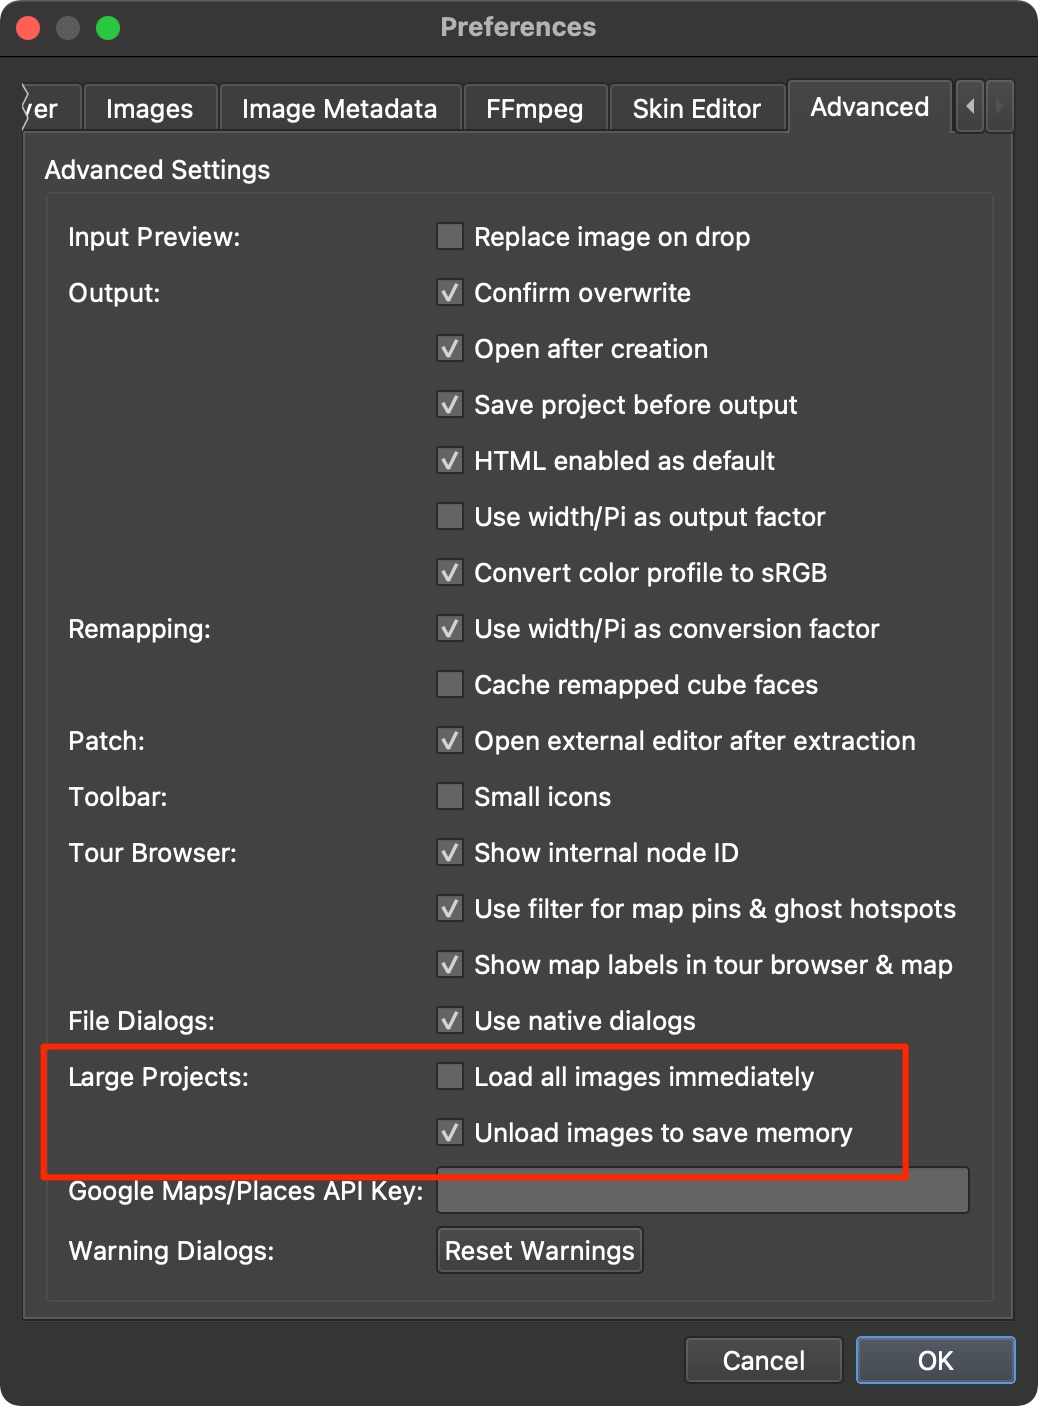
This will keep Pano2VR from loading all the images and after a period of time the images that have not been selected or worked with will be unloaded from memory.
It’s possible that the thumbnail images in the Tour Browser will not load. This is normal behavior. However, you can tweak the project even further.
Speed up Loading Images in Pano2VR
To speed up loading you can convert your images to tiled TIFFs. These TIFFs will have both the multi-resolution information and the thumbnails embedded in the file. They will, however, increase the file size. You can either convert the images by first brining them into a project or by using a droplet.
Using a Droplet
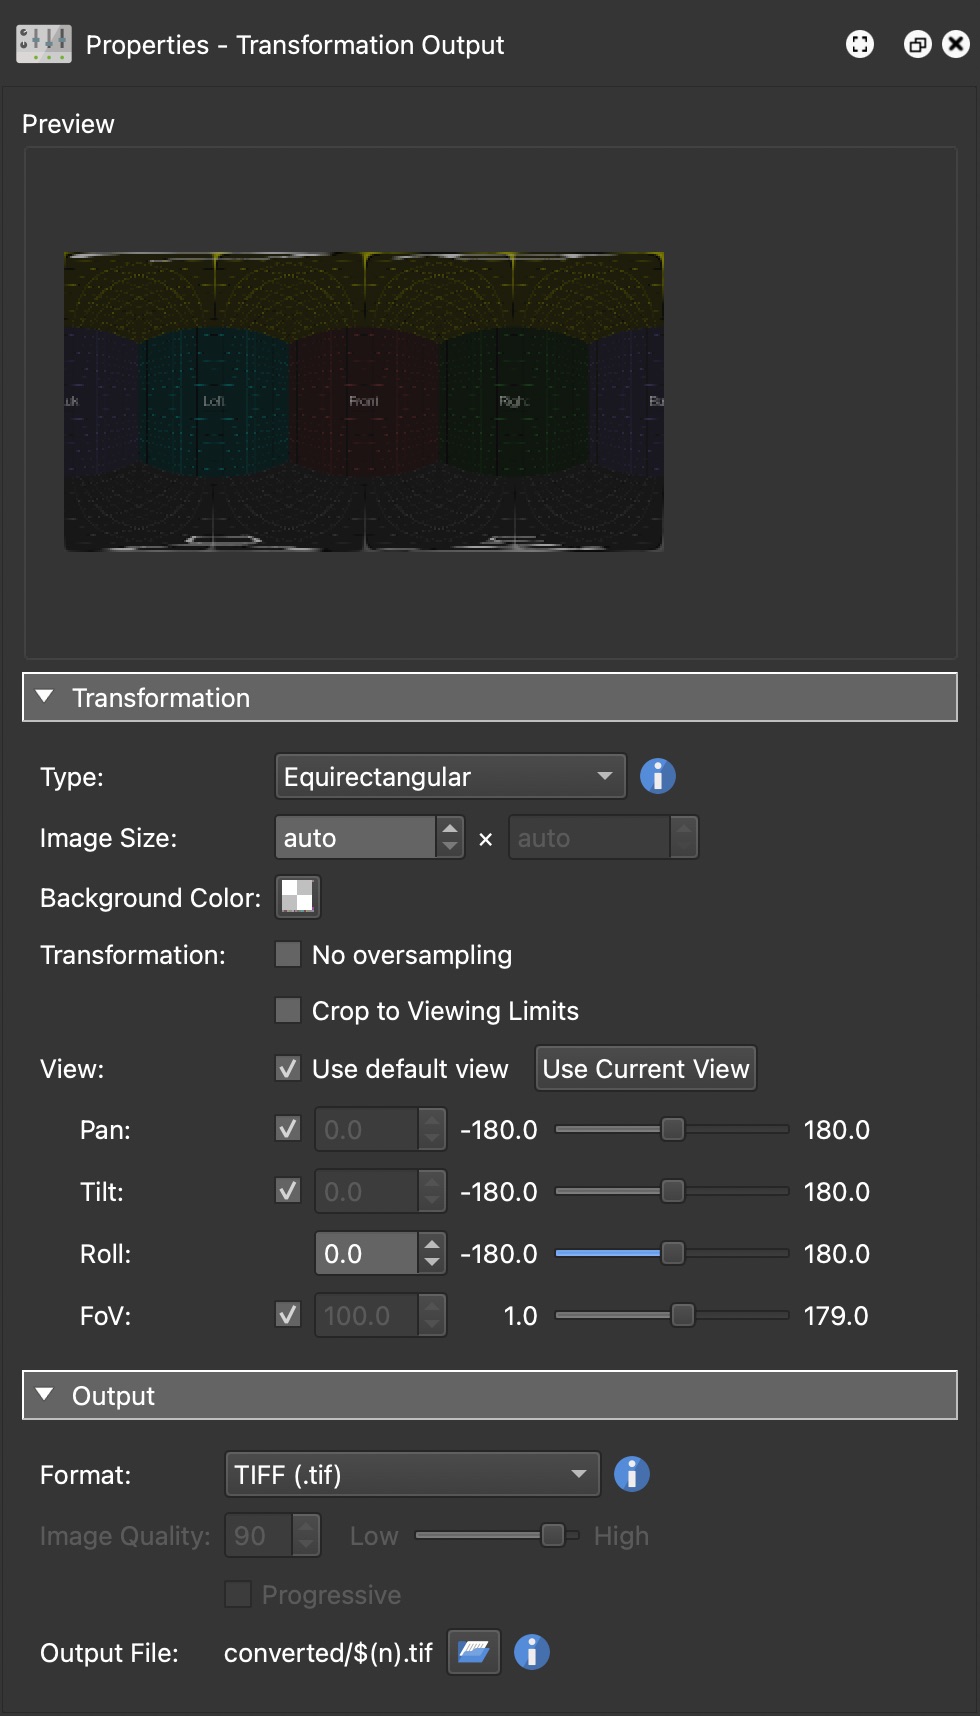
- First, open a new project in Pano2VR.
- Add a Transformation Output.
- In the Transformation Output properties, change Type to Equirectangular.
- Change the Output format to TIFF.
- Edit the Output Folder. Double-click the filepath and edit the filename. Add the placeholder, $(n), to the filename. This placeholder will use the original filename of the image, ensuring each output has a unique name. If this is not added, then each image will be overwritten during the conversion process. In our example, we changed to the folder name and just used the placeholder.
- Go to File > Save as Droplet…. Keep the settings deselected and then click Create. The droplet will be added to your Desktop.
- Take the folder of images to be converted and drop it on the droplet.
Using Convert Input
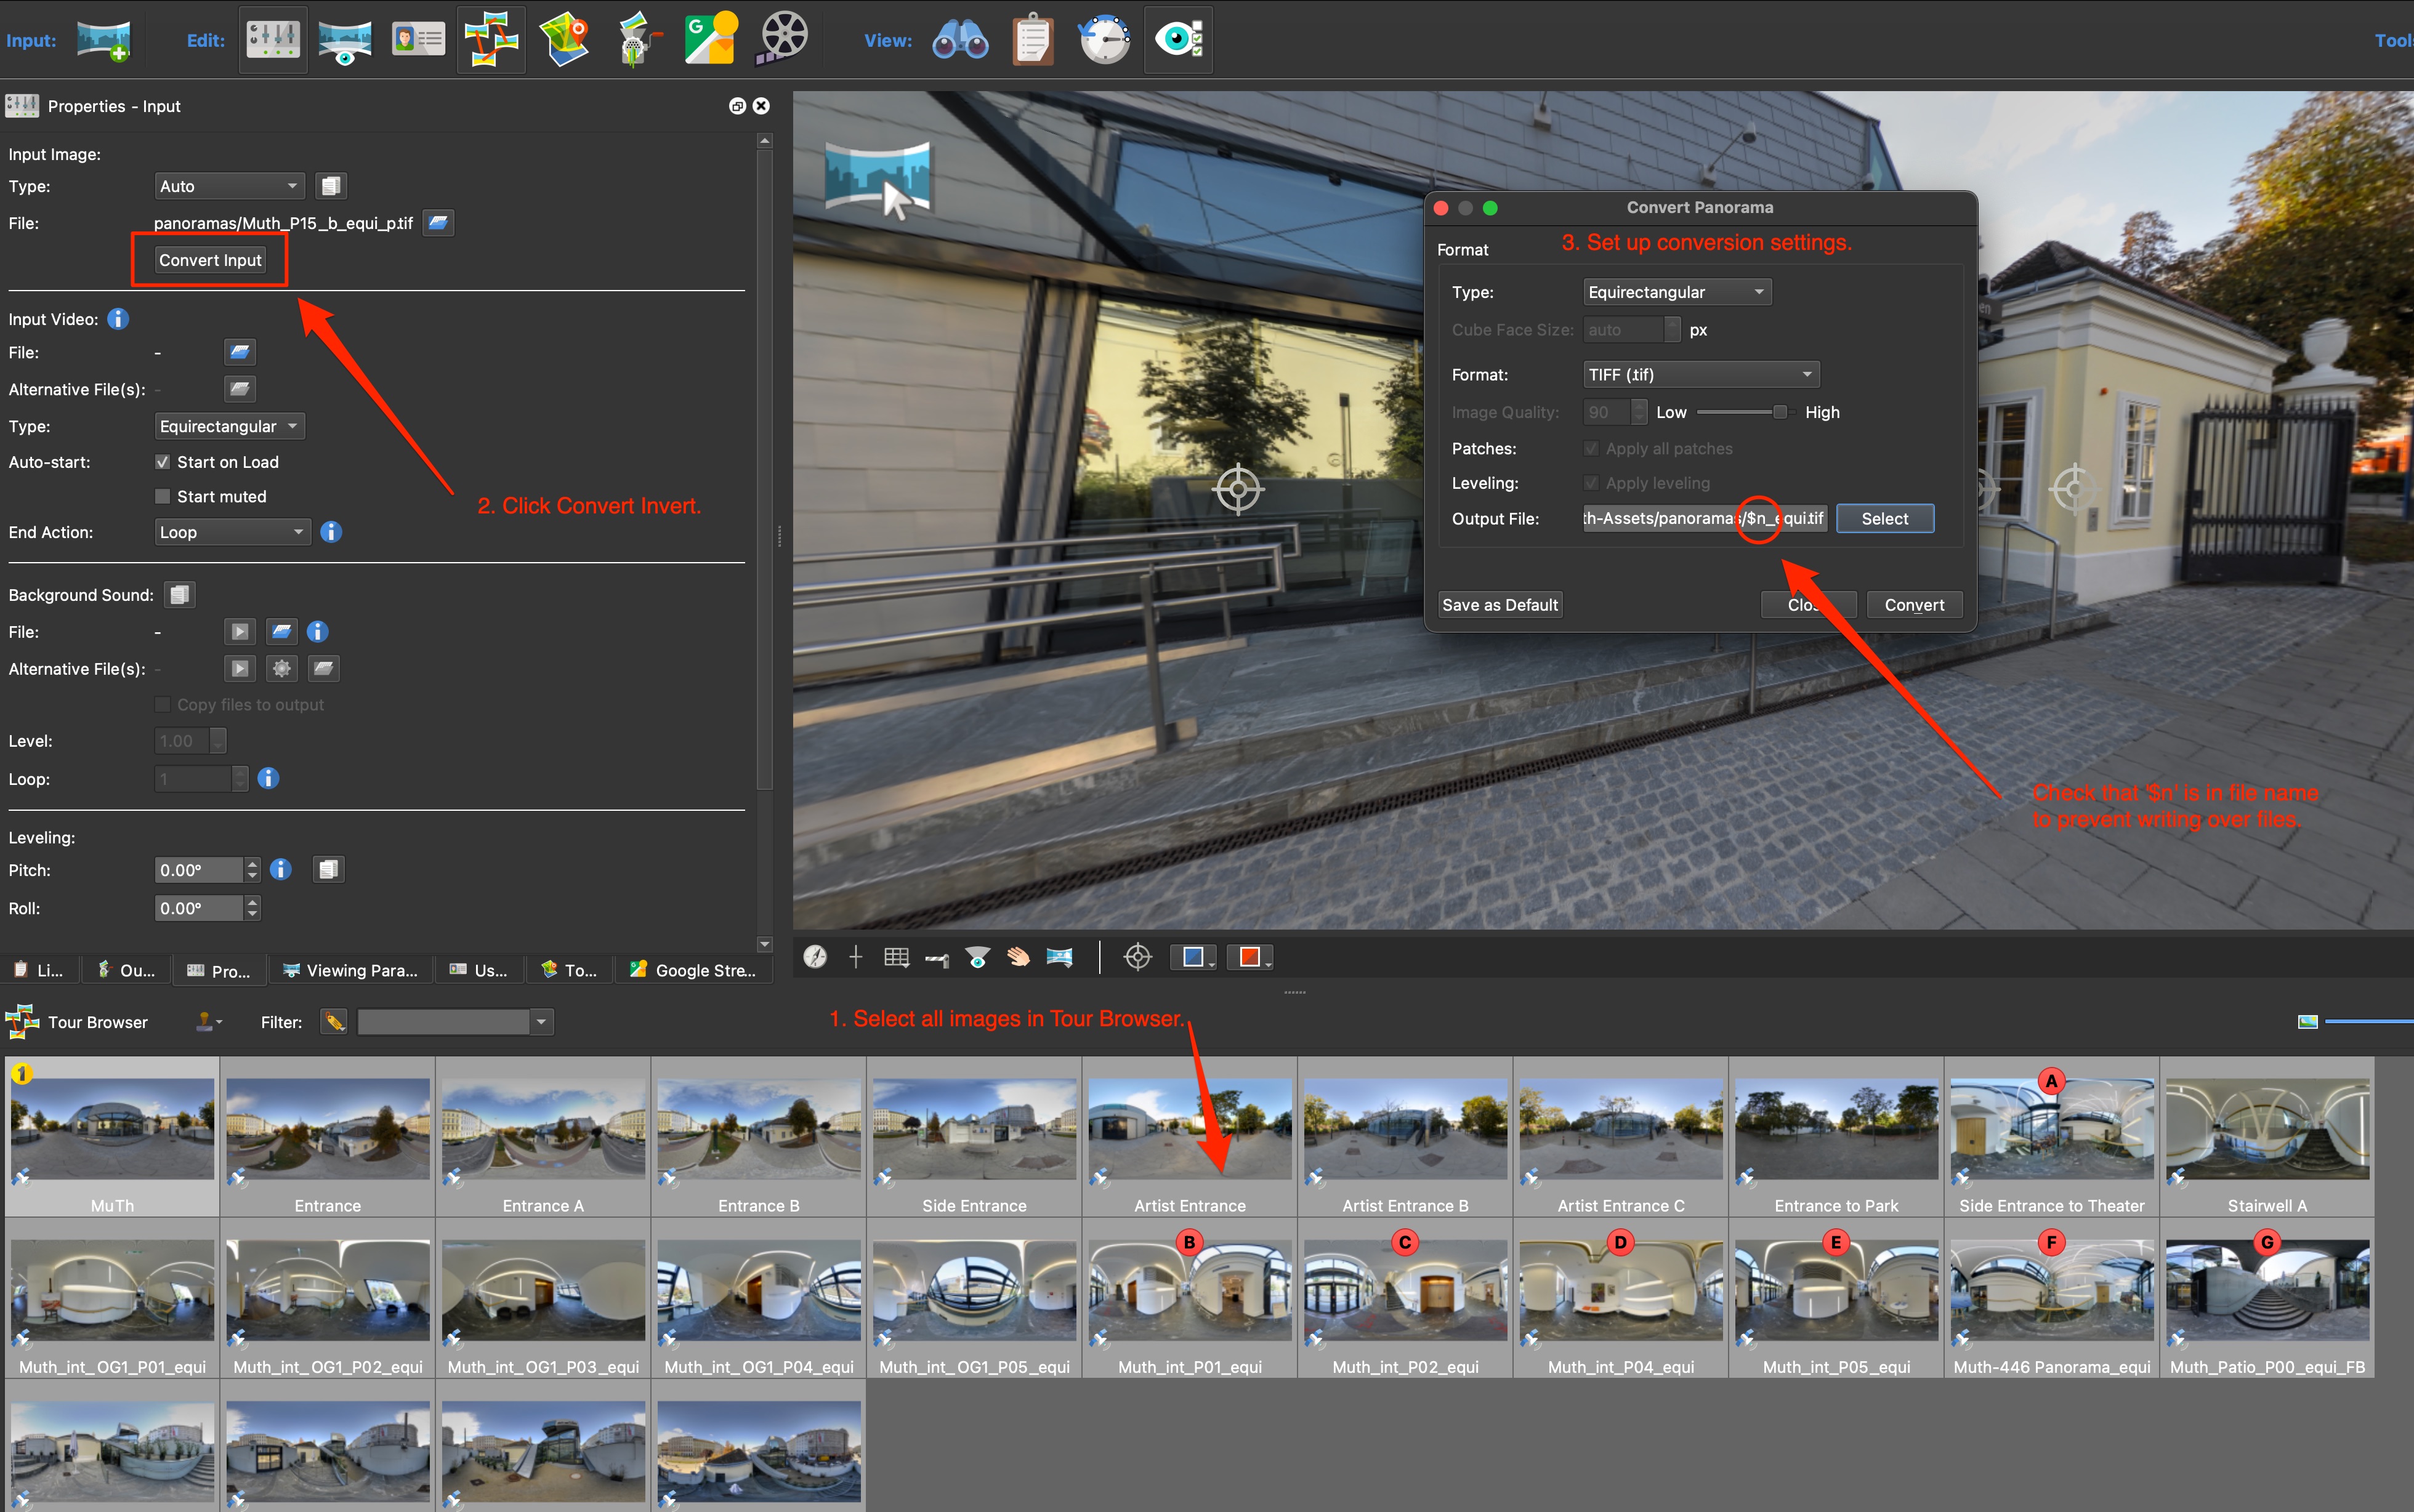
- Bring your images in to Pano2VR. (You may want to save a copy of your current project as Pano2VR will create new images.)
- Select all the images in the Tour Browser (Command-A/Control-A).
- In the the Properties Panel, click Convert Input.
- In the dialog that pops up, choose Equirectangular for the type.
- Choose TIFF for the Format.
- Add the placeholder,
$(n)to the filename in the Output file path. This will keep the images’ original file name. - [Optional] Add a new folder for the new images. This will make it easier to
manage the new images or to remove the original images from the project. For
example,
converted-images/$(n)_equi.tif.