Working with Large Images and Projects
Pano2VR handles very large tours and very large (gigapixel) images well. A few settings make working with them faster and keep memory use in check.
Tell Pano2VR How to Handle Large Projects
The loading options are saved with each project.
- In the Properties panel, open the Project tab.
- Under Project Settings, find Large Projects.
- Deselect Load all images immediately. Pano2VR then only loads a node’s images when you open the node.
- Select Unload images to save memory. Pano2VR then unloads the images of nodes you’re not working on.
It’s possible that some thumbnails in the Tour Browser don’t load right away. This is normal. See Project Settings for details.
Give Pano2VR Memory and a Fast Image Cache
Pano2VR keeps image data in memory up to the Memory Size Hint and moves the rest to cache files on disk.
- Open the Settings and go to the Images tab.
- Check the Memory Size Hint. By default it’s half of your computer’s memory; raise it if your computer has memory to spare.
- Go to the Files tab and click Configure… next to Image Cache Location.
- Add folders on fast drives with enough free space. With several folders, Pano2VR spreads the cache over all of them. See Image Cache Location.
- While you work, watch Memory Management in the Overview panel, and open the Tile Cache Performance window to see whether memory or a slow drive is holding Pano2VR back.
Speed up Loading Images in Pano2VR
To speed up loading, you can convert your images to tiled TIFFs. These TIFFs have both the multiresolution information and the thumbnails embedded in the file. They do, however, take more disk space. You can either convert the images after bringing them into a project or use a droplet.
Using a Droplet
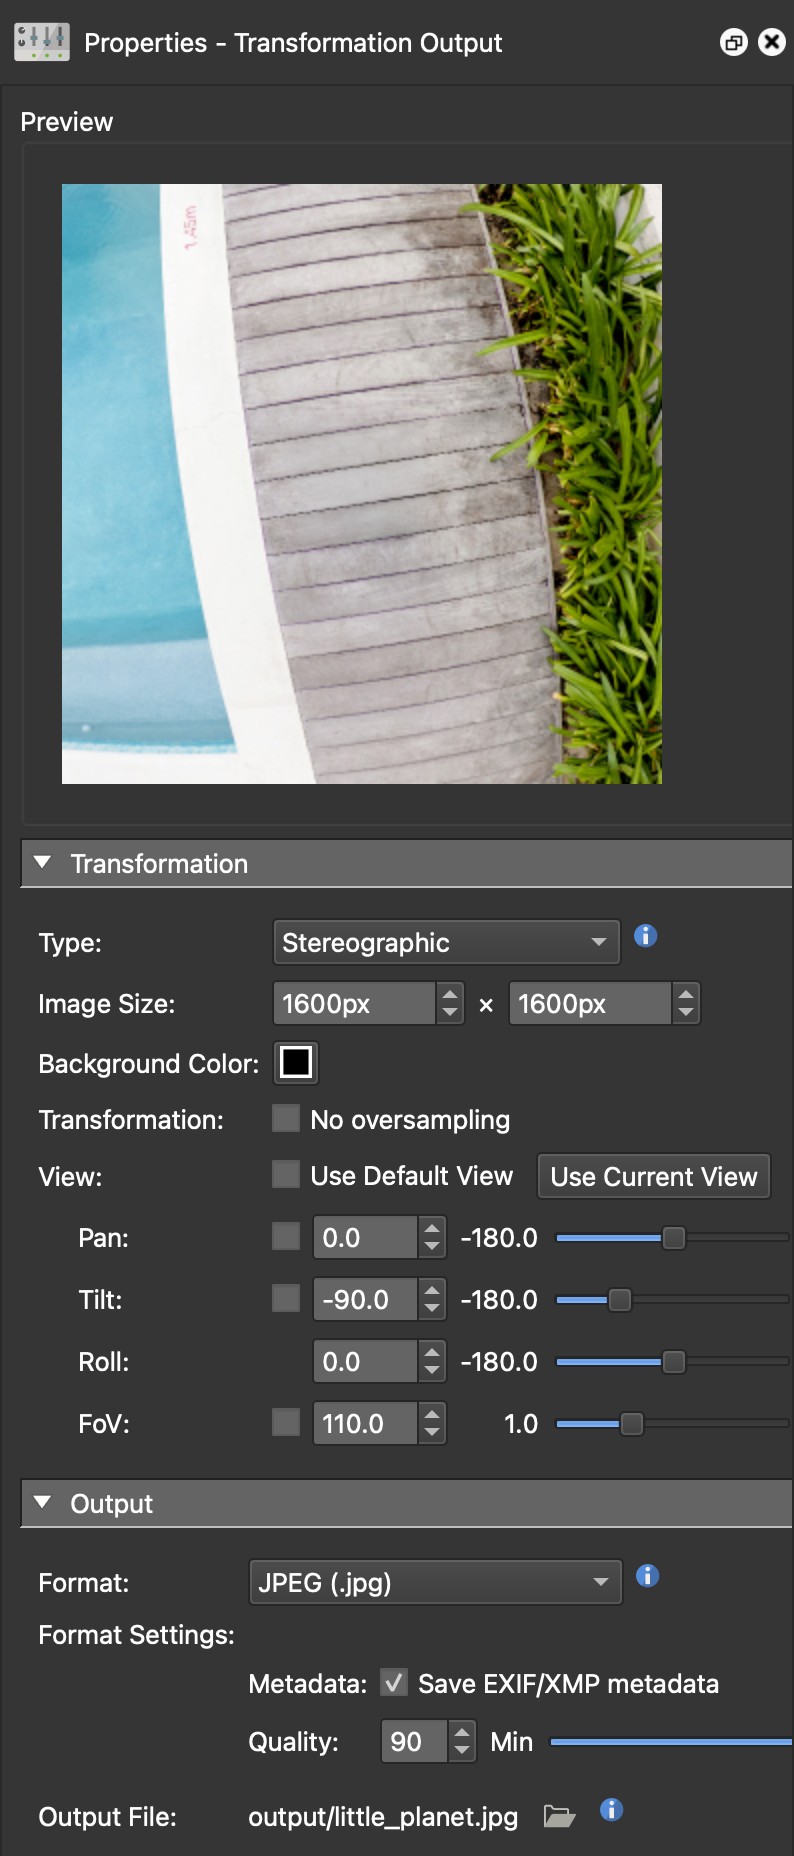
- First, open a new project in Pano2VR.
- Add a Transformation Output.
- In the Transformation Output properties, change Type to Equirectangular.
- Change the Output format to TIFF.
- Edit the Output Folder. Double-click the file path and edit the file name. Add the placeholder $(n) to the file name. This placeholder uses the original file name of the image, so each output has a unique name. Without it, each image would overwrite the previous one during the conversion. In our example, we changed the folder name and used only the placeholder.
- Choose File > Save as Droplet. Keep the settings deselected and then click Create. The droplet is added to your Desktop.
- Drop the folder of images to be converted onto the droplet.
Using Convert Input
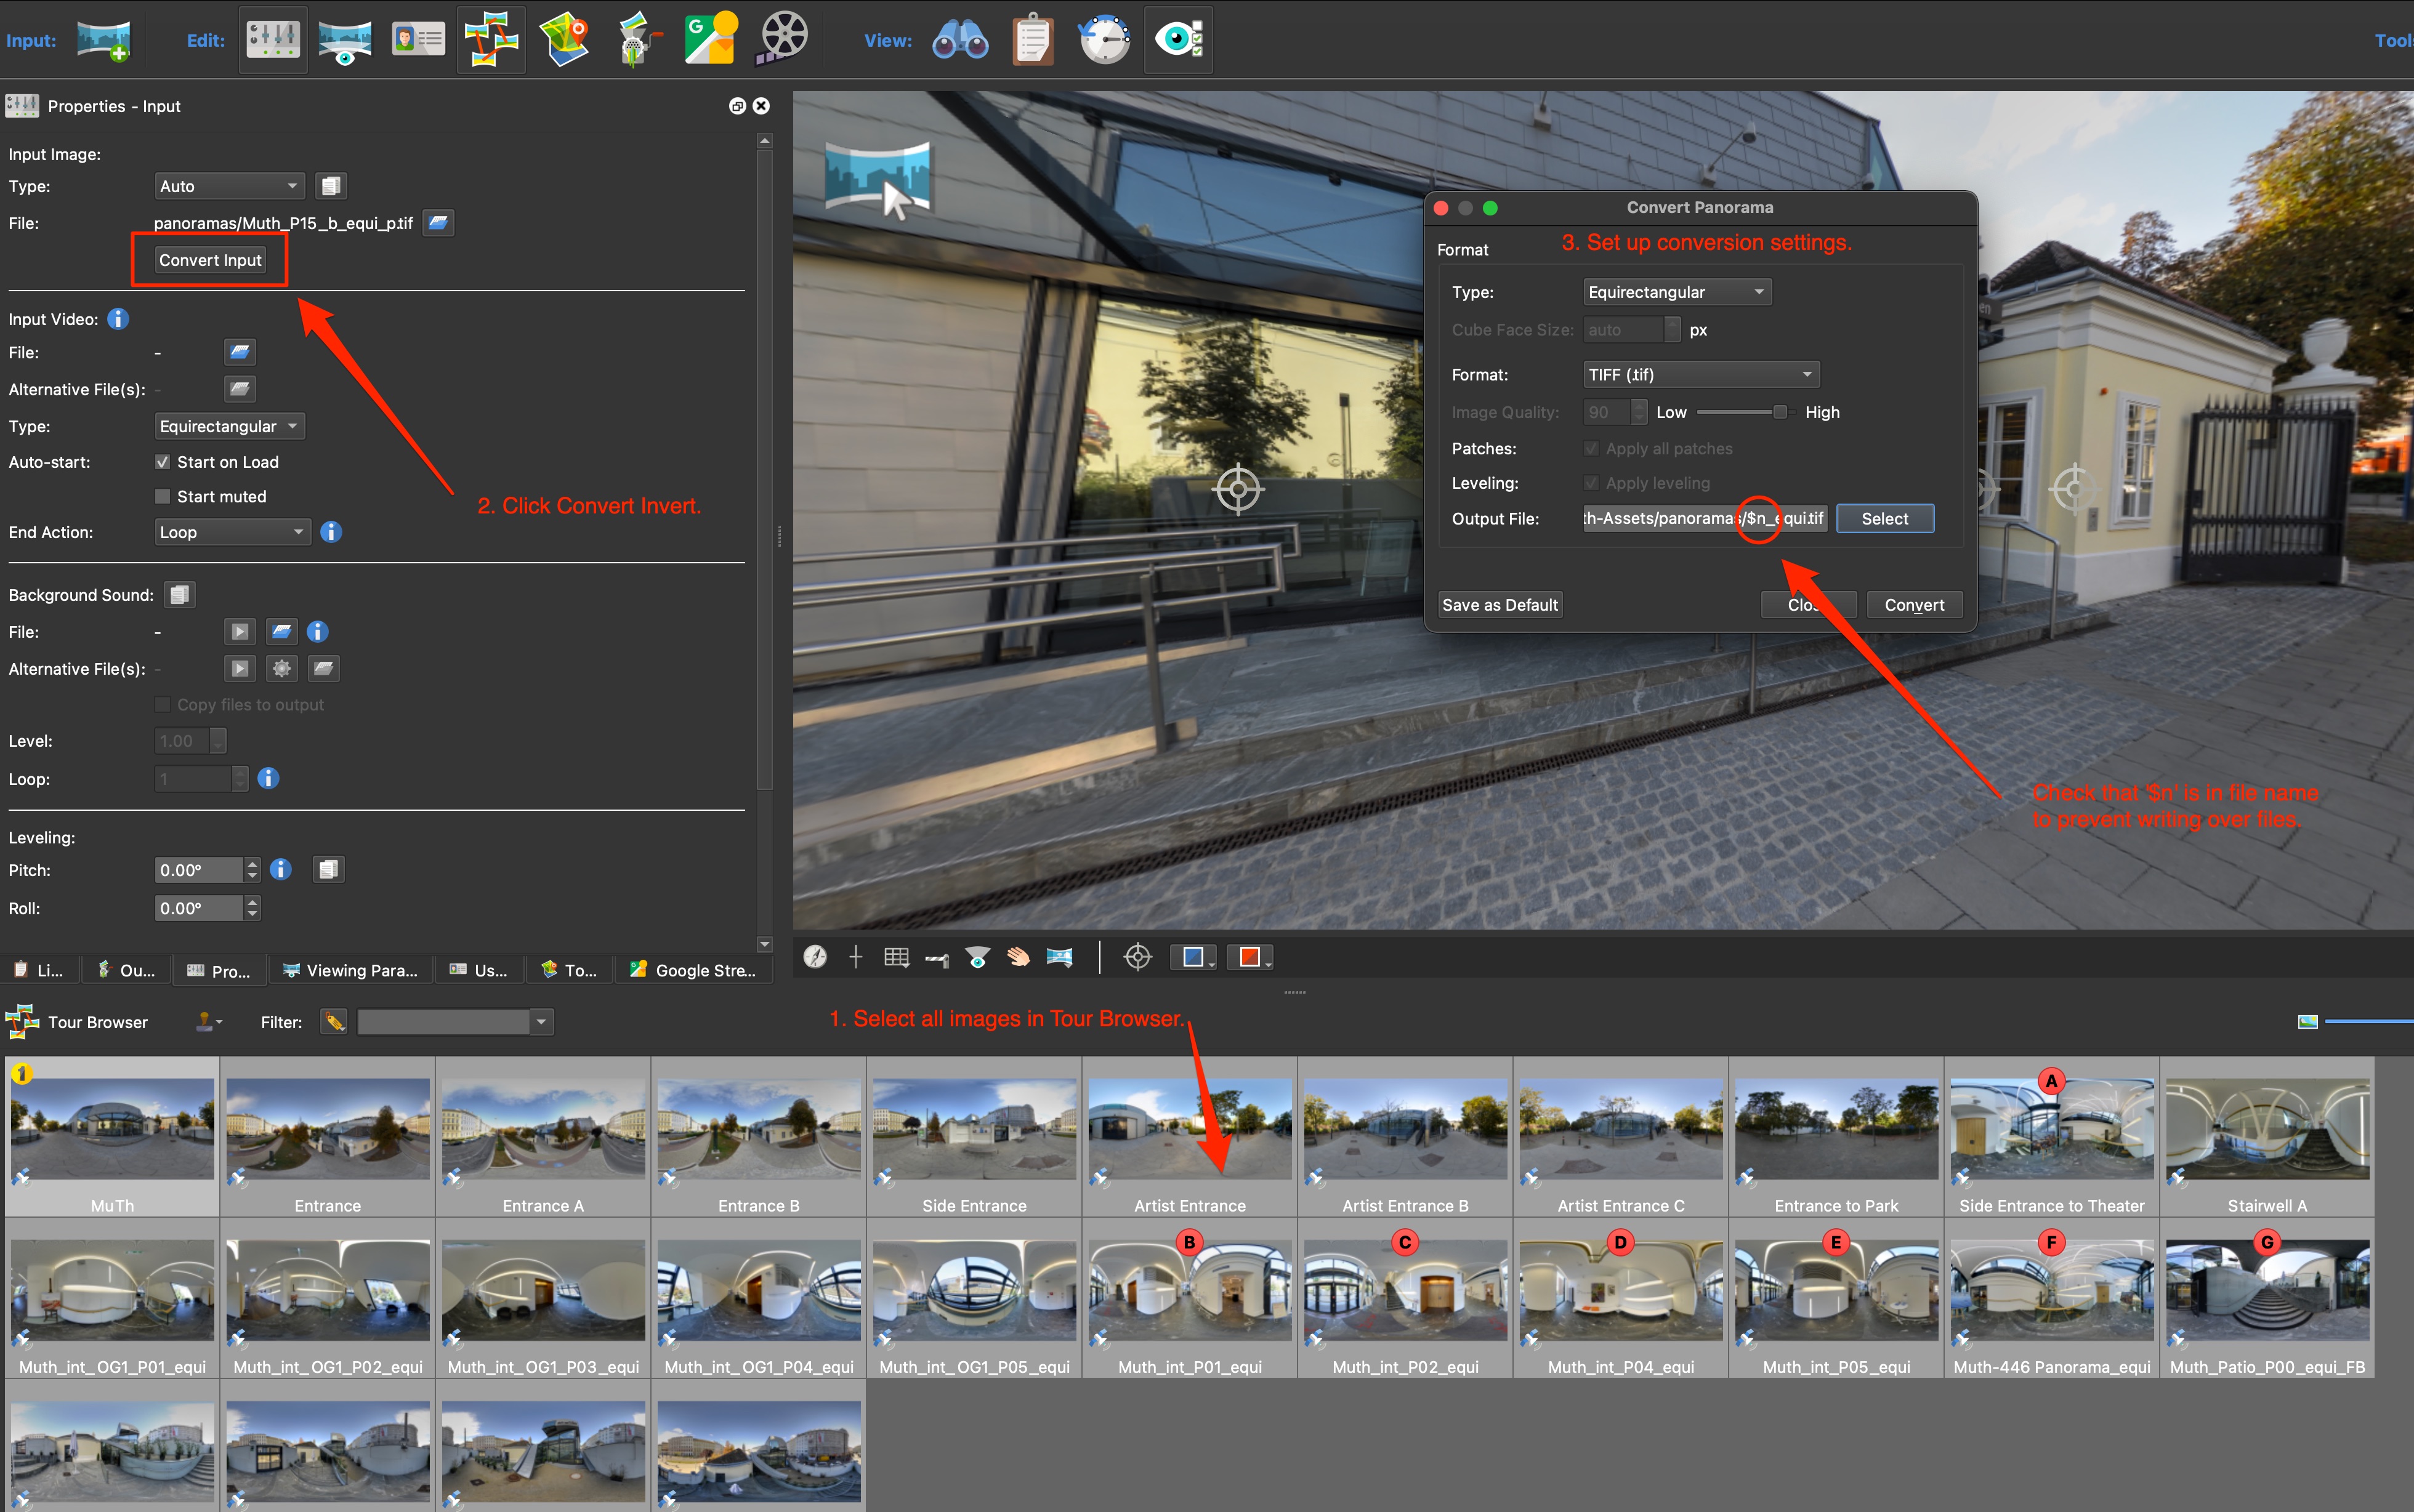
- Bring your images into Pano2VR. (You may want to save a copy of your current project first, because Pano2VR creates new images and uses them as the new input.)
- Select all the images in the Tour Browser (Command-A on macOS, Ctrl+A on Windows).
- In the Properties Panel, click Convert Input.
- In the dialog that pops up, choose Equirectangular for the type.
- Choose TIFF for the Format.
- Keep the placeholder
$(n)in the file name in Output File. It keeps the images’ original file names. - (Optional) Add a new folder for the new images. This makes it easier to
manage the new images or to remove the original images from the project. For
example,
converted-images/$(n)_equi.tif. - Click Convert.