Maps Properties
Each map has different settings. Learn about them below.
Once a map is added in the Tour Map, the Properties panel shows the map’s settings. Which settings appear depends on the map provider. Floor plans have their own properties.
Map ID – Pano2VR assigns each map a unique ID. The ID can contain only letters, numbers, and underscores and must be unique within the project. This also appears in the Map properties of the Map element in the Skin Editor.
Title – Add a title for the map. The title is shown in the Tour Map’s list of maps.
Map Provider – Choose where the map tiles come from: OpenStreetMap, Google Maps, or Mapbox. Choose Custom to use another tile provider. Depending on the provider, more fields appear, as described below.
Single Layer or Multilayered – Available for Google Maps, Mapbox, and Custom. A multilayered map lets the viewer switch between several map styles or tile sets. The layers are listed in a table, and the Tour Map shows a second menu next to the map list where you choose the layer to display.
Map Limits
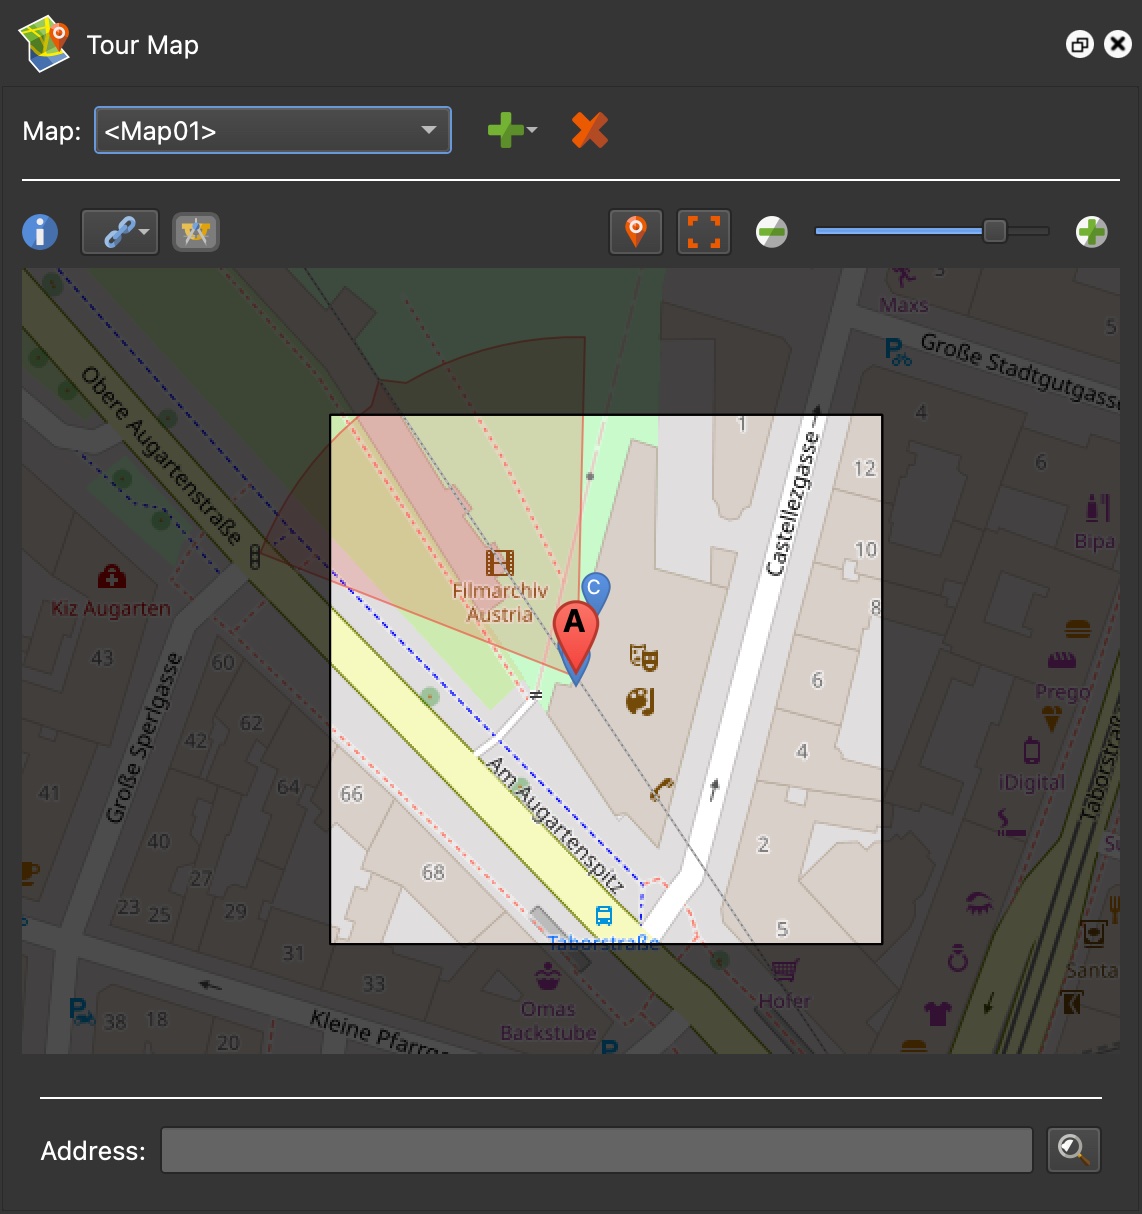
Map Limits – Limit how far one can move within the map, so that your visitors do not lose their spot. Click the Draw Map Limits in Tour Map button to draw the limits: drag over the area that should stay reachable, then drag the borders to refine it. The area outside the limits is darkened. The limits’ North, East, South, and West coordinates are shown below the buttons and can also be edited by hand. To clear the limits, click Clear Map Limits. You can also draw the limits with Set Map Limits in the Tour Map’s Tools.
OpenStreetMap
Map Style – Choose Streets or Terrain.
Google Maps
Google API Key – Add your Google Maps API key. You need an API key to show Google Maps in your tour, and Google may charge you for the usage. Learn more. The key is stored in the project, rather than in each skin.
Map Style – Choose Streets, Hybrid, Terrain, or Satellite. The menu is unavailable when a custom style code has been entered or the map is multilayered. For a multilayered map, add the Google map styles to the layers table, or add a URL template for other kinds of layers.
Google Custom Style Code – Create a style with the Google Maps Platform Styling Wizard, click Finish in the wizard, and paste the JSON code into this field. Use the buttons below the field to open the styling tool or to paste the code from the clipboard.
Mapbox
Access Token – Mapbox requires an access token. Add it here.
Map Style – Choose Streets, Terrain, or Satellite. The menu is unavailable when a Style URL has been entered or the map is multilayered.
Style URL – In Mapbox you can create custom map styles. Paste the Style URL here to use a custom map style. Click the Open Mapbox Studio button to open Mapbox Studio in your browser.
For a multilayered Mapbox map, add the map styles and Style URLs to the layers table.
Custom
Use Custom to add map tiles from another provider.
URL Template – The address of the map tiles. The URL template must contain
the placeholders {z}, {x}, and {y} for the tile zoom level, column, and
row. Recently used templates are kept in the drop-down list. Available for a
single-layer map.
Maximum Zoom – The highest zoom level the provider offers, from 0 to 23. Available for a single-layer map.
For a multilayered map, add a Name, URL Template, and Max Zoom for each layer in the layers table.