Google Street View Basic Workflow
To upload a tour to Google Street View from Pano2VR, open the Google Street View Panel and connect your Google account. You'll then have access to all your images and tours. Here's the basic workflow for uploading a small tour to Google Street View.
-
Add an image or multiple images/tour to your project. Open the following panels (if not already open): User Data, Tour Map, Street View, and Output.
-
Level the images, if needed. ✭ If the image has leveling data, Pano2VR will use this to level the image.
-
Check location accuracy. Sometimes, the recorded GPS might be a little off. Use the Tour Map to fix locations by just dragging the pins in the map.
★ Tip Use the keyboard shortcut Control-] or Command-] to quickly move to the next panorama. -
Check that North is set. In User Data, if North is set to 0º, most likely North has not been set. Setting North can be done a few ways:
-
Hold down the N key while spinning the panorama in the Viewer. You can use the Tour Map to help with the orientation.
-
Open the Tour Map, hold N and spin the radar beam to the correct angle.
-
Use the Pick Landmark method.
-
-
Add Patches.
-
Add a Blurring patch to blur out faces and license plates.
-
Add a Blur Cover patch for quick hiding of the tripod.
★ Tip To add the same patch across all tour nodes, add a patch in the Master Node. -
Set default views. The default view is the panorama’s starting view. Note that the default view added here will only be applied to viewing the tour or panorama from within your account. Google will choose a random starting view when the map is viewed from within Maps.
-
Link the panoramas. Just like setting North, you have a few ways to choose from to link the nodes:
-
If you have just a few panoramas, you can use Auto Place by dragging a panorama or group of panoramas from the Tour Browser to the top right corner of the Viewer. Drop on either Auto Place or Auto Place Both Ways which will connect the images to one another. (See: Linking the Images)
-
In the Tour Map, use the Automatic Linking option, Closest Node, to quickly connect all the nodes. ✭ This is the recommended linking mode for uploading to Street View.
-
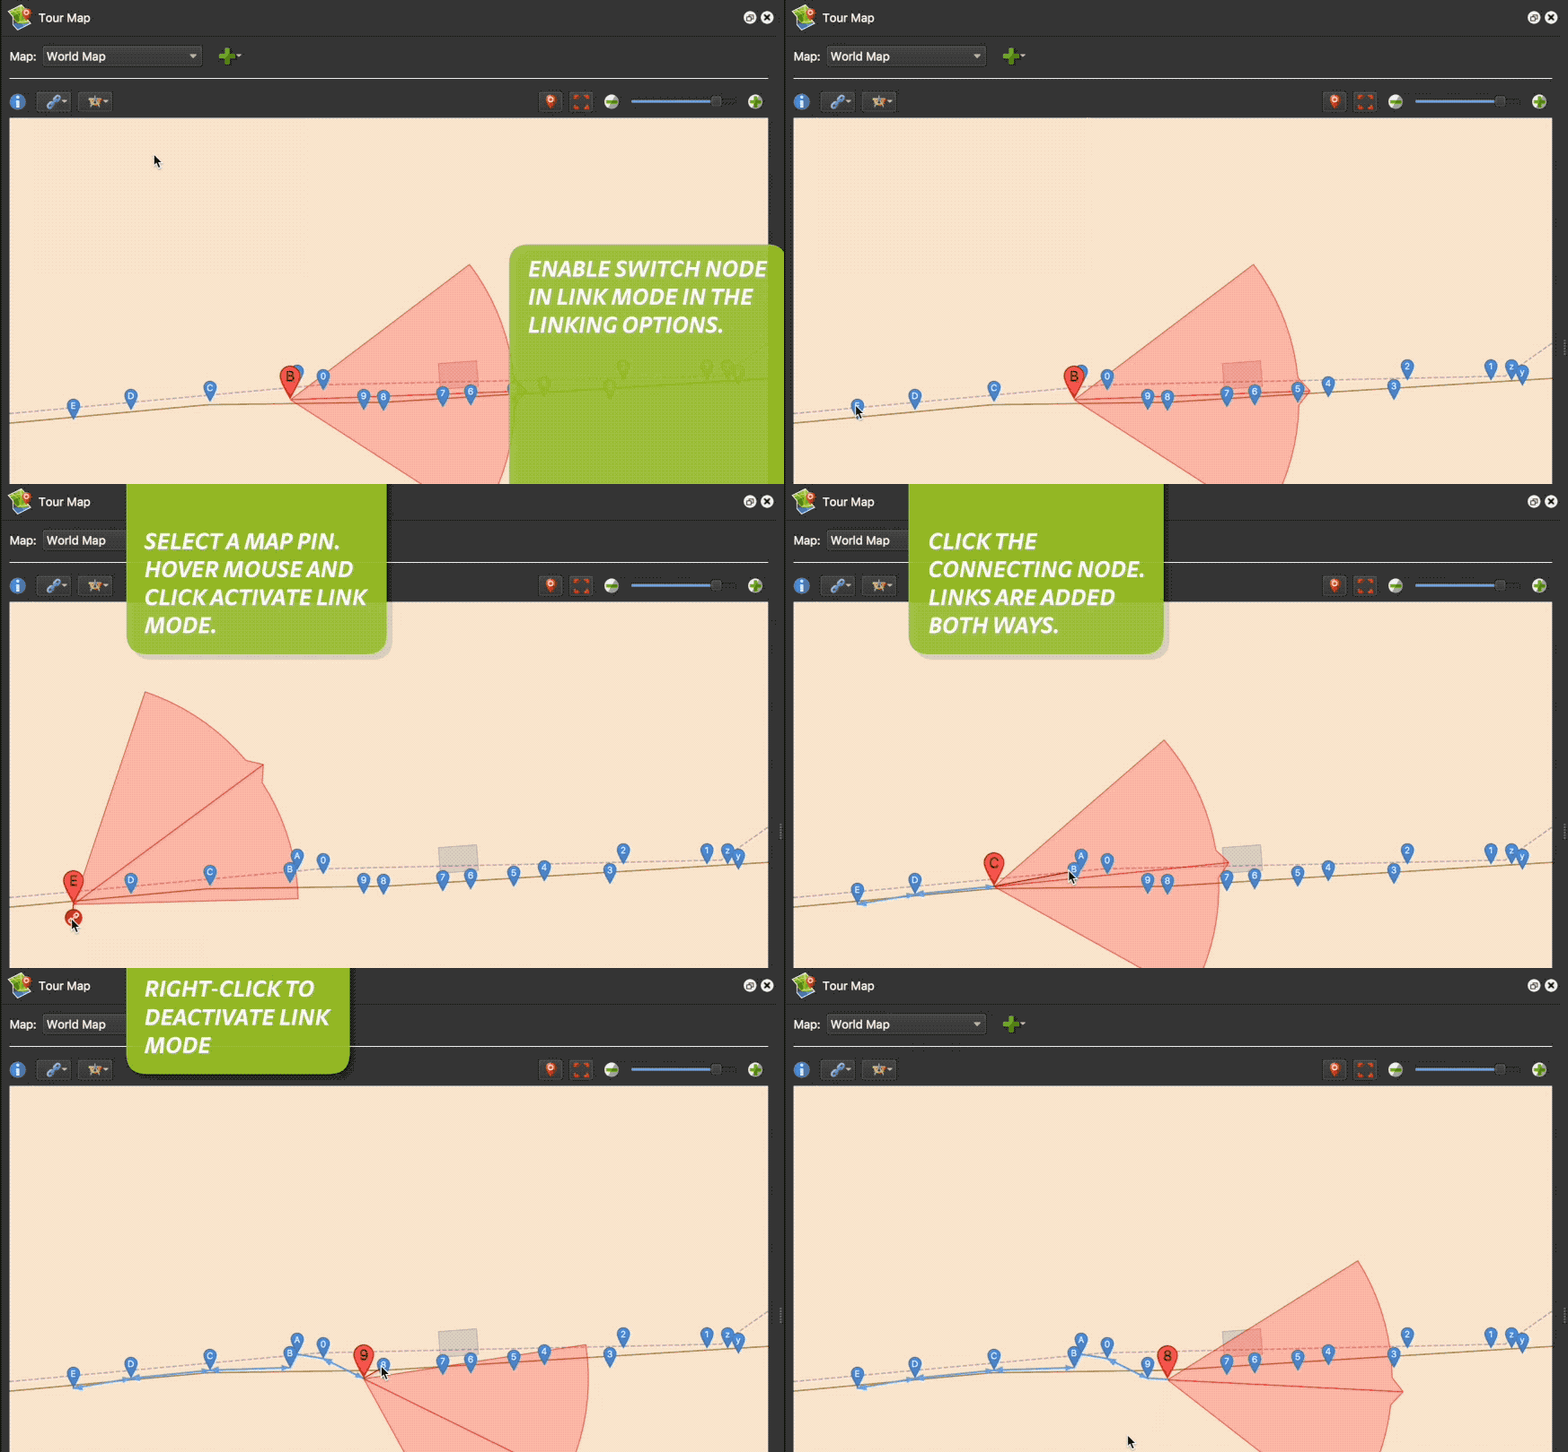
Or activate the Linking Mode in the Tour Map to manually link the nodes:
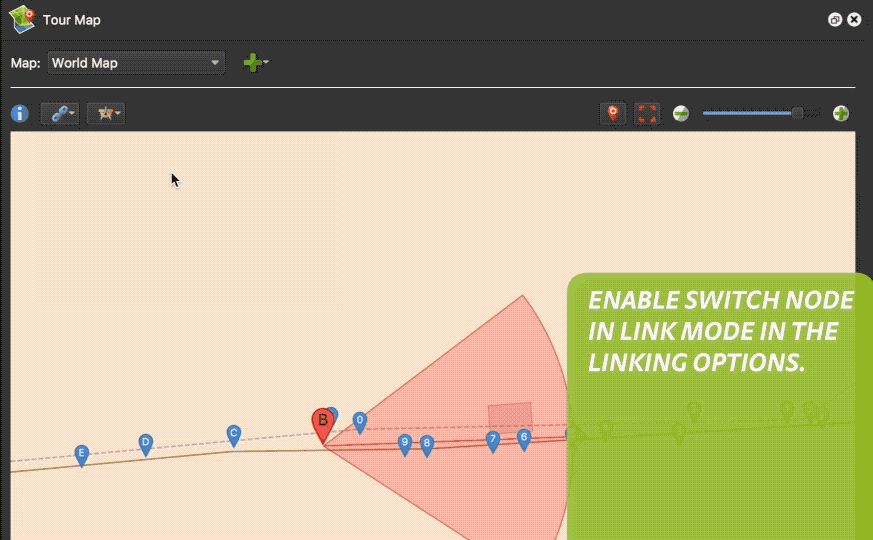
Activate Link Mode ★ Tip After linking the nodes, check the tour by holding down the Alt/Option key while clicking the point hotspots in the Viewer.If you need to remove a connection (while in Link Mode), hold the Alt/Option key and click the target pin of a link in the Tour Map to remove the linking.
✭ Learn more: Adding Levels, Adjusting Map Pins
-
-
Open the Google Street View panel.
-
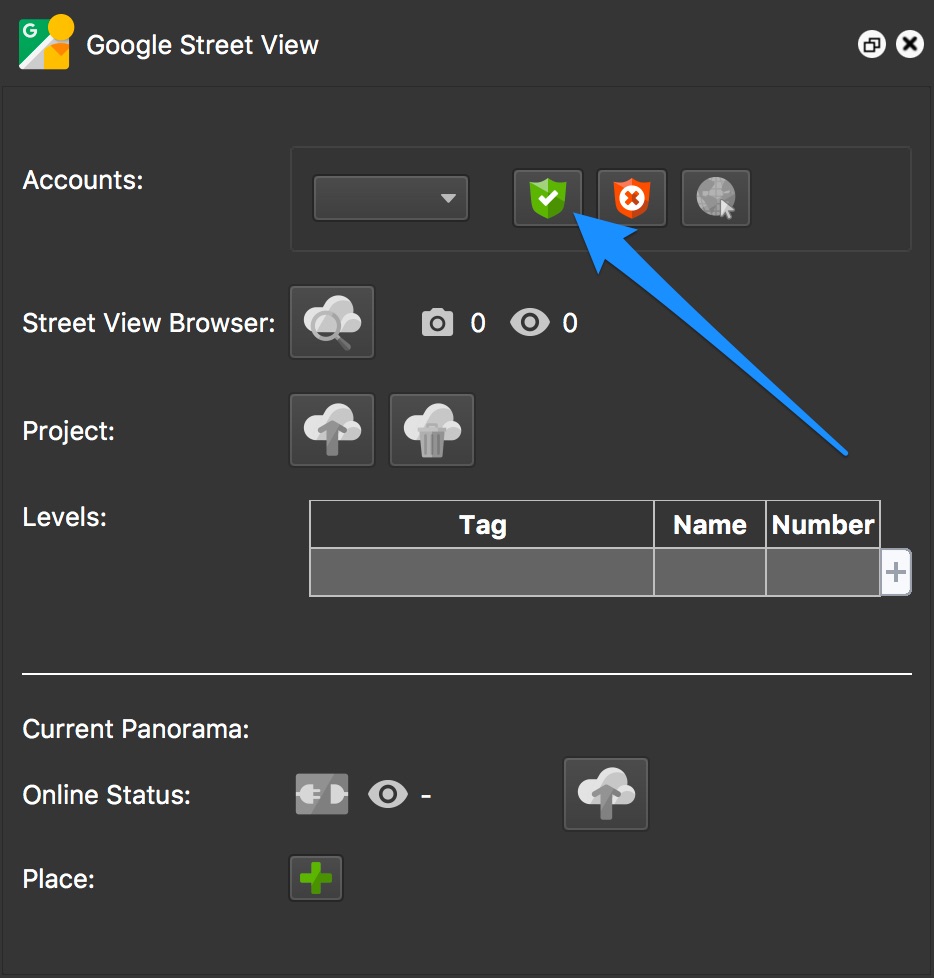
Connect your Google account using the Grant Access button.
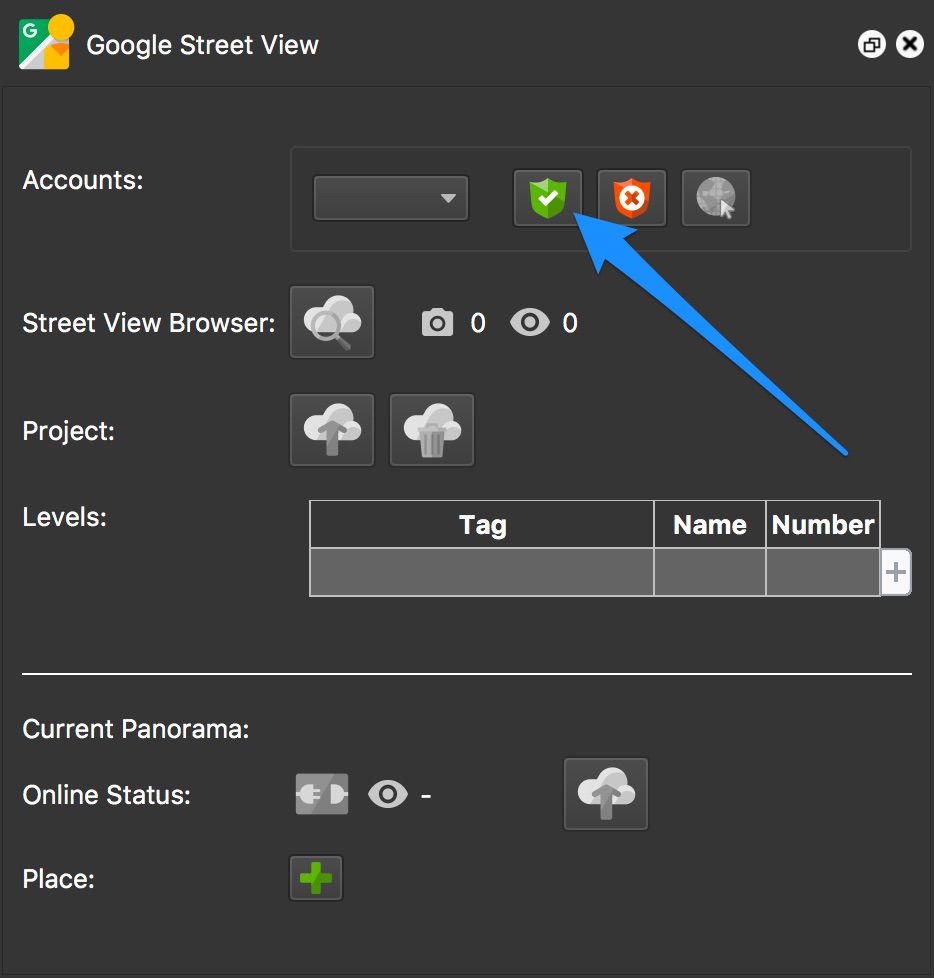
Click Grant Access Button -
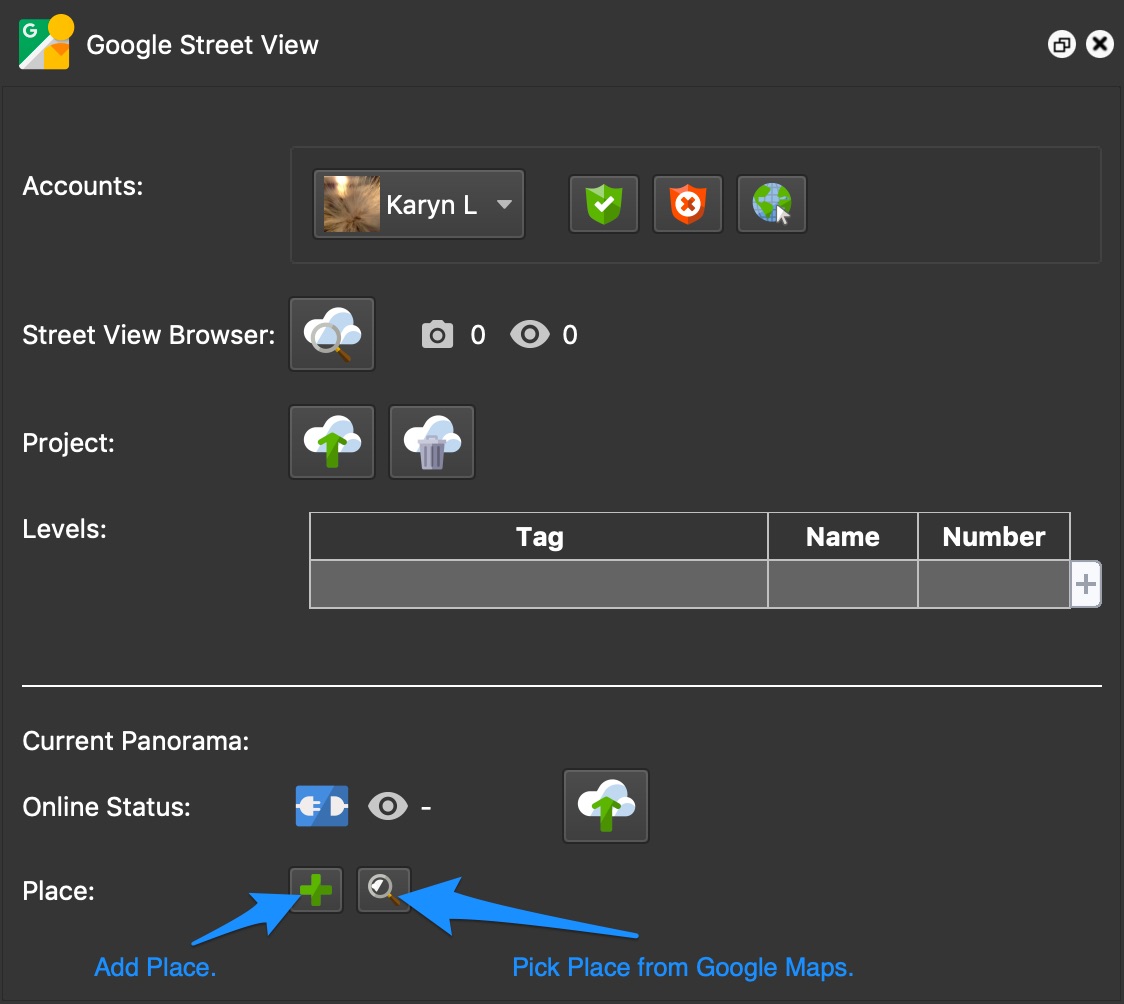
Add a Place ID to the node using one of the following options:
- Click Add Place and then search for the point of interest (POI) and/or choose the POI from the list.
- Click Pick Place from Google Maps. This will open the Tour Map. Find a POI and click it to apply the place.
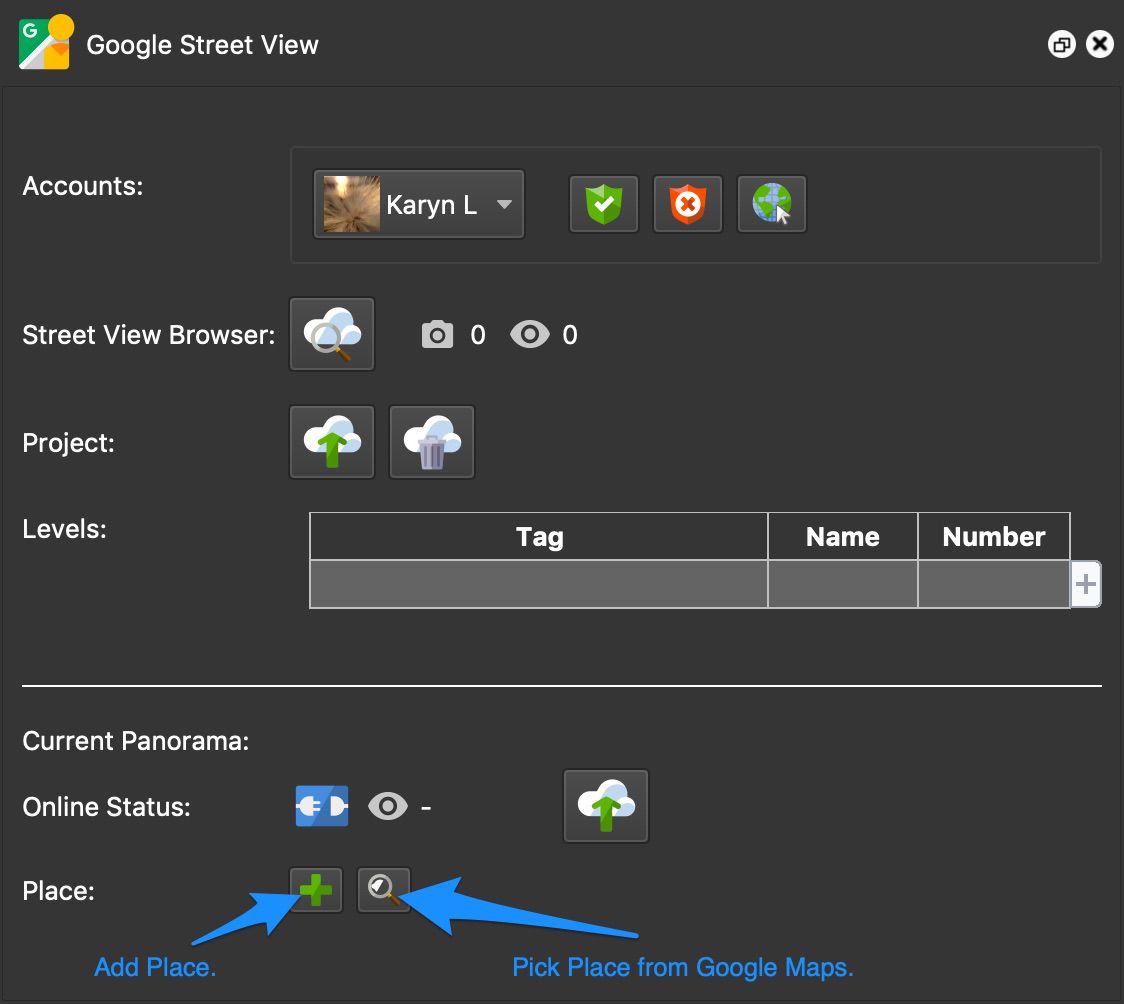
Add Place ★ Tip Use the Copy button to copy the same Place ID to all nodes in the Tour Browser. Note: Currently, you can freely search and add Place IDs, but this could change and require you to use an API key from Google. -
If needed, connect to other panoramas in your Street View library that are not part of the current project by using External Links.
Add a link by doing any of the following:
-
Double-click an empty row in the table (or click the plus icon) and enter the panorama’s Photo ID.
-
In the Street View Browser, right-click the photo you want to link to and choose Add Link to External Panorama.
-
-
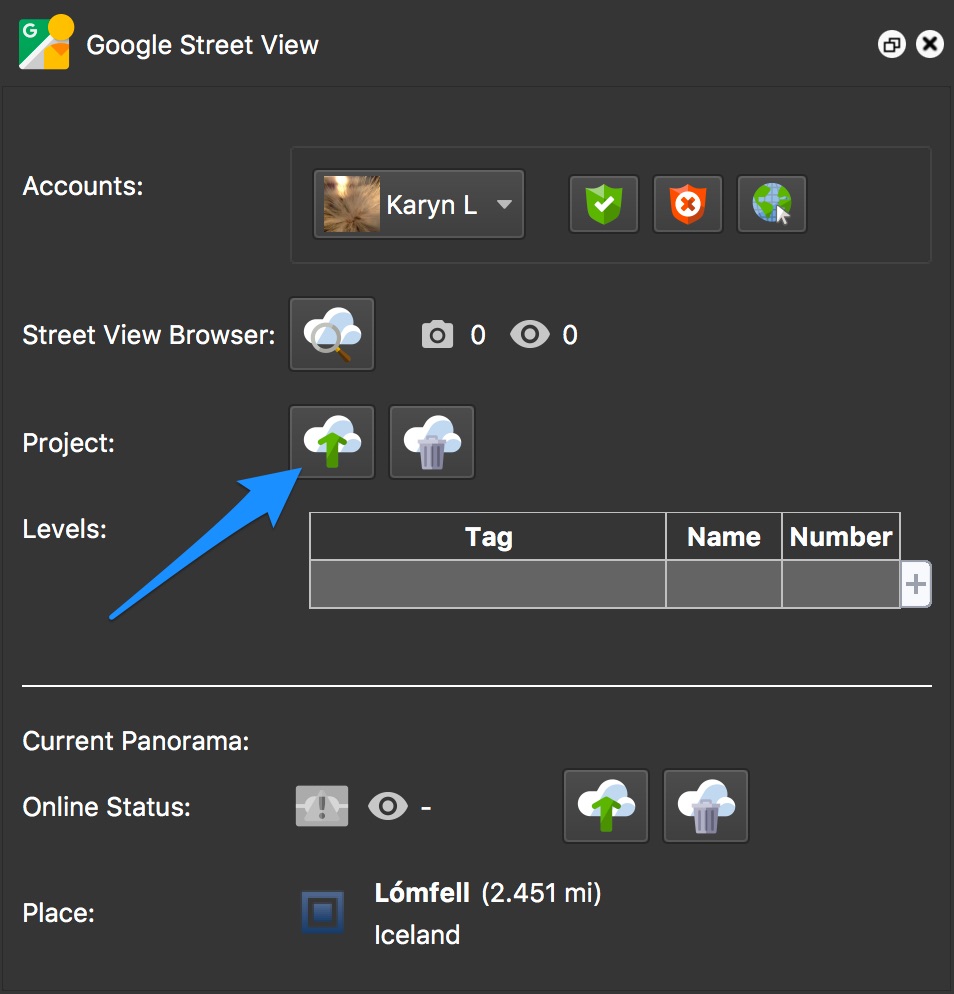
Upload the project using the Upload Project button.
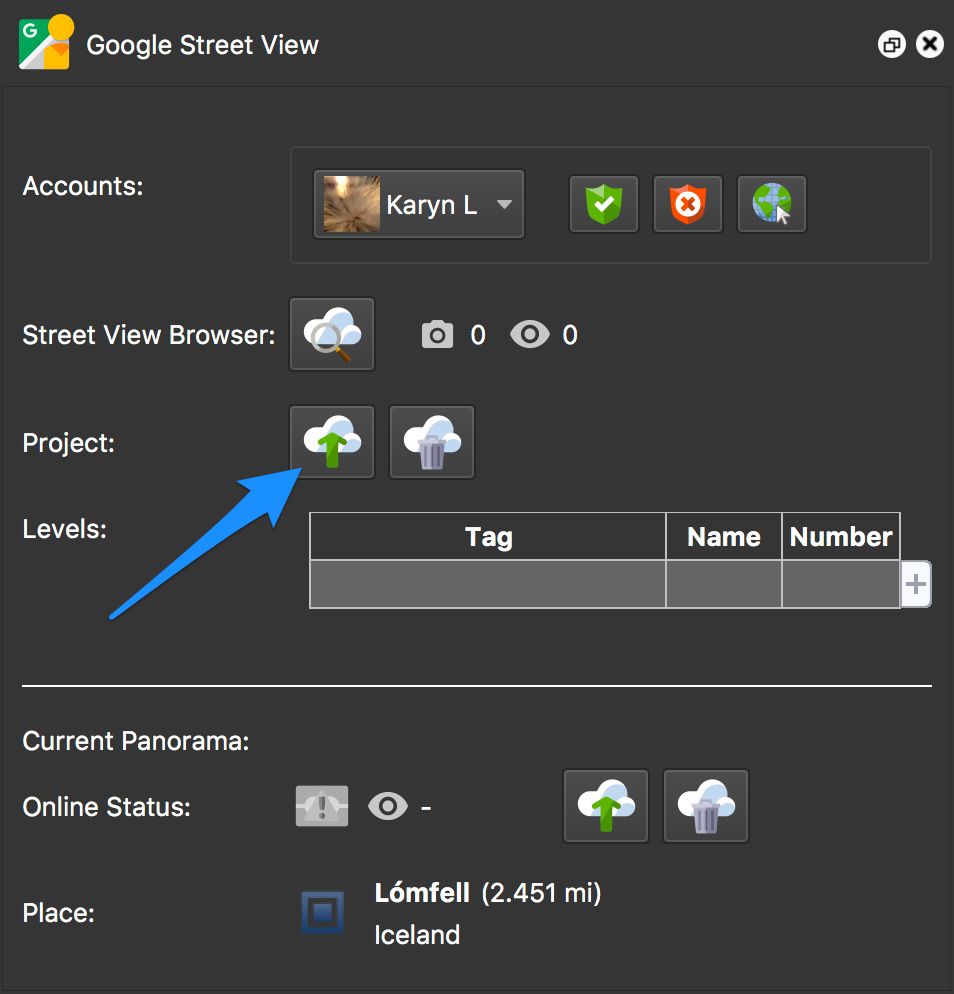
Upload to Google Street View
Once the tour is uploaded and a PhotoID and has share link, the panoramas will be assigned new Auto Tags:
- Street View Uploaded – indicates that node has been uploaded and has a PhotoID
- Street View Link – appears once the node has a share link, which also indicates it has been accepted.
These tags can be filtered in the Tour Browser.
Viewing the Tour
Once the project is uploaded, you’ll see the images, but it may take a while for the connections to be made. In the meantime, you can check your images using the Street View Browser.
To view the panorama or tour in Google Street View, double-click the panorama in the Street View Browser. For a tour, open the tour to expand the images and double-click on one of the tour nodes.
Making Changes
If you need to make a change to the panorama, follow the order that best fits your change. You do not always need to delete the panorama from street view.
Delete the panorama first on street view if you:
- Edit the Panorama image, etc.
- Change the default view
- Change a node name, title, or description
- Change or remove tags
The panorama does not have to be deleted first if you:
- Change GPS
- Change Date & Time
- Add, change or remove a link/hotspot
- Change Place
Troubleshooting
It may occur that when uploading images to Google Maps, you’ll receive an error. This is almost always coming from Google’s servers and sometimes there are some issues that we cannot fix until Google fixes them.
If the nodes are not showing, you can try the following:
- Revoke access and then re-enable access in the Street View Panel.
- Upload the project to Street View again, wait about 10 minutes then hit the Refresh button in the Street View Browser.
If the nodes are still not showing after uploading again, check the Place ID, explained here.
Only delete the project from Google Maps as a last resort. After deleteing the project, check back after an hour or so and hit Refresh. The images should be gone and not show in the Street View Browser. If they appear, more time is needed before they are removed.
If you’re not seeing a blue line in street view, make sure your panoramas are spaced about 3-4 meters apart and a project with 25 or more nodes. And give it time.
You cannot overwrite panoramas. If you’d like to update your images, download them into a new project. Make the necessary replacements in the project, and then delete the images from Street View. Wait a few hours before uploading the new images. All view counts will be reset to zero.
Google Street View Webinar
This webinar
was recorded in September 2020 and is more current than the videos above.