List View
The List View panel is handy for when you want to see all the elements that have been added in an easy-to-read list view.
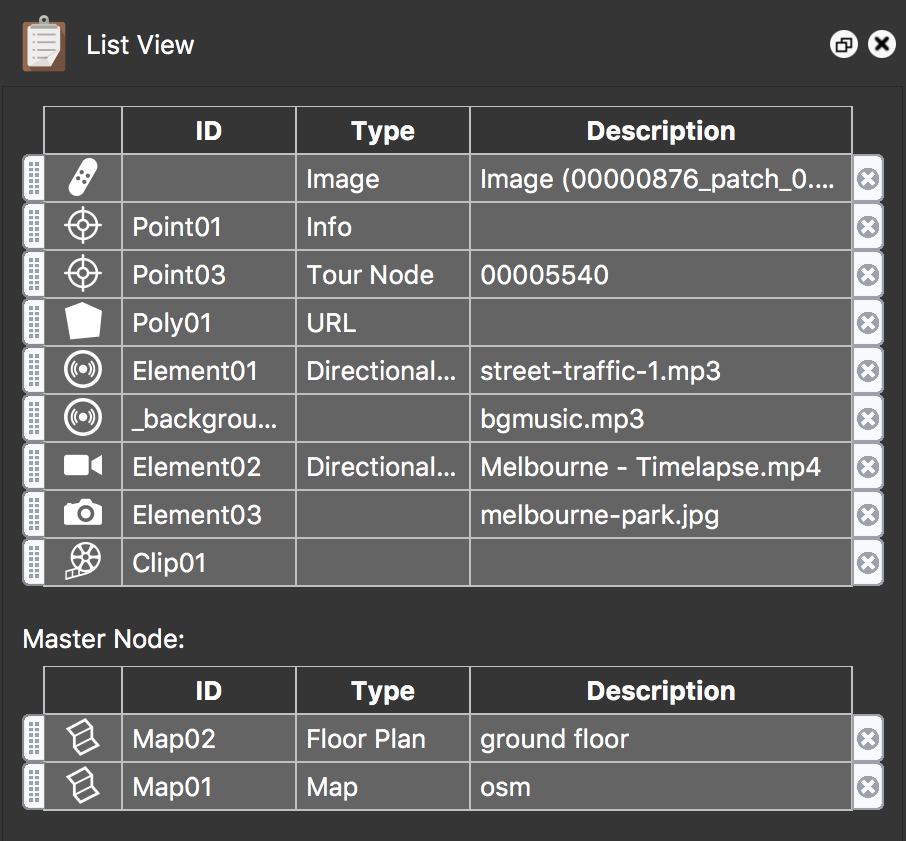
The first column displays the elements that have been added to the panorama. They are represented with their icons found in the Viewer. Clips created in the Animation Editor and maps that have been added to the Tour Maps Panel will also appear here.
ID – Every element is assigned a unique ID that can be used in the Skin Editor
Type – All elements have different types. This column will show the type of element used. For example, whether a patch is an image or mirrorball or if the lens flare is a simple or bright sun lens flare.
Description – Information about the element.
Hover your mouse over any list item to get information about that element.
Master Node – If any elements have been added (hotspots, patches, etc.) to the Master Node, then they will be visible here, in a list of their own.
Working in List View
You can use the list to locate viewer elements, change the list order and copy hotspots. If a Tour Node hotspot has been added, hover the mouse over the item in the list and the node that it links to will highlight yellow in the Tour Browser.
There is a layering order in list view. Elements at the top of the list or the group, are back or closer to the panorama, while anything at the bottom of the list is forward. If an element is covering another element, move that element above it.
Find an element in the Viewer
You can use the List View to find any element added to the Viewer (hotspots, sounds, lens flares, etc.).
Just double-click an element, and it will be brought to view and active in the Viewer.
Remove an element added to the Viewer
Elements add to the Viewer can also be deleted/removed in the List View. Click the x on the right side of the list to remove the element from both the List and the Viewer.
Organize the list
List items can be rearranged by dragging the tabs on the left. When you have multiple patches, for instance, this changes their layering.
✭ Note that list items are grouped by type and the types cannot be mixed. If there are a number of point hotspots and patches, for example, you can reorganize the patches but you cannot move a patch between point hotspots.
Navigate Hotspots
You can also use list view to navigate through your tour pressing the Alt or Option key and clicking a hotspot. This will take you to the node it is pointing to.
Hover your mouse over the list item, and you’ll get an overview of the target node.
Copy – Paste – Delete – Move List Items
Select one item or, for multiple list items, use Shift or Control/Command-click. Once selected, right-click and choose:
- Copy
- Paste
- Delete
All list items can be pasted in both the List View and in the Viewer.
In the main list, choose Move to Master Node to move an element to the master node. This is useful for adding patches to a tour.
Copy Hotspots
You can copy hotspots from one node to another. Just choose Copy from the context menu and then select any node in the Tour Browser (or multiple nodes) you’d like to copy them to.
Then, in the List View, or in the Viewer, right-click and choose, Paste.