Converting Images
After you have brought your images into Pano2VR, you can choose to convert them into a different format for faster loading with tiled TIFFs for gigapixel images and large projects, or to convert to a different image type, or even to convert the image to cube faces.
Convert a Single Panorama
- Import the image.
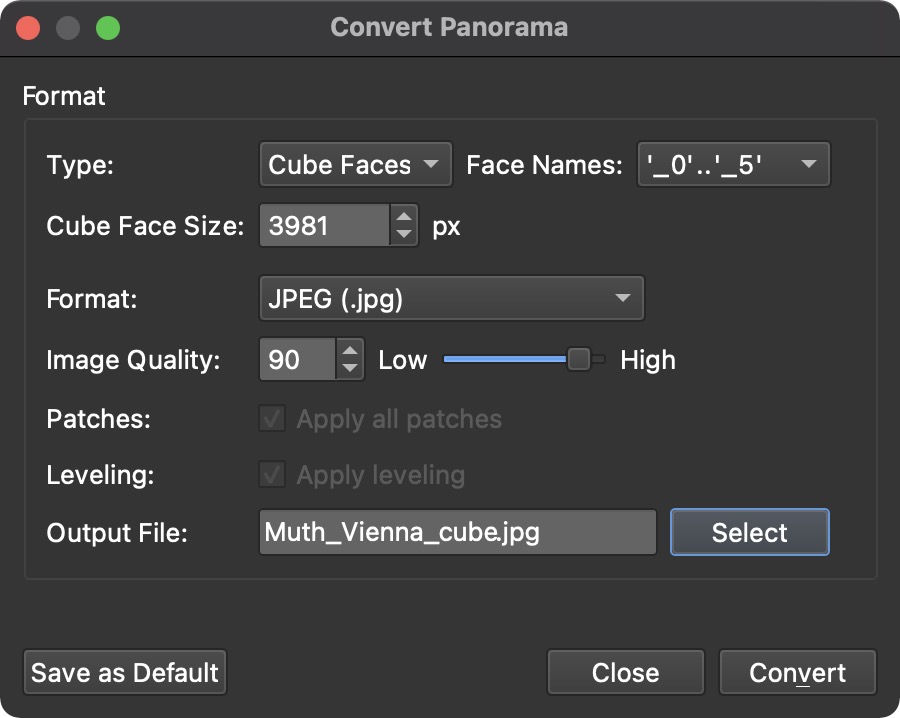
- In the Panorama Properties, click Convert Input to open the convert tool.
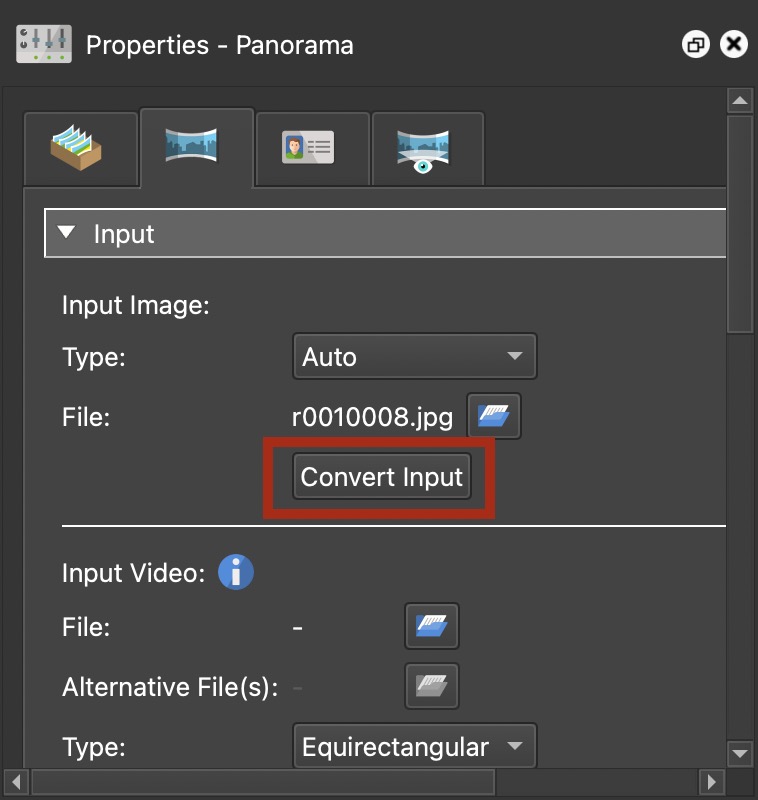
- Choose the type of format. If coverting to Cube Faces, see below.
- Choose the Format. If coverting to JPEG, define the Image Quality.
- If the image had patches added and they should be part of the conversion, then select Apply all patches.
- If leveling was applied, then select Apply Leveling.
- Rename the output file or change the destination output folder.
- Choose, Convert.
★ Click Save as Default to save the settings as they are so that every time the convert tool is opened, these settings will be applied.
Convert a Large Tour to Tiled TIFFS
When converting to TIFF, Pano2VR will convert to Tiled TIFFs (Pyramid TIFF). This is useful if you have a very large tour because converting your images to tiled TIFFs will help to load the images faster in Pano2VR. This will, however, increase the filesize.
There are a few ways to convert your project. You can use the convert input button or you can use a droplet to convert all the images before adding them to a Pano2VR project.
See: Working with Large Images and Projects.
Convert a Gigapixel Panorama
If you are importing a gigapixel panorama, you can convert the PSB to BigTIFF (.btf) for faster loading.
- Import the gigapixel panorama.
- Open Convert Input. The Convert Input tool is found in the Panorama Properties.
- Select the Type.
- For the Format, choose TIFF (.btf).
- If any patches are leveling were applied, these options will be made available. Select as necessary.
- Hit Convert.
Convert to Cube Faces
-
Bring your images into Pano2VR.
-
Select the image or images to be converted in the Tour Browser.
-
In the Panorama Settings (in the Project Properties) click Convert Input.
-
In the window that pops up, choose Cube Faces as the Type.
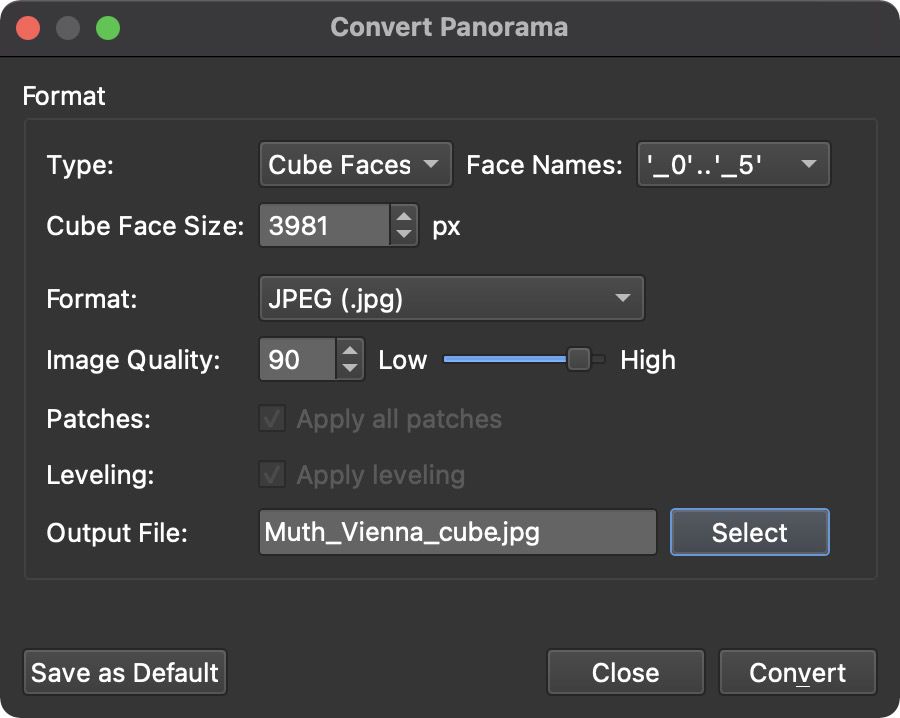
Choose Cube Faces in the Convert Panorama dialog. -
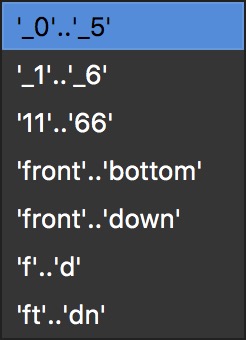
Choose the naming convention for your cube faces in the Face Names menu.
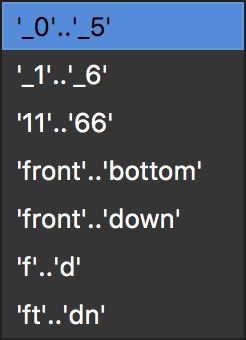
Face Names -
Determine your Cube Face size.
This number is automatically generated and uses either width/4 or width/pi, depending on what is set in Pano2VR’s settings/preferences.
-
Choose an output format. If you choose JPEG, enter the JPEG quality or use the slider.
-
Change the filename and folder location in Output File if you wish. If you do not choose a new folder for the output, the files will automatically be added to the same folder as the source image.
✭ Tip: If you will be using the same format often, consider using Save as Default to save the current settings for the next conversion.
-
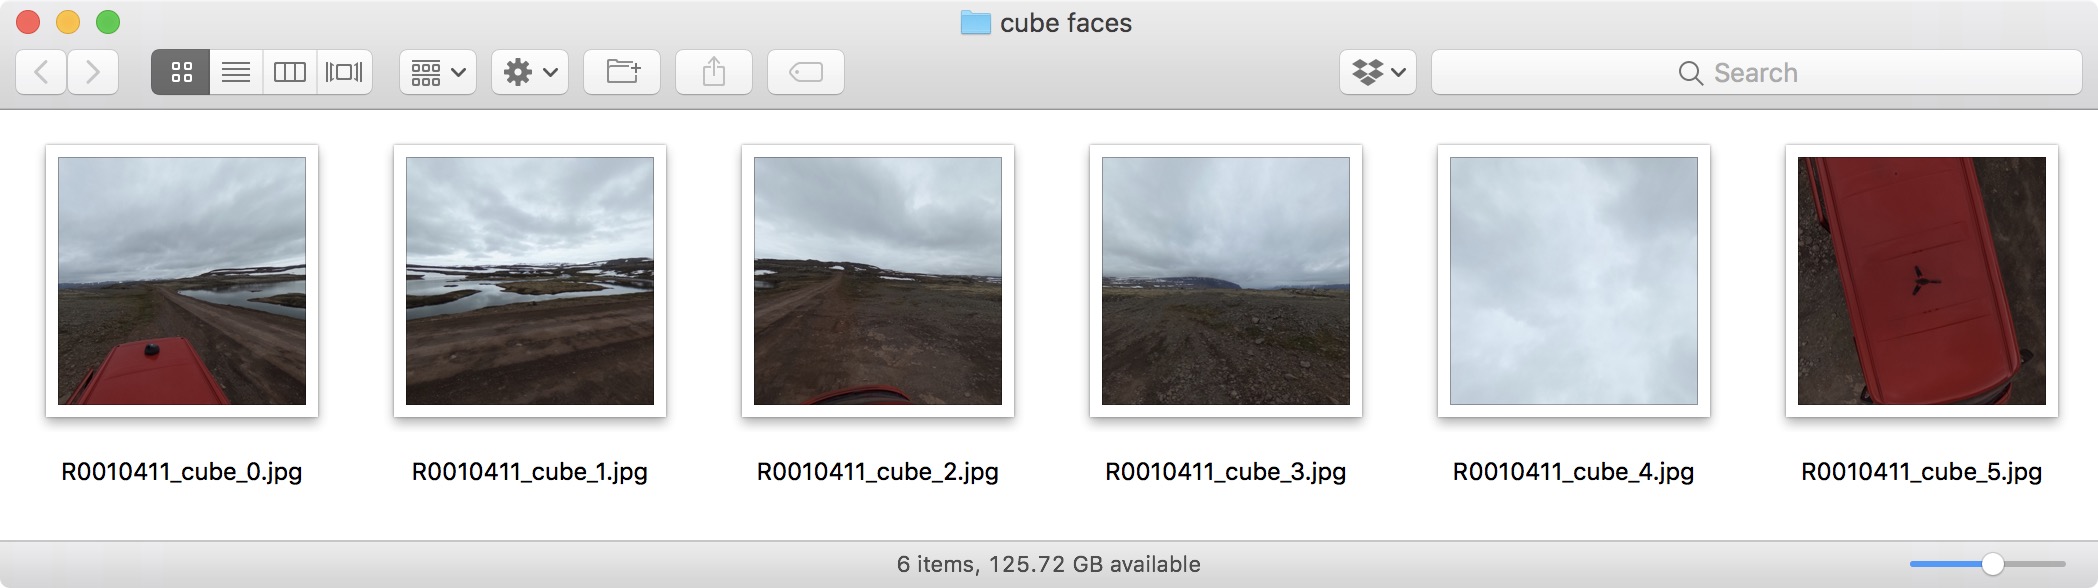
Click Convert to convert and save the images which should look something like this:
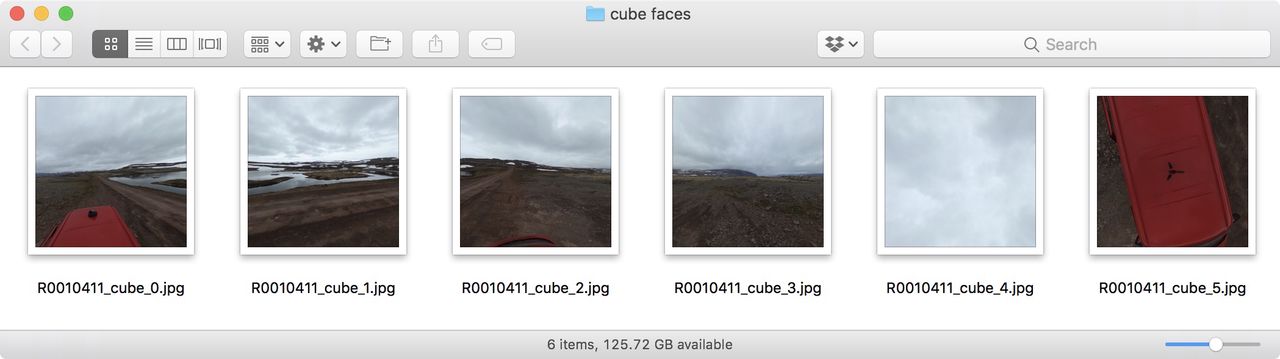
Converted Cube Faces
From Cube Faces to Equirectangular
- Import any one of the cube faces into Pano2VR. Pano2VR will recognize the rest of the cube faces.
- In the Panorama Settings, click Convert Input.
- In the window that pops up, the type will be automatically selected. In this case, Equirectangular.
- Follow steps 6 through 8 from above.