Transformation Output Properties
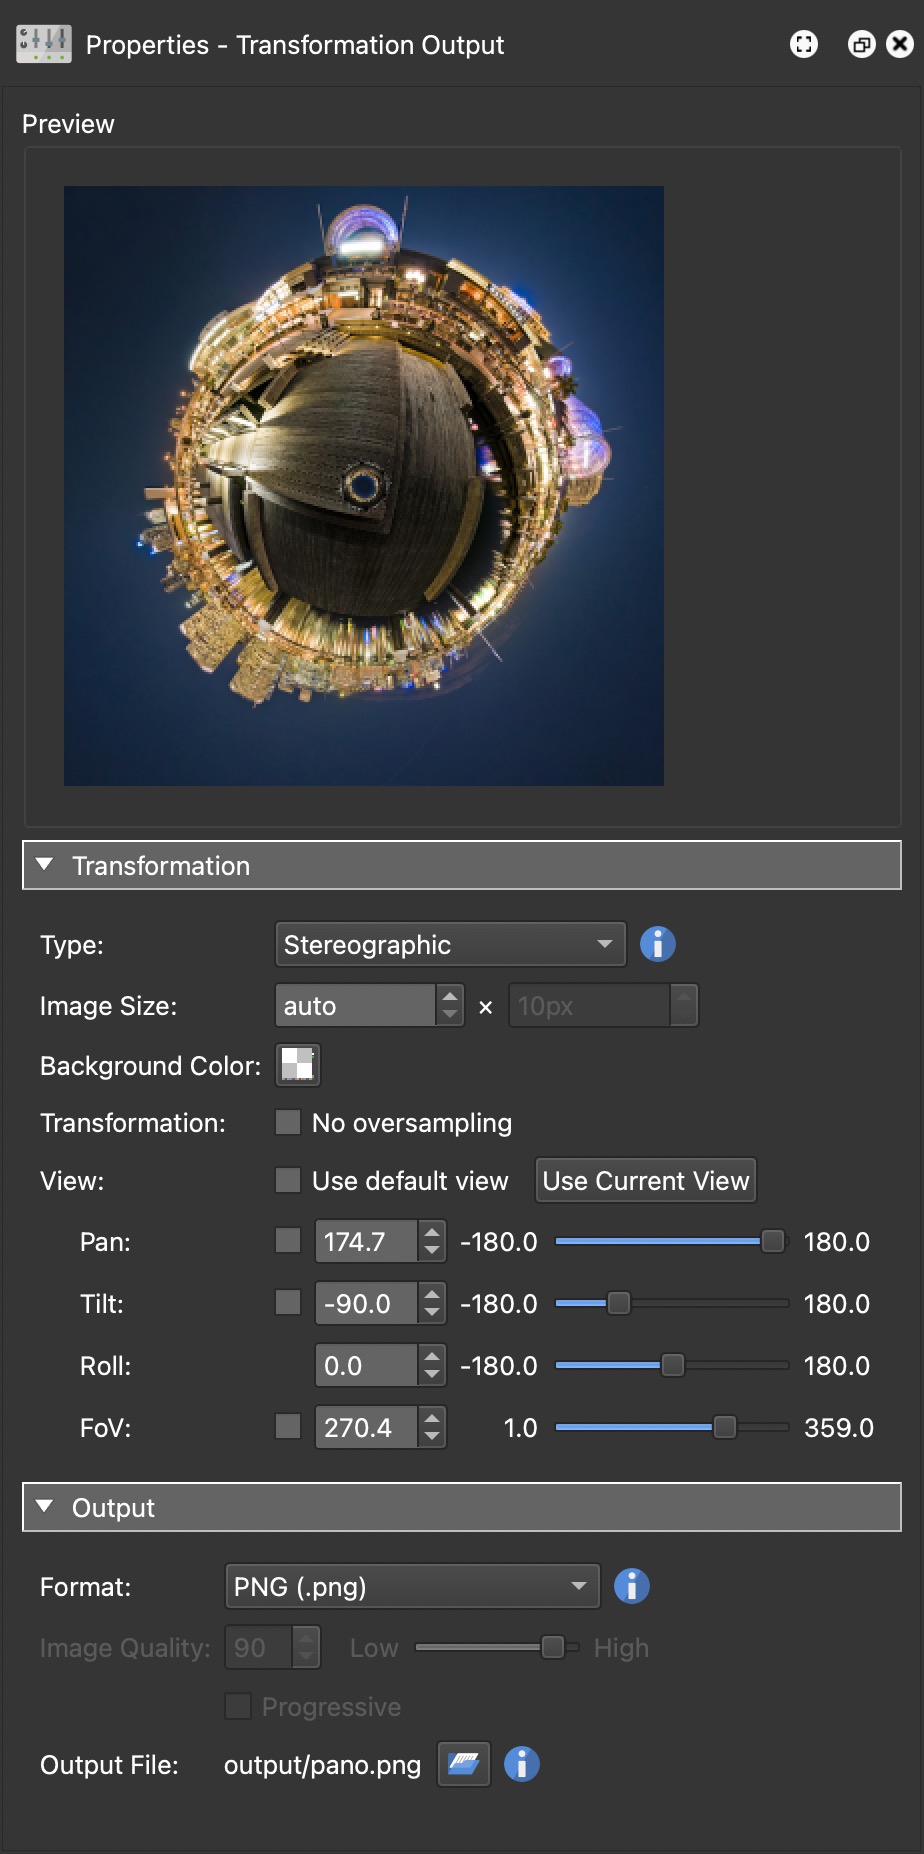
Use Transformation to re-project the panorama to create a thumbnail preview image or an image for print.
Preview
This is the output preview.
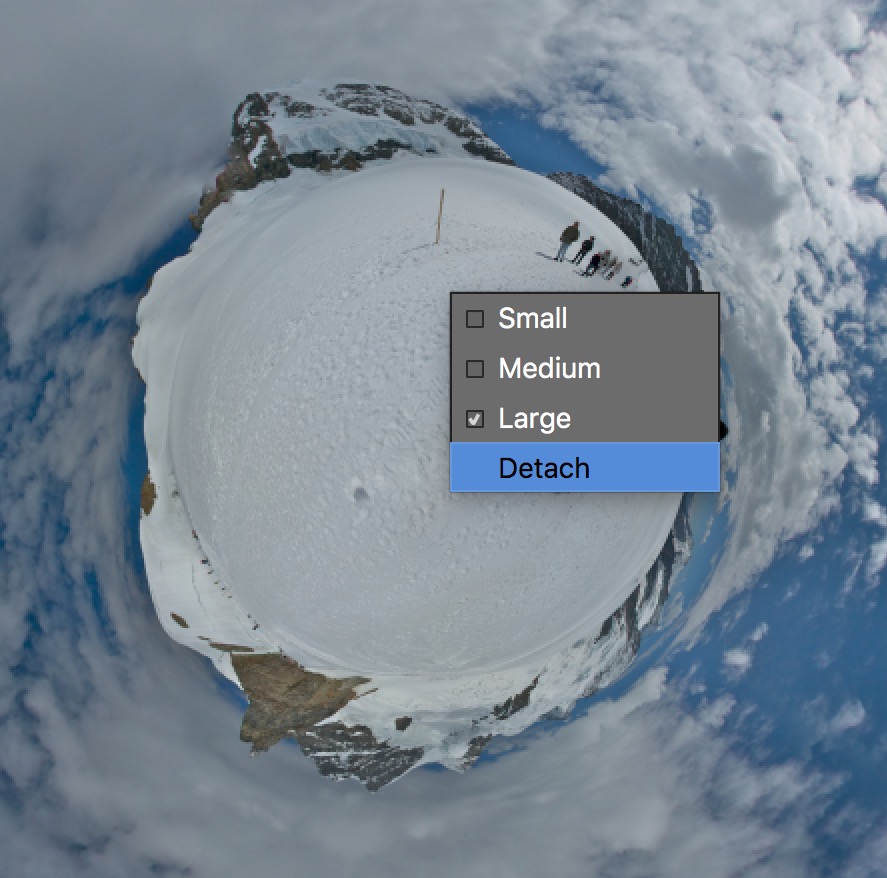
Right-click the preview image to change its size. Options of Small, Medium and Large. The default is Medium. You can also detach the window to make it even larger.
Transformation
Type – Begin your thumbnail creation or image remapping by first choosing which shape or type of image you want. Set the default type by right-clicking the type and choosing Set as Default.
Choose from the following:
- Equirectangular
- Sphere
- Mirrorball
- Stereographic (Little Planet)
- Angular Map
- Rectilinear (default view)
- Mercator
- Cylinder
- Vertical Cross
- Horizontal Cross
- Vertical Tee
- Horizontal Tee
- Vertical Strip
- Horizontal Strip
- Horizontal Strip VR (for use with the Oculus 360 app and Samsung’s GearVR)
- Cube Faces
- 3:2 (video)
- 3:2 (no overlap)
Image Size – Define the size of your image expressed in pixels (Width x Height). Depending on the Type chosen, will depend on which fields can be edited. Types like Horizontal Strip and Horizontal Tee, will use the height to automatically determine the width.
- auto – The image size will be automatically defined based on a number
factors (image’s original resolution, projection, view, etc.). If you’ve made
changes here and want to go back to auto, enter
0.
Background Color – The default is transparent but you can choose to add an opaque or semi opaque background color to the image.
Transformation – Deselect, No oversampling to prevent image aliasing. This may increase render time. If you’d like shorter render times or aliasing is not a concern, then you can turn it off here.
View
Choose to use the Default View set in the Viewing Parameters section, or, when this option is disabled, you can create a different view by manipulating the various sliders or manually entering the values. You can also choose to use only the Pan, Tilt, Roll, or Field of View of the default view by selecting the parameter. Whatever changes you make here will be used on output and can be seen in the Preview below.
- Use Current View – Click to apply the current view in the Viewer.
Output
Format – Choose to output your image to PNG, JPG, TIFF, OpenEXR or Radiance HDR. Only PNG, TIFF and OpenEXR support transparency (alpha channel).
Image Quality – When the output format is JPEG you can choose the quality of the outputted image. 90 is set as the default and can be changed.
Output File – Choose the file name and destination of the outputted image by clicking on the folder icon.
★ Tip: Use placeholders in the
filename, like $(n), to generate specific filenames for all nodes in a tour.
This placeholder will use the
image’s filename.