Animation Output Properties
Once you've created the animation in the Animation Editor, you can then output it by choosing the Animation output from the Output Panel. Below are all the output settings for Animation.
Transitions
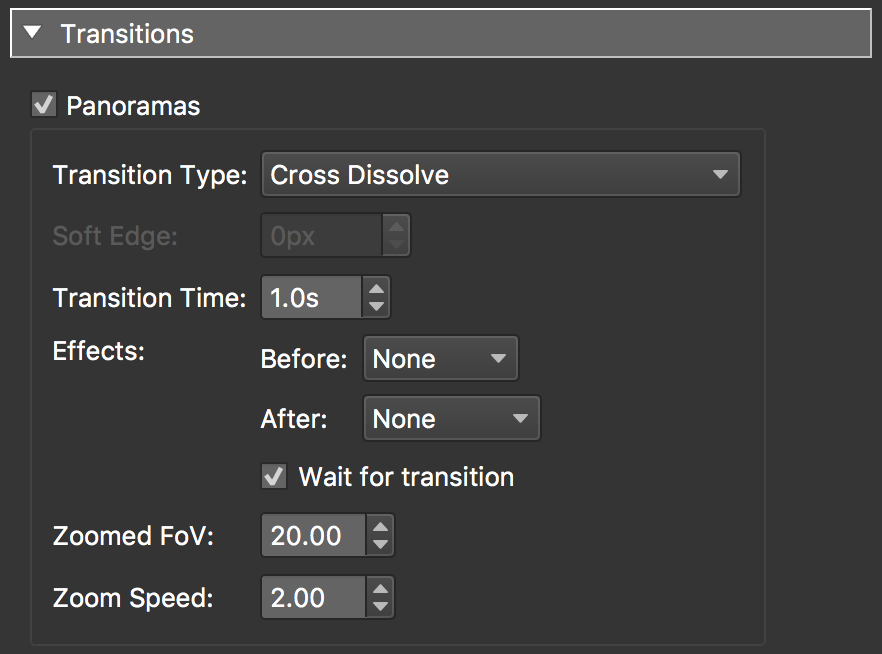
If your Animation has multiple clips, you can chose a transition for moving between them.
Panoramas
Select this to enable transitions.
Transition Type – Choose a type of transition:
- Cut
- Cross Dissolve (default)
- Dip to Color – Use the color picker to the right to choose a color to dip to.
- Iris Round
- Iris Rectangular
- Wipe Left to Right
- Wipe Right to Left
- Wipe Top to Bottom
- Wipe Bottom to Top
- Wipe Randomly
Soft Edge – Depending on the type of transition selected, you’ll be able to apply a soft edge (feather) to the transition. For example, applying a soft edge to either Iris transition, will soften its edge when moving between the two panoramas.
✭ Tip: Use a low value of 30px, for instance, for a subtle blur that looks like motion blur. Or try a high value of 300px for a very soft transition.
Transition Time – The full time of the transition from one panorama to the next. The default is 1 second.
Effects – You can choose to have effects occur before and/or after the transition. The current effects are Zoom In and Zoom Out.
- Wait for transition – When selected, the After transition effect, will not occur until the transition is finished. When deselected, the effect will occur at the same time as the transition.
Zoomed FoV – This value will determine how far the panorama will zoom in. The default value is 20.00 degrees.
Zoom Speed – The speed of the zoom effect.
Animation
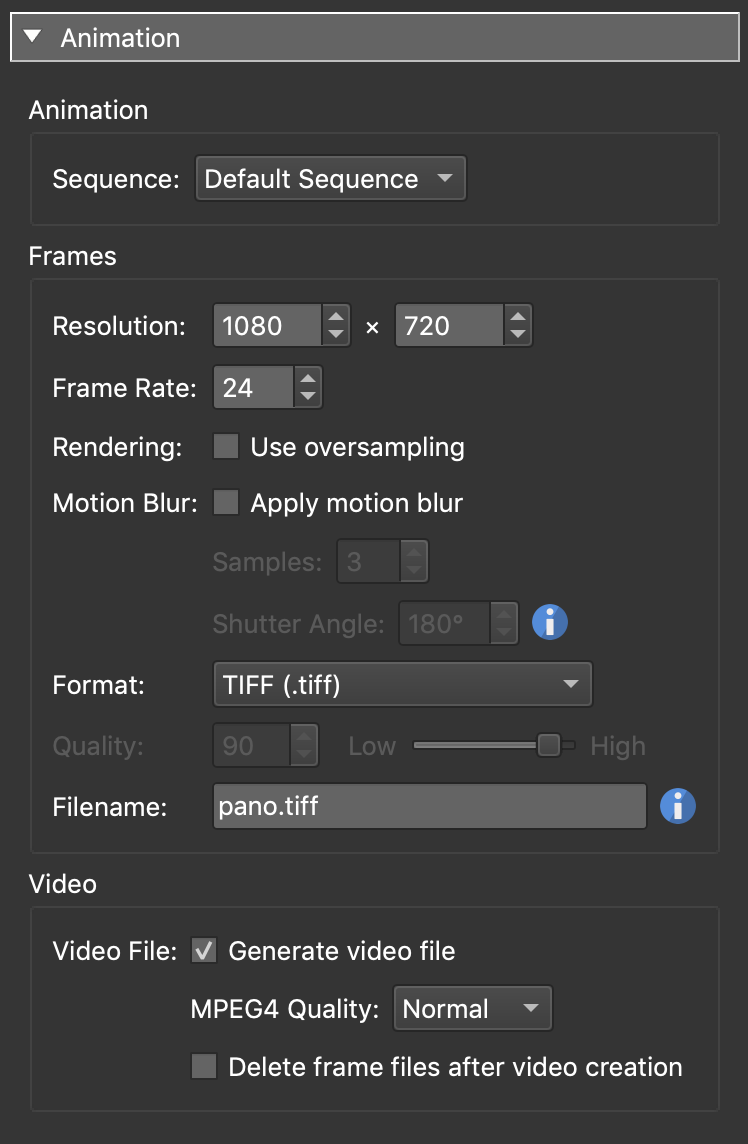
These are the movie settings. You can choose to output just a movie file or just an image sequence (frames) or both.
Animation
Sequence – Choose a sequence that has been created in the Animation Properties, to output.
Frames
Resolution – Define the video’s dimensions (width x height in pixels).
Frame Rate – Define the video’s frame rate. A frame rate of 60 will produce smooth results.
Rendering – Select Use oversampling for better image quality but at the cost of significantly increasing rendering time.
Motion Blur – Select Apply motion blur to apply motion blur to the video which will help to produce a smooth motion in the video.
-
Samples – Determine the number of samples to create. 3 is the default and should work well with most projects.
-
Shutter Angle – This will determine how much motion is recorded in each frame. The default is 180º and is a common setting. A larger angle would create more blur to point of smearing while a smaller angle would create a more stuttered motion.
Format – Select the file format of the frames.
Quality – If you choose JPEG as the frame format, then select the quality of the JPEG.
Filename – This is the filename for the frames. By default they are named
pano and will count up through the sequence, but you can change this to
anything you prefer.
Video
Video file – Select Generate video file to enable the video file output.
✭ Note: To generate a video file, you must have FFmpeg installed. Learn more.
-
MPEG4 Quality – Select the video quality:
- Normal
- High
-
Delete frame files after video creation – In order for the video to be created, each frame must first be generated. Select this option to delete the frames after the render is complete. It might be useful, however, to keep them.