Exporting for VR
Pano2VR projects can be viewed in a head mounted display or VR headset through WebXR, or VRTourviewer.
Skins in VR are supported, however, not all skin features are supported. All Point Hotspots are supported except for PDF, URL, and YouTube/Vimeo hotspots. If a VR skin isn’t used, tour node hotspots will be visible as spinning 3D globes but can be changed using custom hotspot images.
Add a skin for VR in the VR panel of the Web Output Settings. See the instructions below. Pano2VR ships with 2 VR skins that are free to use.
For white label and offline app creation, we recommend using VR Tourviewer. Alternatively, you can use the Package Viewer app for offline WebXR viewing.
To enter VR, you will need a button. All built-in skins have an Enter VR button which will appear in immersive mode.
★ The project must be hosted on a secure server (HTTPS/SSL) to use the devices’s gyroscope which is needed for viewing.
★ Mobile phones require permission to be granted to use the Gyroscope and Accelerometer. On first launch, you should get an opportunity to give permission. If the gyroscope is not working, and you’re using a secure server, then try clearing website data. On an iPhone go to Settings > Safari > Clear History and Website Data.
What is Supported
Point Hotspots are supported except the following types:
- URL
- Video > YouTube
- Video > Vimeo
Pinned elements not supported in VR:
- Web Element
- Lens Flare
Skins are supported but not all skin features. The following skin elements are not supported in VR:
- Video > YouTube
- Video > Vimeo
- Map
- Scroll Area
- Seekbar
- Lottie
Skin features not supported in VR:
-
Custom CSS Position and Size and CSS properties (class, style, inner element)
-
Masking in elements
1 to popup element.Use the Built-in VR Skins
- Create a project.
- Add a Web Output.
- Add a skin that includes an Enter VR button. All built-in skins have one included. If you need to simply update a skin with an Enter VR button, read the instructions below these.
- In the Web Output Properties, find the VR pane. Select Enabled.
- Choose one of the built-in skins (
feather_vr.ggskorvenis_vr.ggsk). - [Optional] In the immersive view, there is a button that appears when viewing up. Clicking it will hide or show the skin. Deselect, Floating Skin Menu Button in the Web Output Properties to hide this button. This button can also be customized.
- Generate the Output. (You may have to save the project first.)
The output will work for Meta Quest and other headsets with browsers that support WebXR.
Update a Skin with Enter VR
There must be a button added to the main skin to enter the immersive mode of the project.
-
Open the skin.
-
Add a graphic element (image, text, rectangle, Lottie, SVG, etc.) that will be the Enter VR button.
★ Tip Alternatively create a component from the built-in skins and then add that component to your skin. And then skip the follow step. -
Add Enter VR action to your button:
- Source = Mouse Click
- Action = Fullscreen/VR
- Type = Enter VR
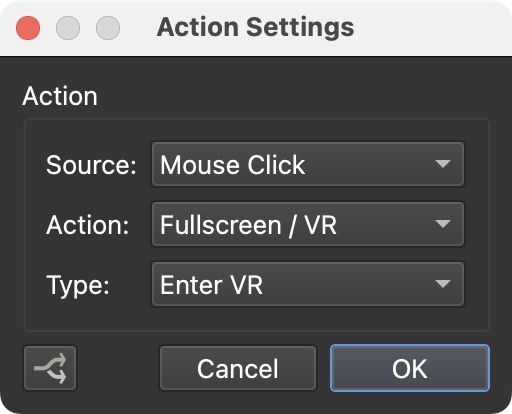
Enter VR action in the main skin. -
Save the skin.
-
In the Web Output VR properties, check that Enabled is selected in the VR pane.
-
Add a VR skin. This is a separate skin from the main skin that has the Enter VR button.
-
Save the project. The VR button you’ve added to the main skin will only be visible on WebXR supported browsers.
Working with Stereo Panoramas
Pano2VR natively supports stereo images and videos.
Importing
- Drag a stereo pair as a top/bottom or strip format into the Viewer or the Tour Browser. ★ If the image is a strip, change the Type to Strip VR.
- In the Properties, define the pair as Left/Right or Right/Left for Stereo Pair.
Tour Building
The tour building workflow is the same as for monoscopic images. Link the panoramas in any way. You can also mix stereo and mono images in the same tour.
Output as Web and add a main skin that has an Enter VR button and add a VR skin.
Custom Hotspot Images
If there is no skin or no hotspot template for tour nodes, spinning globes will appears as the default hotspot image.
If you’d like to override the spinning globes, then you can add a custom hotspot image.
If there are not many tour node hotspots to change, then you can manually set the hotspot image (described below). Or you can use a point hotspot template in the VR skin to change all node hotspots.
-
Select a tour node point hotspot in the Viewer (or in List View).
-
For Custom Image, click the folder to open an image for the hotspot.
-
Choose to resize the image or to have it 3D Distorted which will pin the image to the panorama. You can then set the field of view to make the image appear smaller or larger.
-
Set the image’s distance from the center using the Distance setting. Leave at Auto which is based on location data or deselect auto and set the distance manually. This option is only available if the hotspot type is Tour Node.
★ The custom image, like the spinning globes, will expand when the pointer is over it and contract when it leaves. However, using 3D distortion will image will make the hotspot static, staying at the size (file) that’s been chosen in step 4 above.
Patching
You can use the patch tool to quickly fix movements between the images, nadir, zenith, etc.
-
Add a patch over the area to fix.
-
Extract. This will open an extracted version of both sides in your default image editor. The left side will be the extracted patch.
-
In the photo editor, if using the Clone tool, clone the right side and stamp on the left. So that the left side is being cloned by the right side.
Custom Floating Menu Button
When in the immersive view, a button appears (hamburger menu) when you look upwards (default setting). This buttons shows or hides the skin. (Note that hotspots will always show.) Learn how to customize this button.
- Open a VR skin.
- Add a top-level graphic skin element (text, rectangle, image, lottie, svg, etc.).
- Give it an ID, either
_open_skinor_close_skin. - Give it an action:
- Source = Mouse Click
- Action = Fullscreen/VR
- Type = VR Skin Visibility
- Mode = Toggle
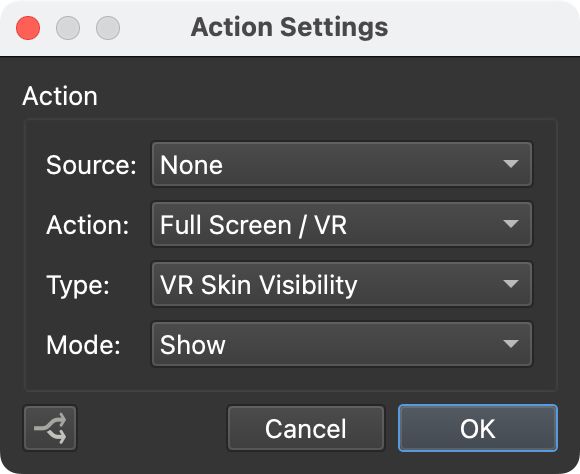
VR Skin Visibility action in the VR skin.
- Save the skin.
- In the VR web output properties, apply it as the VR skin.
- Select Floating Skin Menu.
- Choose where to position the button. Top or Bottom.
- Output and test the skin.
Preview and Test in Immersive View
To view projects in VR they must be served from a secure connection. Use Pano2VR’s Live Update feature in the headset to preview and test the project using the Integrated Web Server. Here we outline how to view the project on Meta Quest.
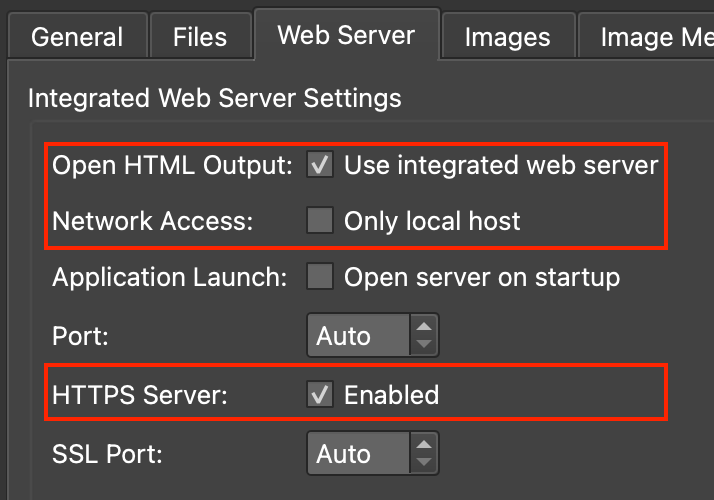
- Check that Use integrated web server is selected, Only Local Host is
deselected, and HTTPS Server is enabled in the
Web Server Settings.
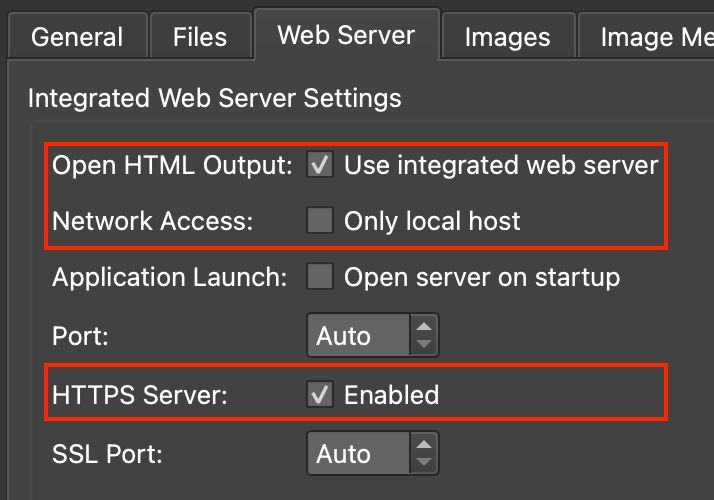
Web Server Settings - Open the Integrated Web Server from the menu bar, Tools > Integrated Web Server.
- Re-output the project. You’ll see the web server’s log fill.
- Make sure that Live Update is on.
- Click the Address (ssl) URL in the upper left corner. This will open your default browser and there might be a warning about proceeding. Depending on your browser, click Show More or Advanced and then proceed (find a link that that says visit website, continue, proceed, or accept risk).
- Scan the QR code with your phone.
- Share the link to the Meta Horizon app. Then save the link to your device. (You’ll also find the saved links in the app’s Menu > Saved.)
- Open the link in the headset.
- In Pano2VR update and save the project as needed. The output will automatically update in Quest Browser.
Updating a project from WebVR to WebXR
In earlier versions of Pano2VR used WebVR for viewing projects in immersive view. In Pano2VR 6.1.6, the player was updated to use WebXR. This required updating projects. This is only necessary for projects created with versions older than Pano2VR 6.1.6.
To update your projects to use WebXR, please re-output your projects.
If you no longer have the project available or need a quicker solution than re-outputting, you can replace the player and edit the HTML page:
- Build a new project with Pano2VR 6.1.6 or later and output the project to
generate a new
webxrfolder in the output. - In the project to be updated, replace the
webvrfolder with the newwebxrfolder. - Copy the new
pano2vr_player.jsfile from the Pano2VR 6.1.6 output and replace the file in old project folder. - Open the HTML page in a text editor and search for
webvrand replace withwebxr. - Test on your favorite HMD.
See also…
-
Swap left and right sides using Convert Input
-
A stereoscopic output made with Pano2VR 5 Pro courtesy of Karel Gillissen