Animation Editor
Use the Animation Editor to create self-playing interactive panoramas and 360º panoramic videos and to export animated 2D videos.
Properties
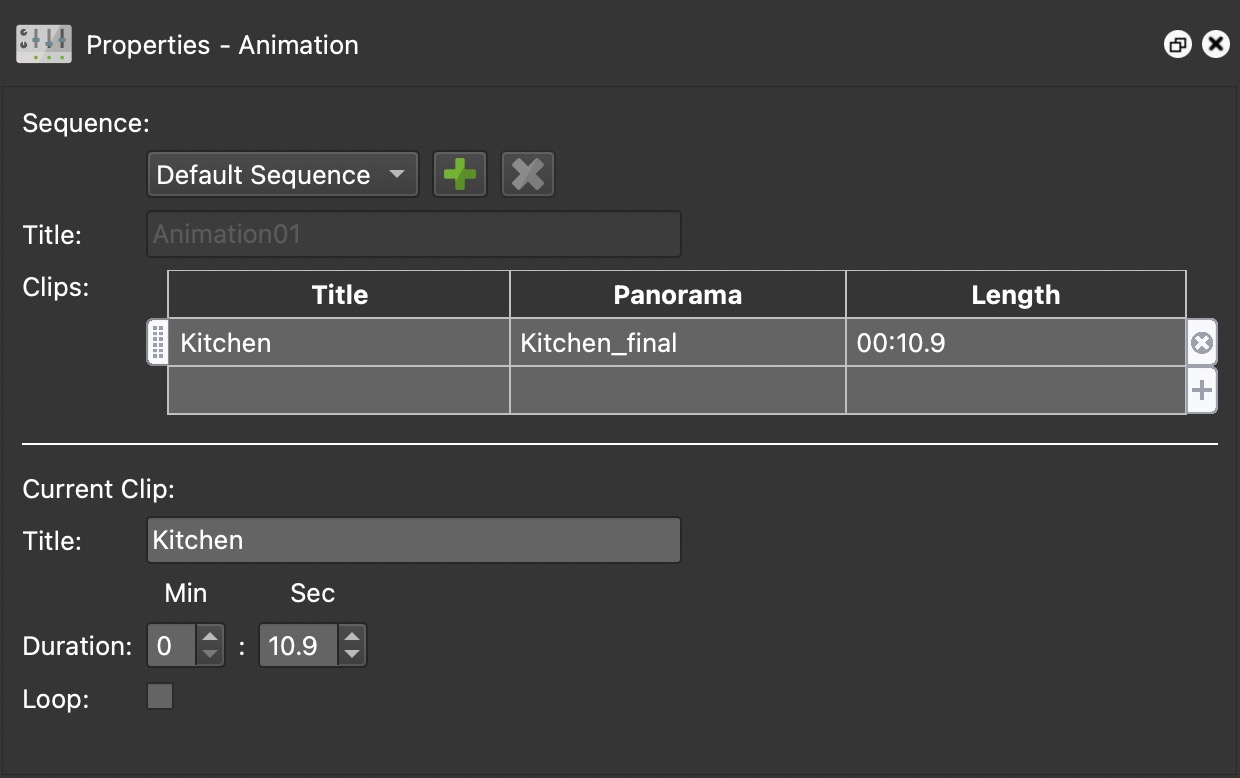
The Animation settings will open in the Properties panel. This is where sequences (group of clips) are created. The properties of the current clip loaded in the editor are also available.
Sequence
A sequence is a group of clips. If making a tour, for instance, each clip can represent a node.
Sequence – Choose a sequence or create a new one by clicking the Add Sequence button. Or remove a sequence by clicking Remove Sequence. ✭ The default sequence cannot be removed nor can its name be changed.
Title – The sequence title.
Clips – Add clips to the sequence here. Double-click in the table to choose clips. Use the handles on the left side of the table to rearrange the clip’s order. Click the “x” on the right to remove the clip.
Current Clip
This section displays the clip’s title, duration and if the clip should loop.
Frame Overlays – Right-click in the viewer to bring up a menu. The Frame Overlays will add an aspect ratio overlay so you can correctly frame the panorama.
-
16:9 – HD video
-
4:3 – SD video and still photography
-
None – Select to remove the overlay.
✭ Once you add an output format (Web, Animation), you will see the chosen output’s dimensions listed in the Frame Overlays.
Overlay Colors – Right-click in the viewer to bring up a menu. The Overlay Colors will set the viewer’s overlay color (viewer borders).
-
Black
-
Dark Gray
-
Medium Gray
-
Light Gray
✭ If the clip is a video, an option to Mute the video’s audio will be available.
Editor
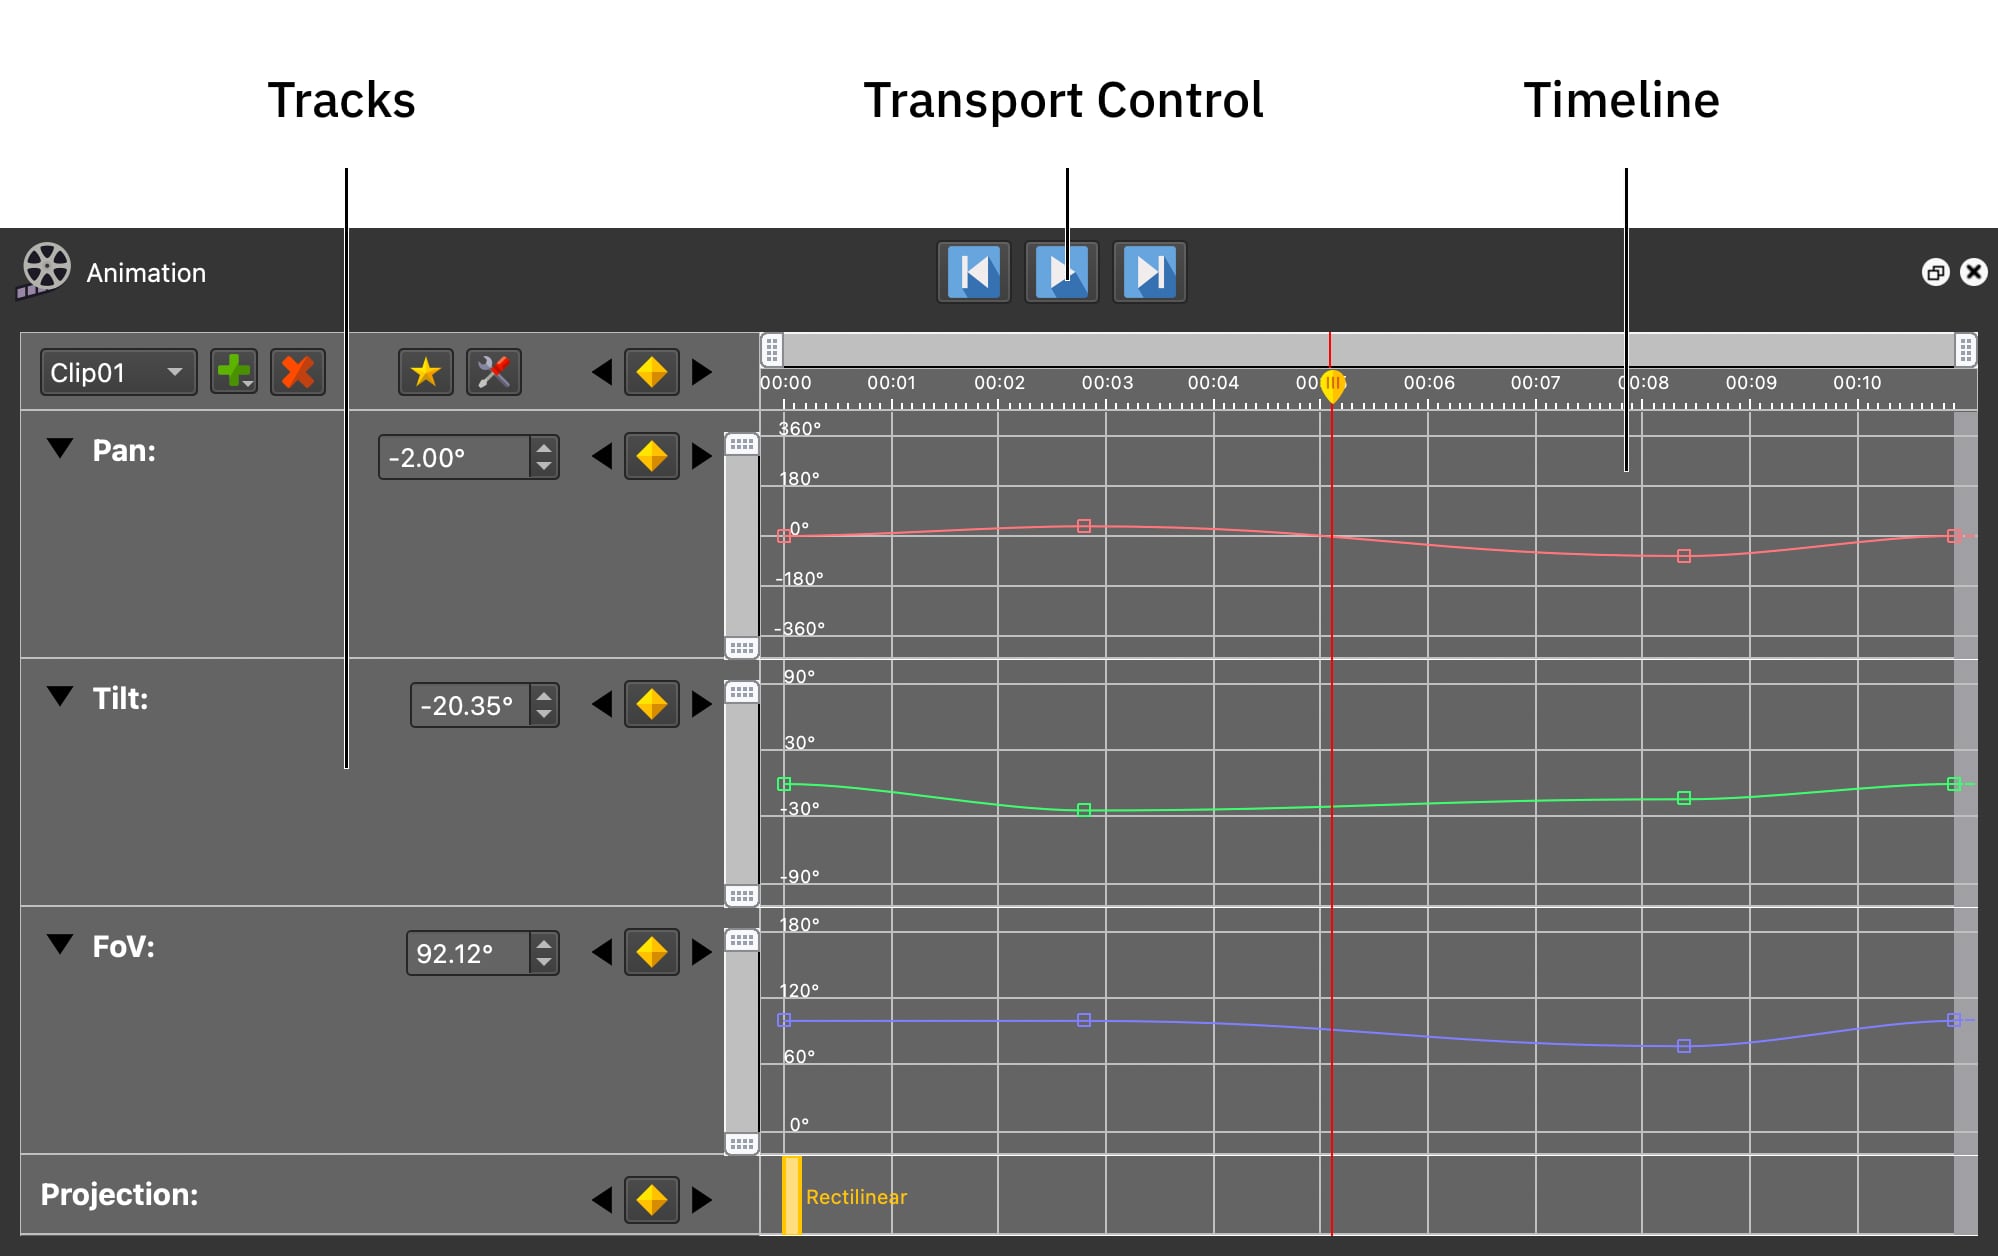
This is where the animation is created. The editor will, by default, open on the bottom half of the program window. It contains a transport control, a way to select the clip to edit, a magic keyframe option, tracks, and most importantly, a timeline.
Transport Control – Use the transport control to play, pause and will go to the beginning and end of the animation. You can also access the controls via the Animation Menu and via keyboard shortcuts.
-
Play/Pause – Spacebar (This keyboard shortcut can be customized in Pano2VR’s Settings/Preferences.)
-
Begin – Page up
-
End – Page down
-
Back One Frame – Left cursor key
-
Forward One Frame – Right cursor key
-
Repeat – This does not have a default keyboard shortcut, but you can define one in the Keyboard Shortcuts. You can choose to repeat the playback of the current clip, all clips or turn Repeat off.
Timeline
The Timeline is where the animation happens!
Tracks
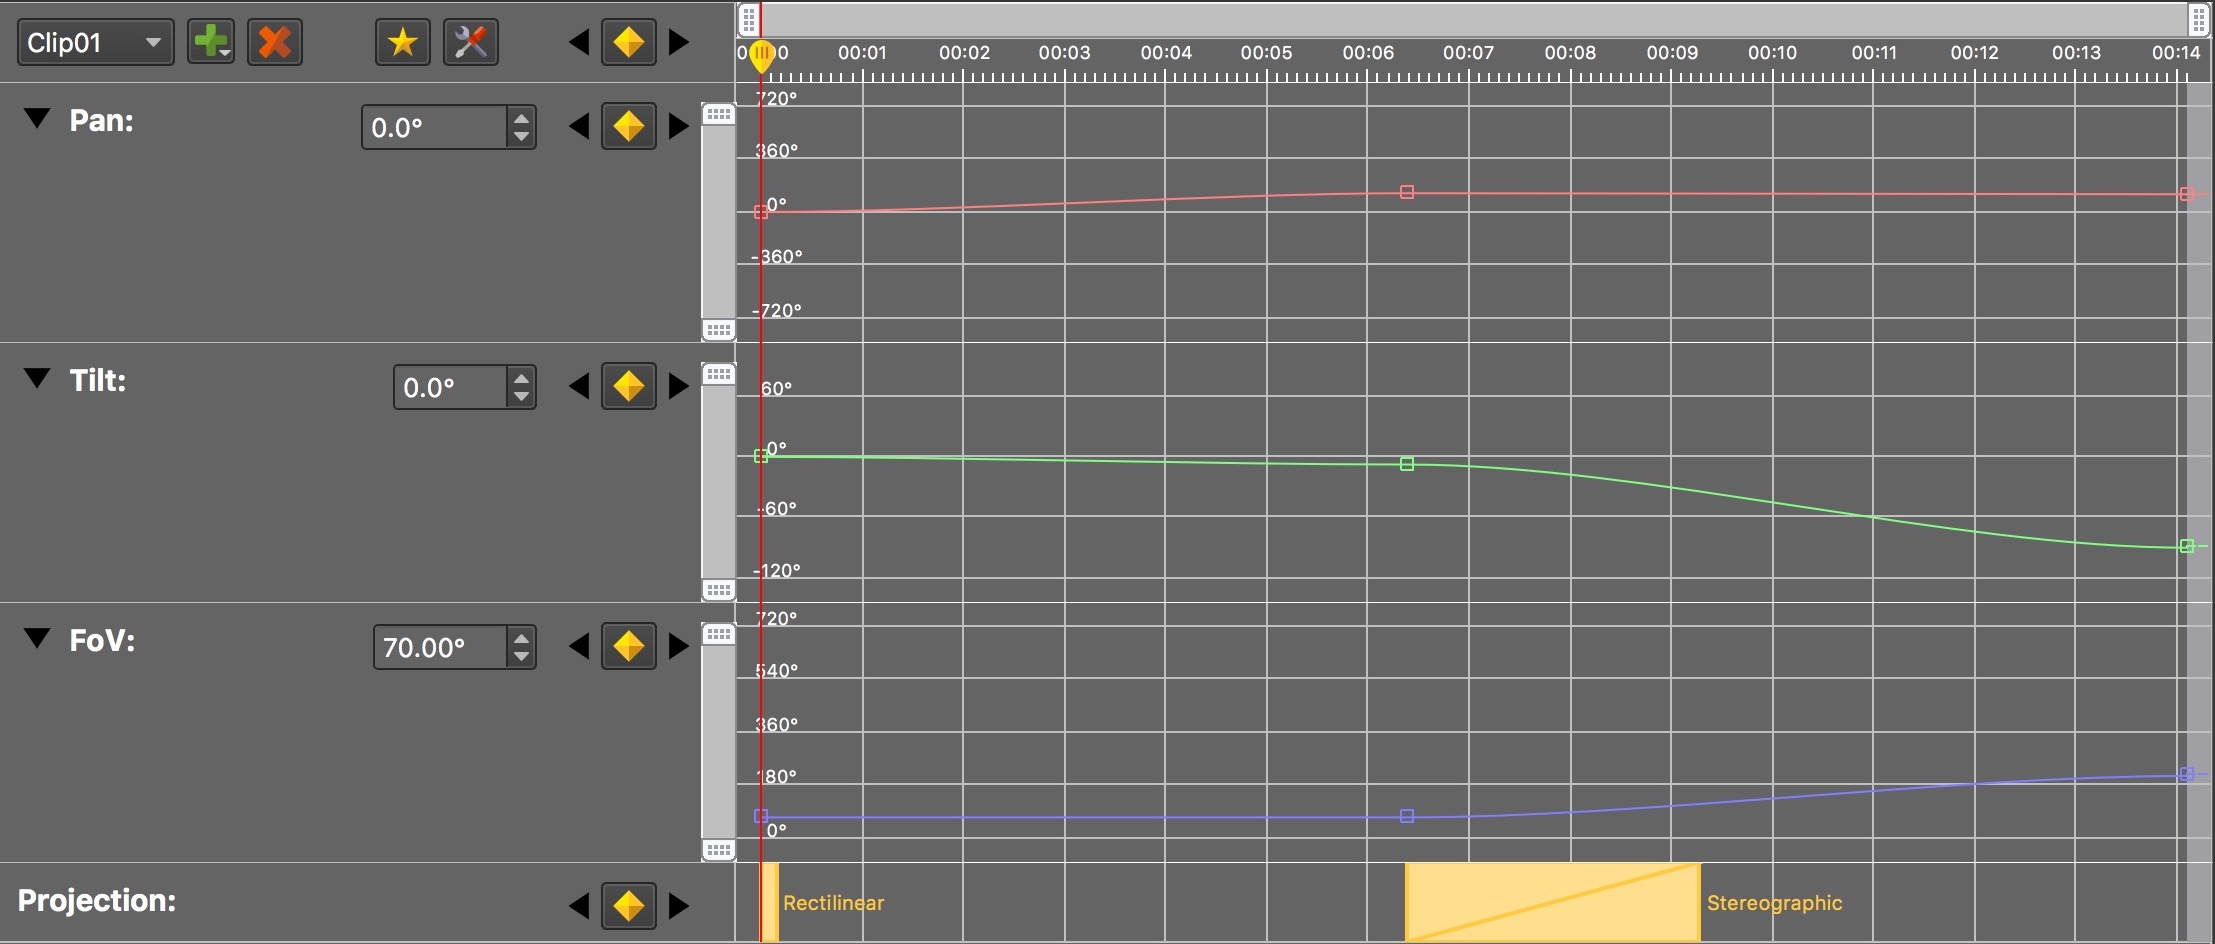
There are 4 initial tracks: Pan, Tilt, Field of View and Projections. Each of these parameters can be animated using keyframes.
Tracks for tracking hotspots and tracks for skin variables can be added by right-clicking on the track header. See Connecting to a Skin for adding Variable tracks and Tracking Hotspots for adding Hotspot tracks.
Collapse Track – The tracks can be collapsed by clicking the black triangles to the left of the track name.
Track zoom – You can zoom in to the track by sliding the horizontal scroll handles.
Each track contains a field where you can see and enter the current value at the playhead. You can also add individual keyframes by clicking on the Toggle Keyframe button in each track.
Each track has a vertical scrollbar. You can drag its handles on the top or bottom to zoom in our vertically.
Right-click the vertical scrollbar to adjust the following:
-
Reset Scrollbar – If the scrollbar has been adjusted, this will reset the scrollbar to it’s default position.
-
Fit Graph – Sometimes the keyframes move beyond the track borders. Use this option to fit all keyframes within the track.
The Timeline has a single horizontal scrollbar. You can drag its handles to zoom in and out of the time scale.
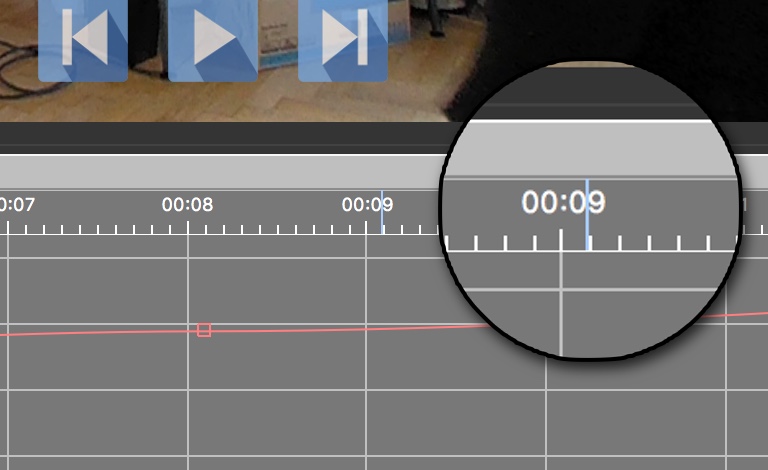
To extend or shorten the clip time, drag on the right edge of the editor. The mouse will turn into a double-arrow. Click and drag horizontally.
Right-click the horizontal scrollbar to adjust the following:
-
Reset Timeline – This will reset the scrollbar to its default position and scale.
-
Trim Timeline to Last Keyframe – Select to trim the timeline to the last keyframe. The animation duration will be adjusted.
✭ When the animation moves beyond the Viewing Limits, the portion of the affected track will turn red and a warning symbol will appear to the left of the track.
✭ If the clip is a 360 video panorama and its length is shorter than the Timeline, you’ll see a blue indicator showing the video’s end. If the video loops, you’ll see the indicator repeat on the Timeline.