Building a Tour
A tour can be built with both Pano2VR and Pano2VR pro. However, the pro version is better suited for the task. The Tour Browser is only found in Pano2VR pro and provides the quickest and easiest way to build interactive panorama tours.
Follow the instructions below to learn how to make the most out of the Tour Browser.
The Tour Browser is opened by default when you first start Pano2VR pro. However, if you need to open it, you can do any of the following:
-
Click the Tour Browser button in the toolbar.
-
In the Menu Bar, go to Window and choose Tour Browser.
-
Use the keyboard shortcut, Alt or Option-Shift-T.
Import the Images
Import all tour images by doing any of the following:
-
Select all images or a folder in Explorer or Finder and drag them into the Tour Browser or Viewer.
-
Click the Input button and then select all the tour images. Click, Open.
✭ TIP: When you drag a folder in to Pano2VR, the name of the folder will be added as a Tag.
Set up the Images
Once the images are added to the Tour Browser, you can then modify the image order (click and drag), change the default views and add geolocation data.
-
Set the starting panorama.
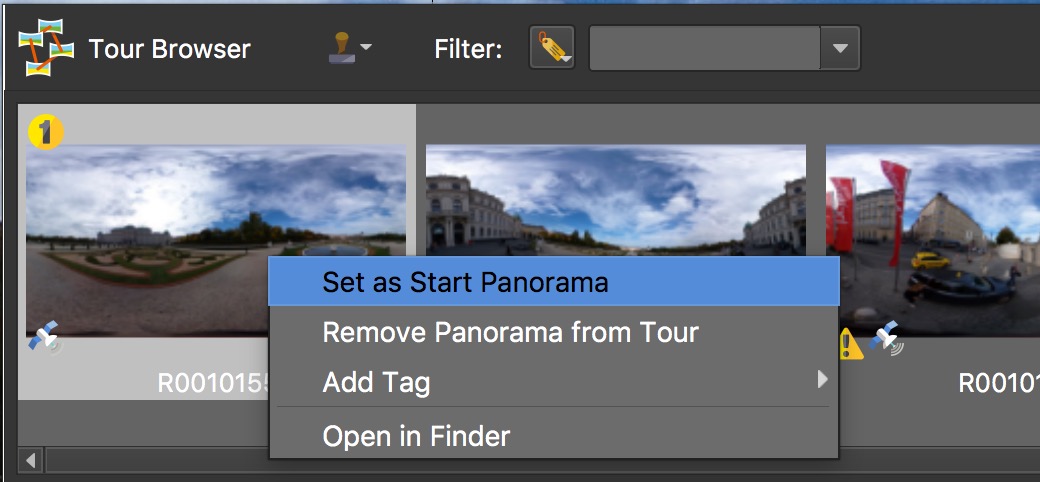
The first image that is imported into the project will be automatically assigned as the starting panorama. You can change this order by rearranging the images or by right-clicking on a thumbnail and choose, Set as Start Panorama. The starting panorama is indicated by the number 1.
The following steps (steps 2-8) are all optional and are not required in order for the tour to function. However, they help to make a better user experience.
-
Set North.
If you know where North is, hold down N and spin the panorama to match North with the North indicator. You can turn on the Center Marker in the Viewer Settings to help line it up.
If you do not know where North is, you can use the Pick Landmark feature in the Tour Map.
-
Add general information (metadata) about the image in User Data (if not already added from Exif data).
-
Add geolocation information (if not already added from Exif data):
-
Open the Tour Map.
-
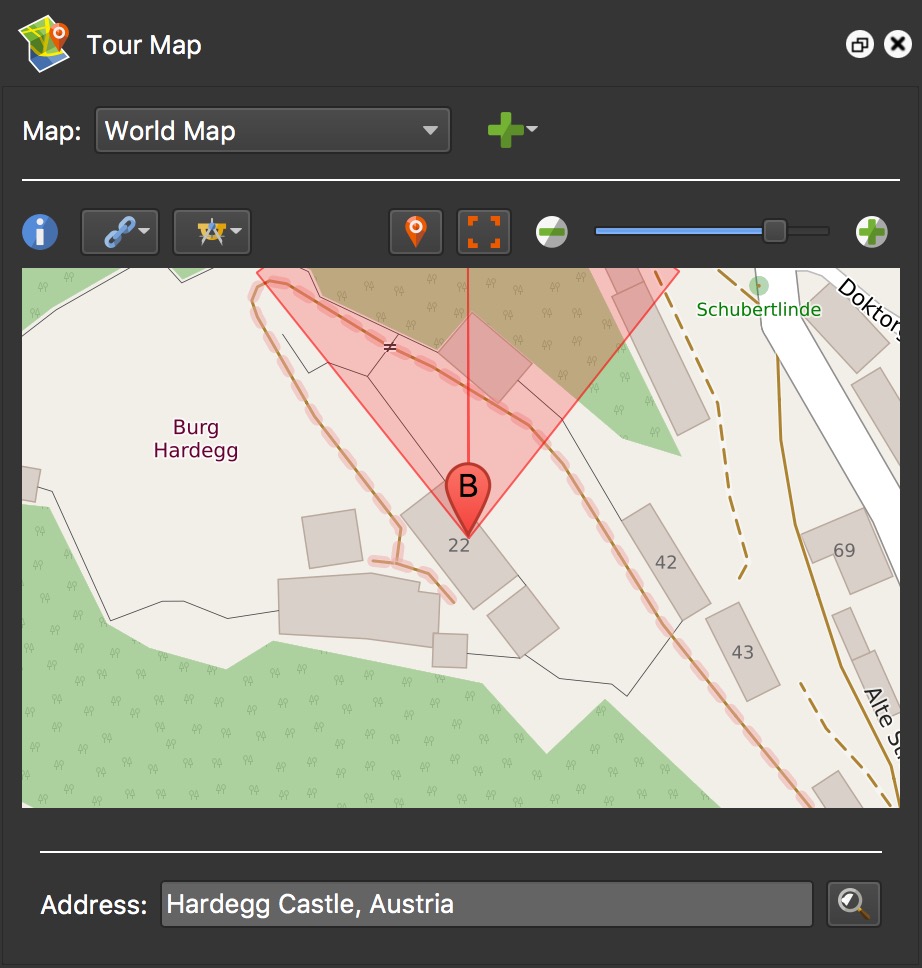
Enter the image’s location or address in the Address search field and click the magnifying glass (Or Enter). A green flag will be dropped. To confirm the location, click the flag and a pin with a radar beam will be dropped.
✭ Need to start over? To remove the marker, select it and hit delete or right-click and choose, Remove Node from Map. Double-click in the map to add it again.
Return to the User Data panel and the Latitude and Longitude fields will have been updated.
-
-
In User Data, add Tags to the image by typing in the field and then hit spacebar, comma, tab, or enter to add the tag.
-
Select the next panorama and repeat steps 2 – 6. Continue to do this for each panorama.
✭ Don’t forget to save your work! If you do forget, don’t worry. Pano2VR backs up your project every 10 minutes.
Linking the Images
After setting up the images, you can start linking (or pointing the image nodes).
You can either manually or automatically link the images. If you have a small tour, linking the images manually is a fine option. However, if you have a lot of tour images, you might want to opt for one of the automatic options.
If the images have location data, then you may see ghost hotspots in the Viewer. You can then double-click these gray hotspots to activate them. The images will be linked. Ghost hotspots can be shown or hidden from the viewer in the Viewer Settings
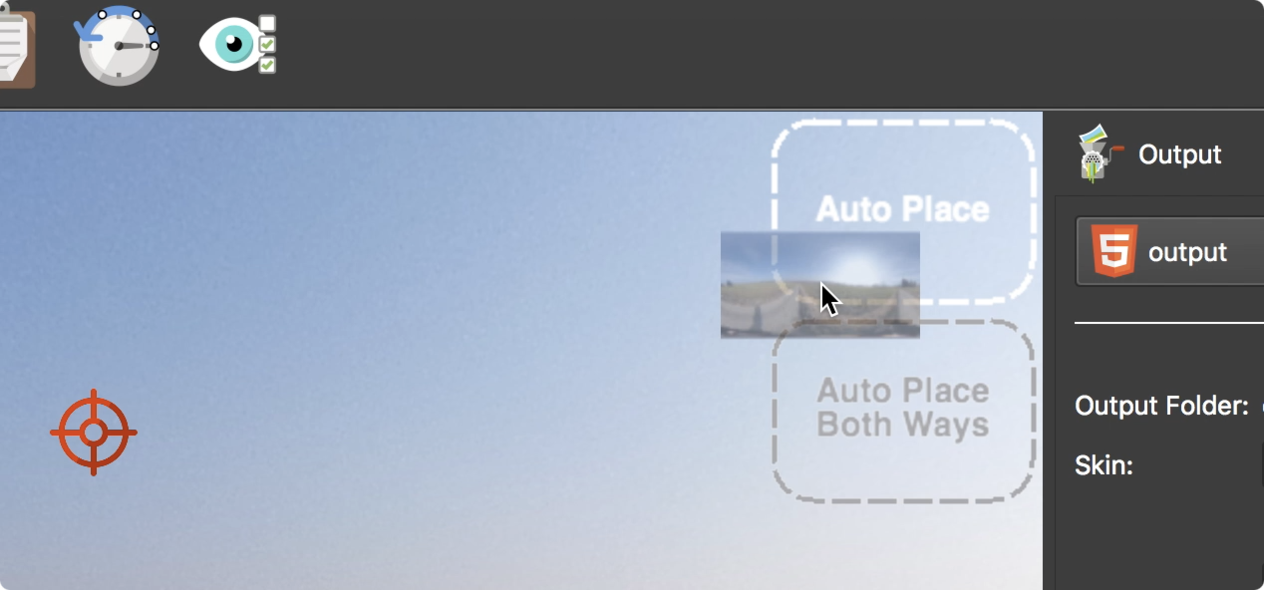
You can also drag images from the Tour Browser to the Viewer using Auto Place:
-
Drag a node to the Viewer.
In the upper right corner, there will be two drop zones where you can drop the node.
-
Drop to one of the following drop zones:
Auto Place – This will link the current node to the placed node.
Auto Place Both Ways – This will link the current node to the placed node and the placed node will link back to the current node.
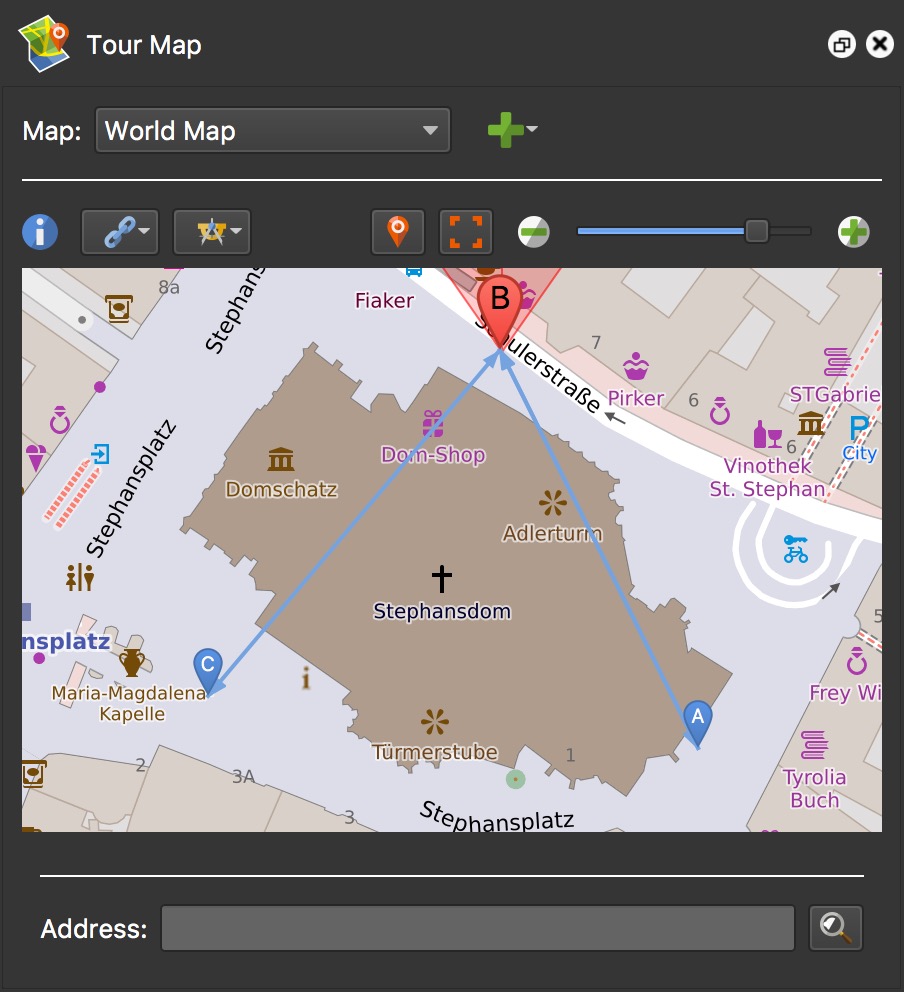
You can also drag a selection of nodes. Select the nodes by either dragging the mouse over the selection or by holding down Control (win) or Command (macOS) and selecting the nodes. The active node (indicated by a darker shade of grey, is what the other nodes will connect to.)
In the Tour Map below, Node B was the active node (selected first). Nodes A and C were also selected and were linked to node B.
Automatic Linking
This method of creating a tour is the fasted way to link the panoramas. There are two automatic linking options and both require the images to have location data and North to be set. See Setting up the Images.
Sequential Linking
This links the images based on their order in the Tour Browser. The target pointing directions are set to point in the direction of the next link, allowing the user to quickly click through the tour.
Choose Sequential from the Tour menu in the Menu Bar. Output the tour and test it. It could be you might need to fine-tune the hotspot’s placements. This is easy to do in the Viewer.
Closest Node
Closest Node links the images according to their location data.
★ This is preferred option for linking when building tours for Google Street View.
Manual Linking
The manual linking method is recommended especially when the images are not geolocated or the precise location is not known. A good place to start building a tour is at the beginning, the start panorama.
-
In the Viewer, double-click to add a point hotspot to the start panorama.
-
For Type choose Tour Node.
-
Give the hotspot a Title. (optional)
If you’ll be using a skin with a tooltip (popup text relating to the hotspot), the title will be the tooltip. -
For Link Target URL choose Tour Panoramas and then select the panorama that will be linked to.
-
Select a Target View for Target, by clicking the target button to the right. In the window, drag the image to the correct view and click OK. This is where the linked panorama opens up to.
-
Follow steps 1-5 for the remaining tour images.
-
Save the project. Output it and test the tour.
✭ Tip: Use the keyboard shortcuts, Command-] (Mac) or Control-] (Win) to move to the next panorama and Command-[ (Mac) or Control-[ (Win) to go to the previous panorama.
✭ Tip: If you’re working with a gigapixel tour or even a large tour and use Node Images, press Command or Control while opening the project file to disable Node Images from loading and to prevent the rendering of new nodes images and/or tiles so you don’t have to wait for all the images and tiles to load before editing the project.
Updating a Published Tour
On output, Pano2VR will only regenerate files that have been changed. If you need to update the entire content of the output folder, you can either hit the trash button to the right of the Output Folder, or you can rename the output folder.
If you need to update the tour on your site, it’s most likely that you do not need to reupload all the files. If you’ve made changes only to the skin, just upload the skin.js file and the images folder. If you’ve added any sounds or videos, also upload the media folder.


