Setting Up a Google Maps API Key
In order to use Google Maps in the Tour Map, or to add Place IDs for Street View, or to add a Google Map in the skin, you will need a Google Maps API key. Google requires this key for anyone wishing to use/embed their Maps JavaScript API (Google Maps).
If you want to use Google Maps in the Tour Map and for Place ID in Street View and for the map element in the skin, we suggest creating multiple keys. One key for the Tour Map and Place ID and one for the skin.
-
Go to the Google Cloud Platform.
-
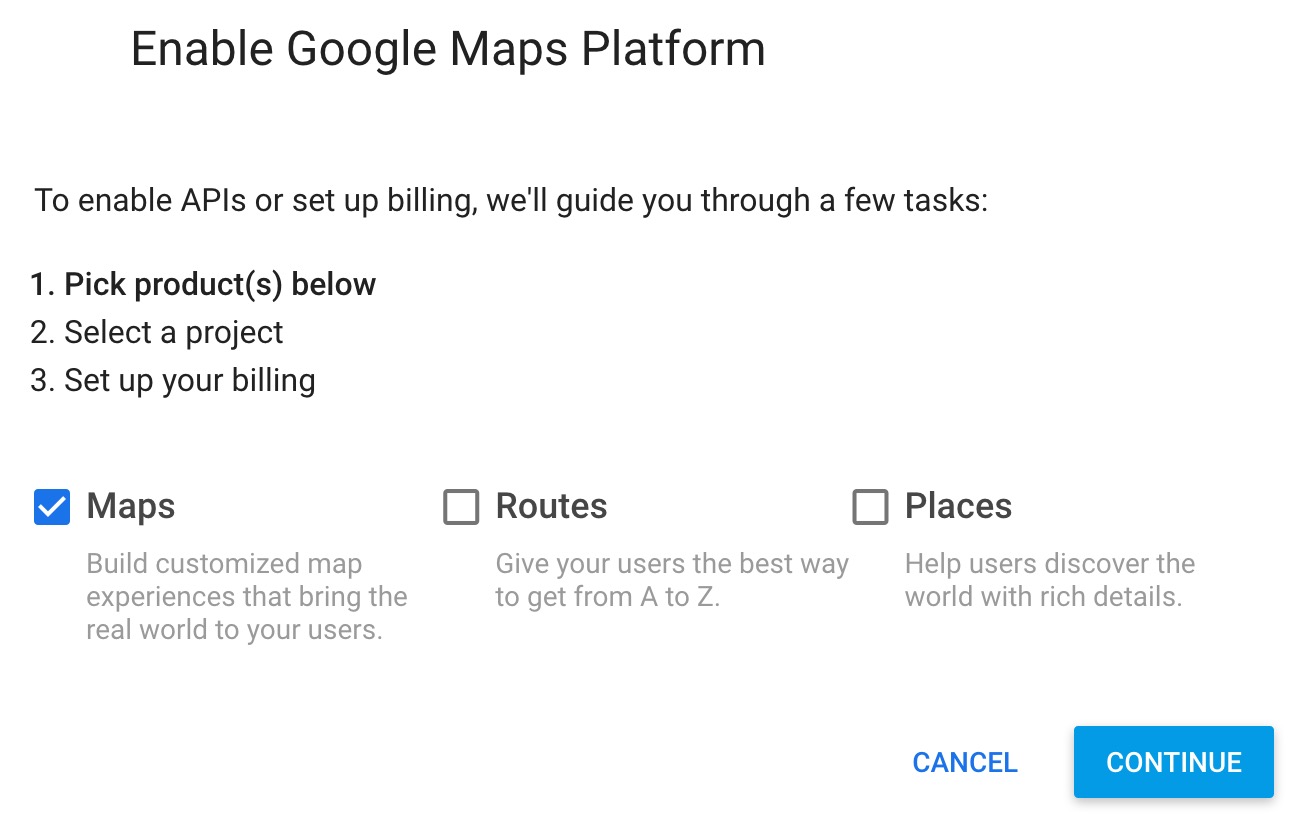
Select Maps. Then follow the instructions with each prompt.
You will eventually be asked to set up a billing account and asked for a credit card.
The Google Maps API key is not free. However, they have given users a $200 credit for 12 months (at the time of publishing – December 2018)
✭ You can also go directly to the Google Cloud Console as instructed in the video above.
Key for Tour Map and Place ID
Once you have this key, we recommend restricting the key to a few APIs, but not to add a domain lock.
-
In the Google Cloud Platform, go the project that is associated with the key. You will probably already see a warning by Google.
-
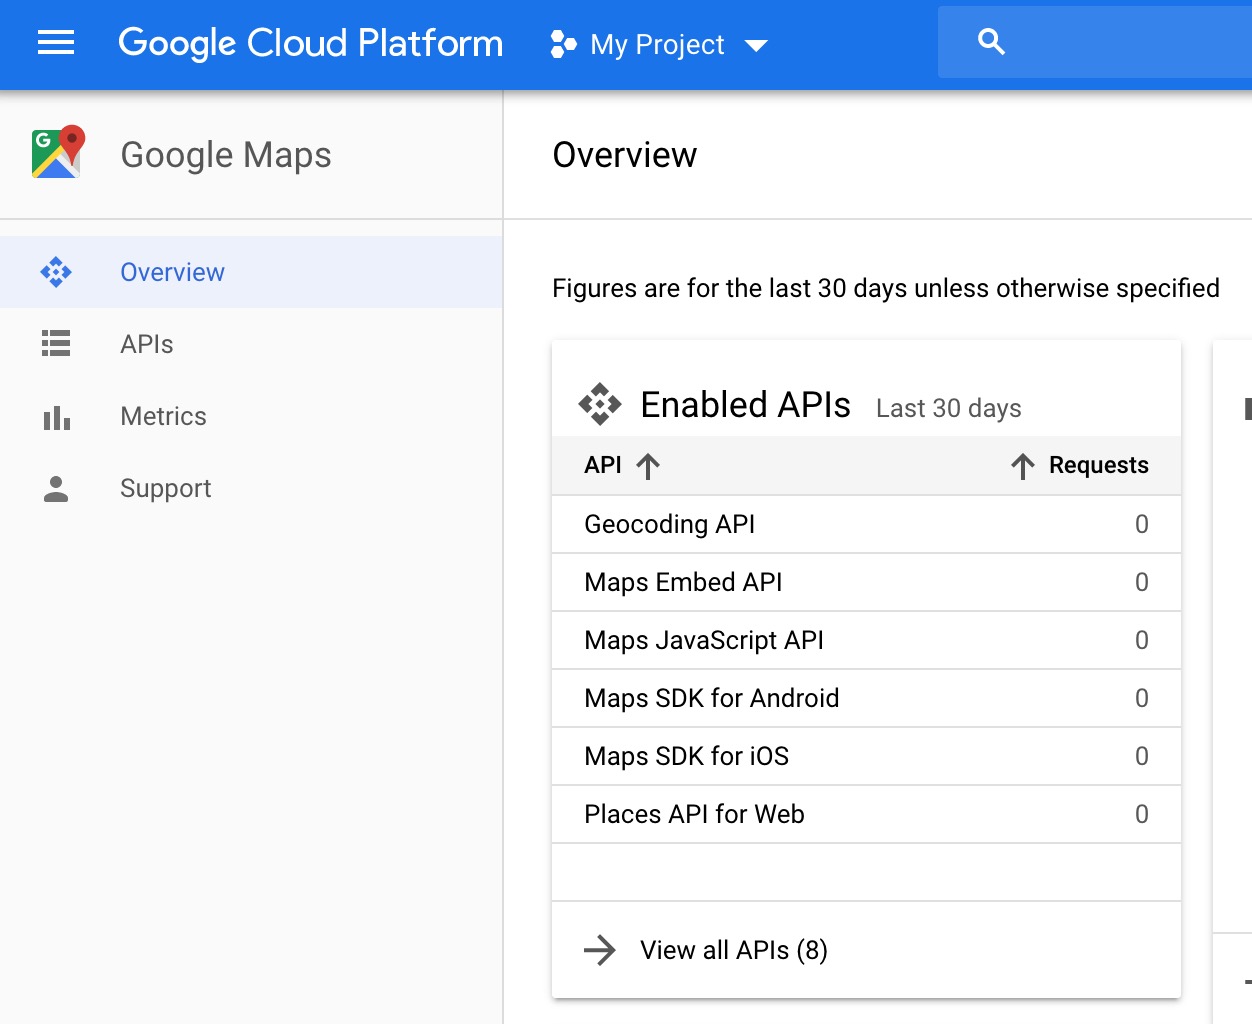
Make sure you have the following API’s enabled: Maps JavaScript API, Places API, and Geocoding API.
You can find out what you have enabled by going to the API section and see what’s listed in the Enabled APIs box. (APIs & Services > Dashboard)To enable these, if needed, you might find them in the Additional APIs box. If so, click on the API name. This opens it in the marketplace. Then click the Enable button.
If they are not listed there, then search for them in the search box at the top of the page. Or go to API library.
-
Restrict the key to these APIs. Open the Navigation menu, go to APIs & Services > Credentials.
-
Click on the key.
-
Under Key Restrictions, go to the API restrictions tab.
Select the Maps JavaScript API, Places API, and Geocoding API. -
Save.
-
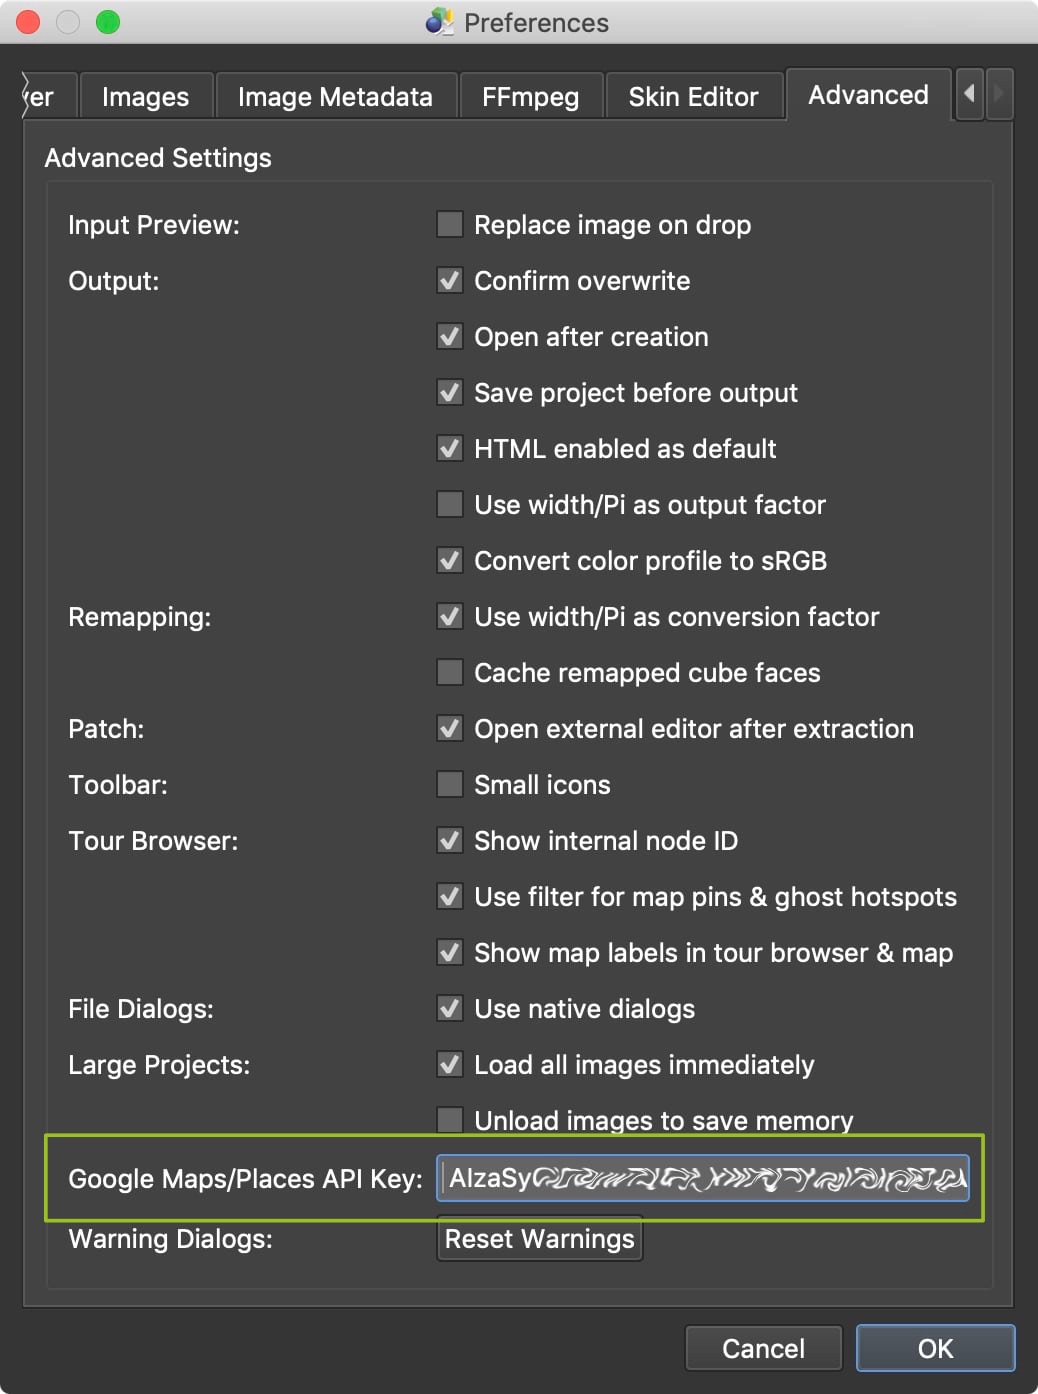
Open the Settings/Preferences in Pano2VR and add your key to the API field under the Advanced tab.
If you’d like to have another key that is restricted to a domain, create a new key and follow the instructions for creating a key for map elements.
Key for Map Element in Skin
These instructions are for a key that will be used in the Map skin element. It’s best practice to have a new key for every project. This way if you need to block a key, not all maps are gone for all projects.
Once you have your key, we recommend restricting the key to a few APIs and a domain.
-
In the Google Cloud Platform, go the project that is associated with the key. You will probably already see a warning by Google.
-
Make sure you have the following API enabled: Maps JavaScript API.
You can find out what you have enabled by going to the API section and see what’s listed in the Enabled APIs box. (APIs & Services > Dashboard)To enable it, if needed, you might find it in the Additional APIs box. If so, click on the API name. This opens it in the marketplace. Then click the Enable button.
If it is not listed there, then search for it in the search box at the top of the page. Or go to API library.
-
Now, we need to restrict the key. Open the Navigation menu, go to APIs & Services > Credentials.
-
Click on the key.
-
Under Key Restrictions, go to the Application restrictions tab.
Select HTTP referrers (web sites) and then enter the domain to lock the key to. -
Go to the API restrictions tab.
Select the Maps JavaScript API. -
Save.
-
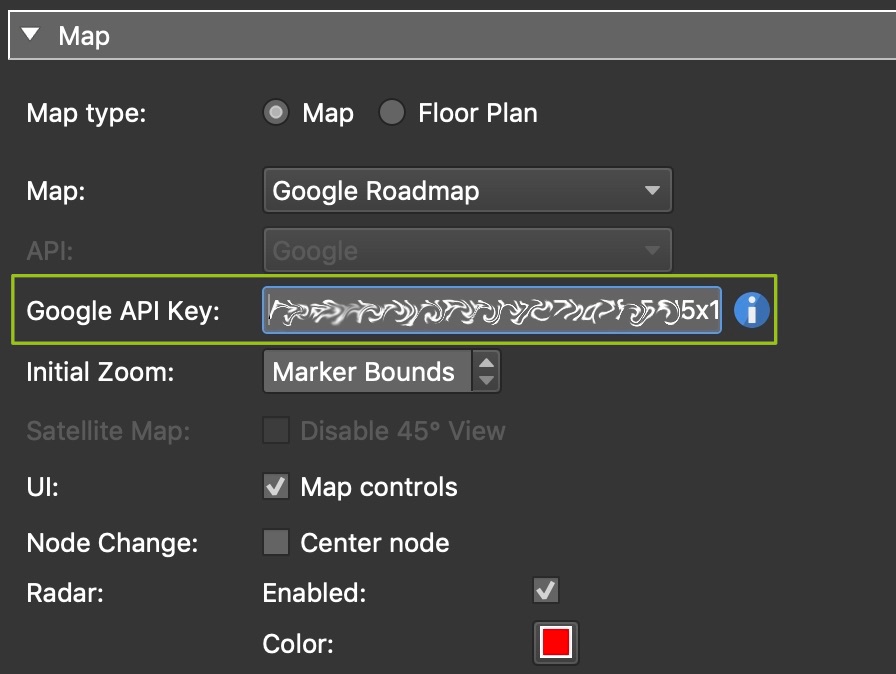
Open Pano2VR and add your key to the API setting in the map element settings.


