Cardboard Viewer Output
Google Cardboard is an affordable HMD (Head Mounted Display) for viewing VR imagery.
★ The project must be hosted on a secure server (HTTPS) in order to use the phone’s gyroscope which is needed for viewing in Cardboard VR.
Monoscopic Images
Single Node Mono Panorama
For Cardboard:
-
Load the panorama.
-
Add the HTML5 output.
-
Add one of the built-in skins:
silhouette_cardboard.ggsk,cardboard.ggsk. -
Expand the HTML panel and select HTML File if not already selected.
-
Choose cardboard.ggt from the Template list in the HTML panel.
-
Generate the output.
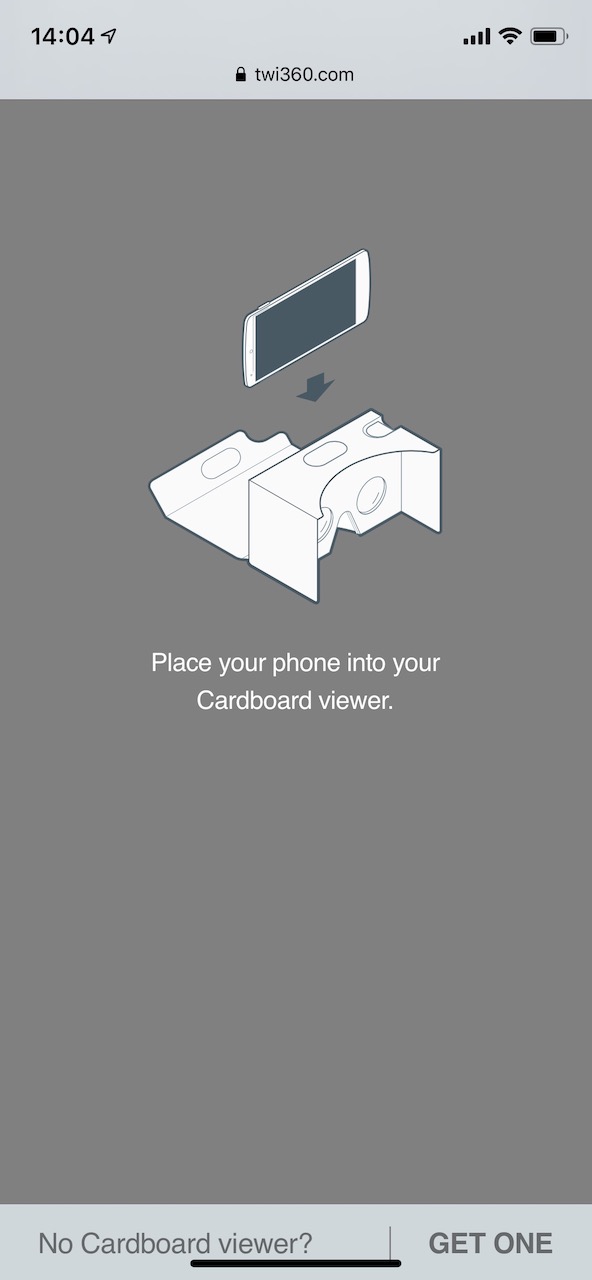
When the project is opened on a mobile phone, the user will be presented with a page instructing the user to place the phone in the Cardboard viewer to get started:
For GearVR:
-
Load the panorama.
-
Open the Transformation output.
-
Choose Horizontal Strip (VR) as the Type.
-
Enter the size (height) of the strip. (1536px)
-
Generate the output.
-
Add the strip to the Oculus app to view in Gear VR.
Multi-Node Mono Panoramas
Pano2VR Pro only
-
Load the panoramas.
-
Link the nodes together using point hotspots.
-
Add the HTML5 output.
-
Choose the
cardboard.ggskskin from the Skins list. -
Expand the HTML panel and select HTML File if not already selected.
-
Choose cardboard.ggt from the Template list.
-
Generate the output.
On output, you will see a small cross in the center of the screen when looking through the HMD. Move your head and point this cross at a hotspot to switch nodes.

Stereoscopic Images
Single Node Stereo Panorama
Pano2VR Pro only
-
Load the left panorama.
-
Load the right panorama.
-
Add the HTML5 output.
-
Expand the HTML panel and select HTML File if not already selected.
-
Choose cardboard.ggt from the template list in the HTML panel.
-
Click the Edit Template button and select Nodes are stereo pairs.
-
Generate the output.
Multi-Node Stereo Panoramas
Pano2VR Pro only
-
Load your images and arrange them in the Tour Browser like so:
Node 1, left image first then right image.
Node 2, left image first then right image.
Node 3, left image first then right image. And so on…
-
Link the nodes together using point hotspots.
You will need to link the left and right nodes separately. This is more easily done by turning on the Grid in the Viewer Settings.
Link, node 1 left to node 2 left. Link node 1 right to node 2 right.
✭ Tip: Shifting the right image’s point hotspot to the left by just over half the width of the point hotspot marker will bring the hotspot image more forward in the stereo output giving a more 3D effect. Caution: Overdoing the effect can make people feel ill.
-
Add the HTML5 output.
-
Choose the
cardboard.ggskskin from the Skins list. -
Expand the HTML panel and select HTML File if not already selected.
-
Choose cardboard.ggt from the Template list.
-
Click the Edit Template button and select, Nodes are stereo pairs.
-
Generate the output.
Switch Between Normal and Cardboard View
To switch between normal and cardboard views within the same node, you will need to add two HTML5 outputs. One will have a normal skin and the other will have a VR skin. Both outputs will share the same output folder. You will also make use of Direct Node Access.
Go here and download the project, cardboard.zip to see it working.
-
Add your image(s) and build your project.
-
Add the node’s ID (node1, node2, etc.) to a User Data field, i.e. Source. This will be accessed by a button that switches between normal and VR views.
✭ The node ID can be found in the context menu for the node in the Tour Browser. If you’re not seeing it, make sure Show internal node ID is selected in Pano2VR’s settings. -
Add an HTML5 output. This will be the normal view.
-
Add a skin.
-
Edit the skin and add a button for switching to VR view.
-
Give it an action: Source = Mouse Click; Action = Go to URL; URL =
vr.html#$(us); Target =_self.
✭vr.html#is the page url and$(us)is the placeholder for the Source field in User Data. -
Save the skin.
-
In the HTML5 output settings, in the HTML pane, make sure the HTML file is using the normal template and that the output file path is
output/index.html. Check the template settings and make sure Direct node access is selected. -
Add a second HTML5 output.
-
Add a cardboard skin for VR (You can use the one in the project linked above).
-
Edit the skin and add a button to switch to normal view. Give it an action: Source = Mouse Click; Action = Go to URL; URL =
index.html#$(us); Target =_self. -
In the HTML5 output settings, in the HTML pane, make sure the HTML file is using the cardboard template. Open the template settings and select, Direct node access.
-
Change the output file path to
output/vr.html(Right-click the path and choose, Edit.) -
Open the Advanced pane and change the skin filename to
vr.js. -
Press the Alt or Option key while clicking the Generate Output button to output both HTML5 outputs.
-
Upload the output folder to a server with the starting page being
index.html.