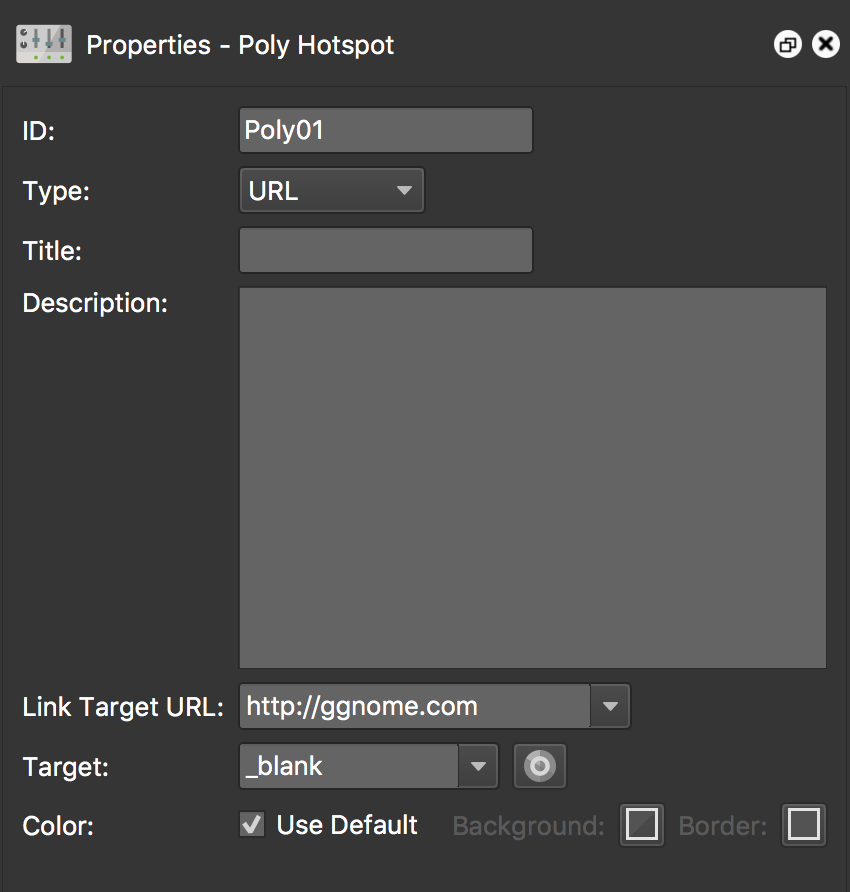
Polygon Hotspot Properties
Here you’ll find the properties for the polygon hotspots.
The hotspot properties are found in the Properties Panel and will appear once a hotspot is added or selected.
ID – The ID of the Hotspot which can be used in the Skin Editor.
Type – Choose what the hotspot will do. What you choose here will affect the Link Target URL below.
-
URL – Enter the website URL or file name of a node (i.e. http://www.example.com).
-
Tour Node – ★ Pano2VR pro only – Choose a node from the menu to link to other nodes in a tour.
Title – Add the title of the hotspot here. This title will be visible (e.g. tooltip) when the mouse pointer hovers over the hotspot.
Description – Enter a description of the hotspot here.
Link Target URL – The options here will depend on the Type chosen. If you’ve chosen,
-
URL – enter the web or path URL to the node.
-
Tour Node Pano2VR Pro – choose a node from the menu. Click the green arrow to open the linked node. Alternatively, drag in a tour node from the Tour Browser on to the polygon hotspot.
Target – Add a target to specify where to open the website (or panorama).
★ Note: If using the Pro version and Tour Node is selected as Type, click the bullseye icon to orient the opening view of the next panorama.
★ Tip: You can also enter the Pan, Tilt, and Field of View information in the Target field. This will override the default view settings in viewing parameters of the target node. Enter the parameters separated by forward slashes (/): 324.0/-3.5/70.0.
Color – Choose the color of the polygon hotspot.
-
Use Default – Select to use the default colors defined in the Hotspots panel in the HTML5 output panel.
-
Background and Border – Click the colors to open a color palette and define new colors.
✭ The color changes are not visible in the Viewer.
