Actions
Actions or a set of directions can be applied to any element added to the skin to create interactivity.
Object Movement
Pan
This action is commonly used on buttons that have an arrow indicating left or right. Applying this action to an interactive button or image will cause the panorama to rotate to the left or right.
Type – Panning is the horizontal rotation, therefore you can only choose from Left or Right directions.
Speed – Adjust how fast or slow the movement will be. The speed is determined by a rate of degrees per frame. For example, entering the number, .40, will have a rate of rotation of four tenths of a degree per frame.
Tilt
This action is commonly used for buttons; especially ones that use an arrow indicating up or down. Applying this action to an interactive button or image will cause the panorama to tilt up or down.
Type – Tilt is the vertical rotation, therefore you can only choose from Up or Down.
Speed – Adjust how fast or slow the movement will be. The speed is determined by a rate of degrees per frame. For example, entering the number, .40, will have a rate of rotation of four tenths of a degree per frame.
Zoom
When this action is applied to an interactive button or image, the panorama will narrow or broaden its field of view respectively.
Type – Choose to zoom In or Out.
Speed – Adjust how fast or slow the movement will be. The speed is determined by a rate of degrees per frame. For example, entering the number, .40, will have a rate of rotation of four tenths of a degree per frame.
Set View State
Use this action to switch between viewstates.
State – Select the state. If you added custom view state labels to the current project (available only for multi-viewstate projects) in the Project Properties, those labels will appear here. If a project with multiple states is not opened, add the state’s number to change to.
Speed – Adjust how fast or slow the movement will be. The speed is determined by a rate of degrees per frame. For example, entering the number, .40, will have a rate of rotation of four tenths of a degree per frame.
Player Settings
Set Viewer Mode
This action sets the Viewer to either rotate or drag modes in Object2VR.
Mode – Choose a mode:
-
Rotate Mode – Change the viewer to rotate mode where the object movie will rotate as the mouse is pressed and dragged. (
1) -
Move Mode – Changes the viewer to drag mode where the user clicks and drags to move the object movie. This is useful for when the object is zoomed in. (Expert:
0) -
Toggle Modes – This will toggle between the two modes. (
2)
Set Polygon Mode
Use this action to have an element in the skin change how polygon hotspots appear.
For Show One, Hide One, and Toggle One you will need to enter the hotspot’s ID to target it.
Mode – Select a Polygon Hotspot Mode:
-
Always Hidden (Expert:
0) – Polygons are not visible but still active -
Always Visible (
1) -
Show Current (on hover) (
2) -
Show All (on hover) (
3) -
Disabled (
-1) – Disables all polygon hotspots -
Show One (
4) – Shows and activates a polygon hotspot ID. Start polygon hotspots Always Hidden. -
Hide One (
5) – Hides and disables a polygon hotspot ID. Start polygon hotspots Always Hidden. -
Toggle One (
6) – Toggles the visibility of a polygon hotspot ID. Start polygon hotspots Always Hidden.
#Poly0[2-4]. Learn more about regular expressions.Set Polygon Color
Use this action to change the background and border color of a single polygon hotspot. Be sure to enter the hotspot’s ID to activate the setting.
#Poly0[2-4]. Learn more about regular expressions.Set Language
Language – To change to a translation, select the language and the region (or leave this second menu at <Main>.). Alternatively, you can add the language code manually by double-clicking the language code.
Change Margin
Change the skin’s margins.
From Edge – Choose the edge to change.
Margin – Add the margin size in Pixels or Percentage.
Transition – Determine the amount of time it takes for the change to occur.
Easing Function – Choose how the transition behaves by selecting an easing option. Depending on the option, the change will accelerate or decelerate during the movement. Ease in, for example, will start slowly then accelerate. See the options in action:
Delay – Create a delay for the transition.
Full screen
Type – Choose from the following Fullscreen actions:
-
Enter Fullscreen
-
Exit Fullscreen
-
Toggle Fullscreen – Action will toggle between the Enter and Exit types.
Auto Rotate
Auto rotation is enabled in the Web Output Properties.
✭ Once Auto Rotate is activated and after no mouse activity for 3 seconds, the cursor will hide. It will reappear when the mouse moves again.
Choose from the following Auto Rotate actions:
Start Auto Rotate
This action will start to rotate the object.
Speed – The speed is determined by a rate of degrees per frame. Entering the number, .40, will create a rotation at a rate of four tenths of a degree per frame. A negative number will rotate it counterclockwise while a positive number will rotate clockwise.
Delay – The time it takes for the object to begin to rotate (in seconds) again after it has been manually moved by the user.
Return to Horizon – Brings the object’s center perspective (horizon) back into view after it has been manually tilted upwards or downwards. A value of 0 will equate to no return and an increase in the value will return the image to the horizon at a quicker speed.
Expert Mode – Here, you can enter Speed, Delay, and Return to Horizon in the Speed field. For example: 0.4/5/0.4.
Stop Auto Rotate
Use this action to stop autorotation.
Toggle Auto Rotate
Select this action to toggle between Start Auto Rotate and Stop Auto Rotate.
Pause Auto Rotate
This action will pause the auto rotation without disabling auto rotation.
Resume Auto Rotate
If auto rotation has been paused, this action will resume the auto rotation.
View
Apply these actions to a skin element to move the object to a specified point or view.
Default View
This action will jump to the default view.
Move to Default View
This action will cause the object to move back to the default view. You can specify the speed of this movement.
Speed – The speed is determined by a rate of degrees per frame. For example: Entering, .40, will cause the panorama to move at a rate of four tenths of a degree per frame.
Easing Function – Choose the interpolation between views.
-
Ease Out – This will ease out (slow down) the movement as it gets closer to the default view. (Expert:
0) -
Ease In Out – Ease in/Ease out in which the movement back to default view will accelerate at the start and then slow down at the end of the movement. (
1) -
Ease Out Back – This movement is similar to Ease Out except that at the end of the movement, it moves slightly beyond the default view and then returns to the default view. (
2) -
Linear – The movement will be at a constant speed from beginning to end. (
3)
Expert Mode – Select to manually add the Speed and Easing Function.
Set View
This action will jump to the specified view:
Column – Set the column.
Row – Set the row.
Zoom – Set the zoom in percent.
Expert Mode – Select to enter the exact location of the view using the Column, Row, and Zoom parameters. Enter the parameters separated by forward slashes (/): 4/0/100.
Move to View
This action will cause the panorama to move to the specified view. You can set the speed of this movement and the easing function.
Set Column / Row
Set the view to a specific column, row, and zoom level.
Column – Set the column.
Row – Set the row.
Zoom – Set the zoom in percent.
Expert Mode – Select to enter the exact location of the view using the Column, Row, and Zoom parameters. Enter the parameters separated by forward slashes (/): 4/0/100. Add the Speed as well.
Set Zoom
Set the zoom level.
Go To URL
When an element is given this action, interaction with the element will send the user to a specified URL. It is generally good practice to use this action for opening HTML files or web links.
URL – Enter the path of the web page or HTML file. You can also enter a placeholder here. For example, $(hu) will call the URL used in the URL field of the Hotspot. Use the Edit button (to the right of the URL field) to open a larger text field to allow easier editing of the URL.
Target – Add a target to specify where to open the website. You can also use placeholders here. For example, you could use $(ht) which will use the target specified in the Link Target URL field of the hotspot.
Position/Size
Position actions will move the target element’s position within the skin. Choose from the following Position action types:
Set Element Position
This action will jump the targeted element to the defined position.
-
Offset X/Y – Enter how many pixels the element should move along the X and Y axes.
-
Target – Select the targeted element.
-
Expert Mode – Select to enter the Offset X/Y using a forward slash:
10/5.
Change Element Position
When this action is applied, it will cause the targeted element to visibly move from its current position to the position defined in the Offset X and Y fields.
-
Offset X/Y – Enter how many pixels the element should move along the X and Y axes. Negative values can be used.
-
Transition Duration – Set the time it takes for the element to change position. The default is 1 second.
-
Easing Function – Choose the easing of the transition. See the easing functions.
-
Delay – Set a delay in seconds for the transition.
-
Target – Select the targeted element.
-
Expert Mode – Select to enter the Offset X/Y using a forward slash:
10/5.
Toggle Element Position
Toggles the element from its current position to the specified location (and back).
-
Offset X/Y – Enter the number of pixels the element should move along the X and Y axes. Negative values can be used.
-
Transition Duration – Set the time it takes for the element to change position. The default is 1 second.
-
Easing Function – Choose the easing of the transition. See the easing functions.
-
Delay – Set a delay in seconds for the transition.
-
Target – Select the targeted element.
-
Expert Mode – Select to enter the Offset X/Y using a forward slash:
10/5.
Easing Function Options
Click the options below to see the effect of easing. Use Control All to move all at the same time.
Set Relative Position
Use this action to change an element’s position to a set amount with each button click. With each click the relative position is changed.
-
Offset X/Y – Enter the amount of pixels the element should move along the X and Y axes.
-
Limit – Select, Use Limits, to enable. Enter the total pixels the element should move. Useful for navigating flat images, image galleries and manually created thumbnail scrollers.
For example, if the Offset is set to 10px for X and the Limit to 100px for X, the element will move 10 pixels to the right at every mouse click (or any other source), until it has moved the length of 100 pixels. Likewise, a setting of -10px for the X offset and 0 for the X limit, it will move the element to the left until it reaches the limit of 0
-
Target – Select the targeted element.
-
Expert Mode – Select to enter the Offset X/Y using a forward slash:
10/5.
Change Relative Position
This action functions the same way as Set Relative Position except that the change along the path will be visible (as opposed to jumping to the position).
-
Offset X/Y – Enter the number of pixels the element should move along the X and Y axes. Negative values can be used.
-
Limit – Select, Use Limits, to enable. Enter the total pixels the element should move. Useful for navigating flat images, image galleries and manually created thumbnail scrollers.
For example, if the Offset is set to 10px for X and the Limit to 100px for X, the element will move 10 pixels to the right at every mouse click (or any other source) until it has moved the length of 100 pixels. Likewise, a setting of -10px for the X offset and 0 for the X limit will move the element to the left until it reaches the limit of 0.
-
Transition Time – Set the time it takes for the element to change position. The default is 1 second.
-
Target – Select the targeted element.
-
Expert Mode – Select to enter the Offset X/Y using a forward slash:
10/5.
Set Z-Index
The z-index sets elements’ stacking orders. Here, you can change an element’s stacking order with this action. Setting this a positive number (1), will move the element above others while a negative number (-1) will move the element under or below the other elements.
Scroll Into View
Use this to scroll elements into view that are inside a Scroll Area but are out of view.
Scroll By
Set the x and y offset to scroll the content of a Scroll Area. The target must be a scroll area.
Set Element Size
Size – Enter the desired element size in pixels. The change will be abrupt; immediately changing from one size to the next.
★ Set the size using variables as values. Select Expert Mode. Enter the variables for X/Y: $(var_width)/$(var_height).
Change Element Size
Size – Enter the desired element size in pixels. The change will be smooth and visible until the element reaches the indicated size.
Transition Time – Set the length of the transition from the previous size to the new size.
★ Set the size using variables as values. Select Expert Mode. Enter the variables for X/Y: $(var_width)/$(var_height).
Angle
Set Element Angle
This action will rotate the targeted element. The change will be jumpy.
Angle – Set the angle.
Target – Choose which element will be affected by the action.
Expert Mode – Select to enter the angle as a float value.
Change Element Angle
This action will rotate the targeted element. The change will be smooth.
Angle – Set the angle. Negative values can be used. If you’d like spin 30º to the left, use -30.
Transition Time – Define the time it takes to transition from the starting angle to the angle defined.
Target – Choose which element will be affected by the action.
Expert Mode – Select to enter the angle as a float value.
Toggle Element Angle
Use this action to toggle or switch between default and specified angles.
Angle – Set the angle. Negative values can be used. If you’d like spin 90º to the left, use -90.
Transition Time – Define the time it takes to transition from the starting angle to the angle defined.
Target – Choose which element will be affected by the action.
Expert Mode – Select to enter the angle as a float value.
Visibility
Choose from the following Visibility action types:
-
Show Element – This action will show the targeted element.
-
Hide Element – This action will hide the targeted element.
-
Toggle Element Visibility – This action will toggle between the Show and Hide Element actions.
-
Add Element – Use this action to add an element to a parent element. This is especially useful for adding an element to a cloner that is set to Auto Size or a Scroll Area. The Scroll Area does not auto size, so if an element is added, it’ll need to be removed before adding a different element. See: Cloner Element and Scroll Area
-
Remove Element – Use this action to remove an element from its parent. This is especially useful for removing an element from a cloner that is set to Auto Size which will then resize the cloner. The same applies to the Scroll Area. Remove the element to reset the scroll area to the new content. See: Cloner Element and Scroll Area
Target – Choose which element will be affected by the action.
Alpha
Set Element Alpha
This action will adjust the opacity of the targeted element to the parameter set in the Alpha field.
Alpha – Enter the amount of opacity for the element. Alpha is based on percentage values. The float value, 1, represents 100%, .50 represents 50%, etc. Select Expert Mode to enter a more specific value.
Target – Choose which element will be affected by the action.
Change Element Alpha
The element’s alpha channel will gradually change from the alpha set in the element’s settings tab to the parameter applied in the Alpha field.
Alpha – Enter the amount of opacity for the element. Alpha is based on percentage values. The float value, 1, represents 100%, .50 represents 50%, etc. Select Expert Mode to enter a more specific value.
Transition Time – Define the time it takes to transition from the default setting to the setting defined here.
Target – Choose which element will be affected by the action.
Toggle Element Alpha
Toggle between opacity parameters. The parameter set in the Alpha field will be applied on the first interaction, then back to its default state (set in the settings tab) on the second interaction.
Alpha – Enter the amount of opacity for the element. Alpha is based on percentage values. The float value, 1, represents 100%, .50 represents 50%, etc. Select Expert Mode to enter a more specific value.
Transition Time – Define the time it takes to transition from the default setting to the setting defined here.
Target – Choose which element will be affected by the action.
Scale
Set Element Scale
The element will be scaled up or down depending on the parameter set in the Scale X/Y fields. The scaling will not be animated.
Scale X/Y – Enter the scale parameters here. Scale is based on percentage values.
- Link X and Y Scale – Select to maintain aspect ratio.
Target – Choose which element will be affected by the action.
Expert Mode – Enter the scaling for X and Y as float values. The float value 1, represents 100%, .50 represents 50%. For example: .5/.25 will scale the element’s x-axis down 50% and its y-axis to 25%.
Change Element Scale
The element will be changed to the scale parameters set in the Scale X/Y fields. The scaling will be visible (animated).
Scale X/Y – Enter the scale parameters here. Scale is based on percentage values.
- Link X and Y Scale – Select to maintain aspect ratio.
Transition Time – Define the time it takes to transition from the default setting to the setting defined here.
Target – Choose which element will be affected by the action.
Expert Mode – Enter the scaling for X and Y as float values. The float value 1, represents 100%, .50 represents 50%. For example: .5/.25 will scale the element’s x-axis down 50% and its y-axis to 25%.
Toggle Element Scale
The element will change to the specified scale parameters on the initial action, then scale back to its default parameters set in the settings tab.
Scale X/Y – Enter the scale parameters here. Scale is based on percentage values.
- Link X and Y Scale – Select to maintain aspect ratio.
Transition Time – Define the time it takes to transition from the default setting to the setting defined here.
Target – Choose which element will be affected by the action.
Expert Mode – Enter the scaling for X and Y as float values. The float value 1, represents 100%, .50 represents 50%. For example: .5/.25 will scale the element’s x-axis down 50% and its y-axis to 25%.
Trigger Click
Use the Trigger Click action to prompt a mouse click action (without an actual mouse click).
Target – Choose which element will be affected by the action.
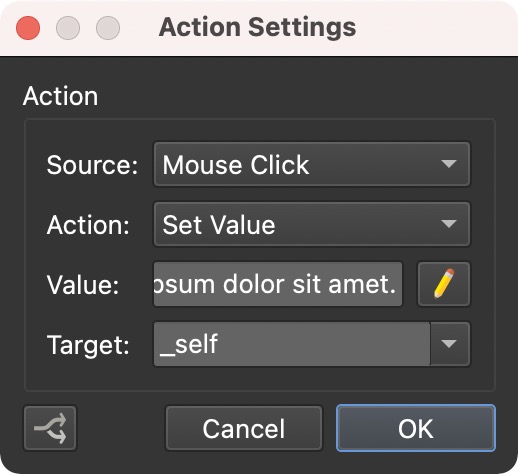
Set Value
The Set Value action allows you to dynamically change elements.
It can be used for example, to dynamically set file paths for the external image loader to display different content.
For example: Value = pictures/image01.jpg and Target = external 01.
If you are outputting a web project, you can use this action to display framed content (video, objects, panoramas), using a text field.
Value – Enter the Value to be set. Use the Edit button (to the right of the Value field) to open a larger text field to allow easier editing of the value. The value can be tags, skin elements, and placeholders.
Target – Choose which element will be targeted by the action.
Parameter – Some elements/targets can have multiple values set. For those, you’ll have an option to choose which parameter to use to set the value.
Text Box
Use the Set Value action to dynamically change the text in a Text Box. This could be body text, HTML to display an iFrame, or Javascript for more advanced applications.
When this action is applied to text box, the text changes to whatever is entered as the value:
Source = Mouse Click; Action = Set Value; Value = Add text, iframe, javascript here; Target: Text 1
Cloner
Dynamically change the content in a cloner based on the cloner source. For example, if the cloner is set for showing info-type hotspots, you could change it to show only PDF-type hotspots.
Value – add the hotspot skin ID.
Target – Add the target element.
Source = Mouse Click; Action = Set Value; Value = ht_pdf; Target = Cloner
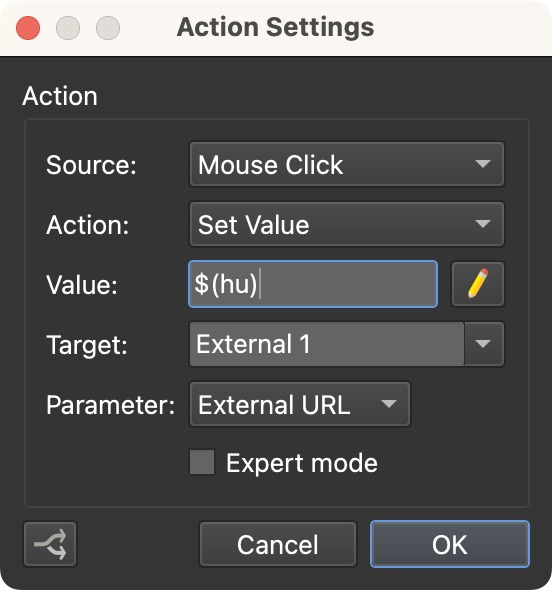
External Image
Dynamically change the external image’s (or other media) location (URL).
For example, you may have a hotspot template for a pop-up image. To dynamically change the image that is shown you can use the placeholder, $(hu) or $(r)$(hu) for use in WordPress sites. Leave the External Image’s setting, External URL blank.
Source = Mouse Click; Action = Set Value; Value = $(hu); Target: External Image; Parameter = External URL
You can also set the external image’s Alternative Text.
Source = Mouse Click; Action = Set Value; Value = $(ut); Target: External Image; Parameter: Alternative Text
Video Element
Just like the External Image Loader, you can use the Set Value action to change out videos in the Video Element. However, you cannot change the type of video (file, YouTube, Vimeo, URL).
To change the video of a YouTube type:
Source = Mouse Click; Action = Set Value; Value = aCaokpNrSx4; Target = Video 1
★ Note that you only need the YouTube ID, not the entire URL. The same goes for Vimeo videos.

Timer Element
The Set Value action can be used to manually set the Timer Element to activate or deactivate skin elements. This is useful for delaying skin actions. Change the Timer’s Type to Manual.
For example, a button could be used to resize an element and then after a delay, position the element. When the button is clicked, the timer is activated and the element is scaled. At the same time, the timer is set to a delay. When the timer is deactivated, the element’s position will change.
Give the Timer the following actions:
-
Source = Activate; Action = Scale; Type = Change Element Scale; Scale = enter new scaling; Target = the element to scale
-
Source = Deactivate; Action = Position/Size; Type = Change Element Position; Offset = enter new position; Transition = 1.000s; Target = the element to change position
Then give the button this action:
- Source = Mouse Click; Action = Set Value; Value = number of seconds for delay; Target = Timer 1
Seekbar Element
A single Seekbar can be used to control multiple media files using the Set Value action. For example, a Play Media button would have the following actions:
- Source = Mouse Click; Action = Set Value; Value = the ID of the element to be controlled; Target: Seekbar 1
★ _main cannot be controlled with the Set Value action.

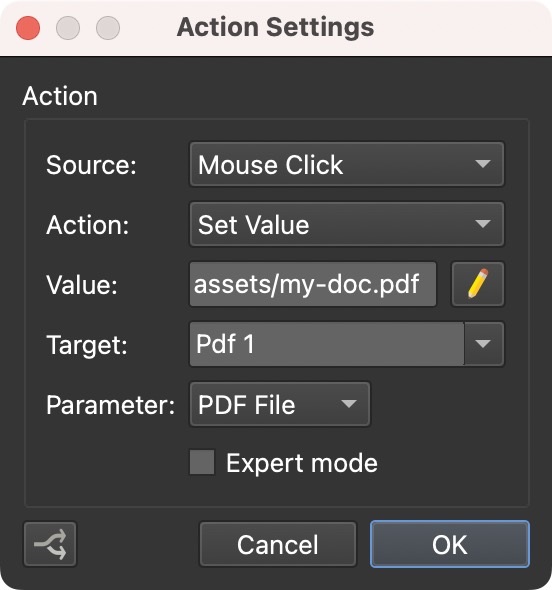
PDF Element
If you’d like to show multiple PDF files using one PDF element, you can use the Set Value action to swap out the files. PDF files can be added to the Assets. Apply the following example to a button or other element:
- Source = Mouse Click; Action = Set Value; Value = the file of the PDF; Target: Pdf 1; Parameter: PDF file
You can also change the page that the PDF opens to by changing the Parameter:
- Source = Mouse Click; Action = Set Value; Value = page number; Target: Pdf 1; Parameter: Start Page
Media
Play Media
An action to playback the audio and video.
Loop – Set the amount of times the media should play back.
0= play back a continuous loop1= single playback- 1= requires an action to startn= play back n times
Target – Choose the media element that should be targeted. Any media files added to the skin or to the Viewer, will also appear in this list.
- background – Targets background audio.
Pause Media
This action will pause the targeted media.
Target – Choose the media element that should be targeted. Any media files added to the skin or to the Viewer, will also appear in this list.
-
main – Targets all media added to the project and the skin.
-
background – Targets background audio.
Stop Media
This action will stop the targeted media. Any media files added to the skin or to the Viewer, will also appear in this list.
Target – Choose the media element that should be targeted:
-
main – Targets all media added to the project and the skin.
-
background – Targets background audio.
Play/Pause Media
Use this action on a button to toggle between playing the targeted media or pausing it. Any media files added to the skin or to the Viewer, will also appear in this list.
Loop – Set the amount of times the media should play back.
0= play back a continuous loop1= single playback- 1= requires an action to startn= play back n times
Target – Choose the media element that should be targeted. Any media files added to the skin or to the Viewer, will also appear in this list.
- background – Targets background audio.
Play/Stop Media
This action will toggle between playing the targeted media or stopping it. When playing after stopping, the media will return to its starting position.
Loop – Set the amount of times the media should play back.
0= play back a continuous loop1= single playback- 1= requires an action to startn= play back n times
Target – Choose the media element that should be targeted. Any media files added to the skin or to the Viewer, will also appear in this list.
- background – Targets background audio.
Seek Media
Use this action to skip forward or backward in a media file by a given amount of time.
Time Difference – Set how many seconds the media should seek. Use a negative value to jump backwards.
Target – Choose the media element that should be targeted. Any media files added to the skin or to the Viewer, will also appear in this list.
- background – Targets background audio.
Activate Media
Activate image and video pinned media elements added to the project (in the Viewer). If you add this to a button, it will pop out the media and play it (video and audio).
Mode – Select an activation mode:
-
Activate
-
Deactivate
-
Toggle
Target – Choose the media element that should be targeted. Any media files added to the skin or to the Viewer, will also appear in this list.
- background – Targets background audio.
Visibility Media
Use this action to set the visibility of pinned images, videos, and web elements.
Mode – Select a visibility mode:
-
Show
-
Hide
-
Toggle
Transition Time – Set the amount of time it takes to change the visibility of the pinned media.
Target – Choose the pinned media’s ID from the target list.
Set Media Speed
Use this action to set a media element’s speed. Note that YouTube videos can only have a setting of 0.25, 0.5, 1, 1.5, and 2. Vimeo videos can only have settings of 0.5, 1, 1.25, 1.5 and 2. Also, for Vimeo, the video’s owner must enable speed control for that video.
Speed – Set the playback speed. Target – Choose (or enter) the target media’s ID.
-1 and use the Play Media action.Start Autoplay Media
This action will initiate the playback of a media file that should start when the project/panorama opens. Use this action in a button or information text (like a splash screen) to start any sounds that should auto-play. This is especially useful for touch devices as it removes the need to rely on “on touch” activation of a project.
Volume
★ Note that not all browsers will play the volume at the same loudness level. For example, if the level is set to 30% it may sound louder or softer across browsers.
Set Volume
Apply this action to a button to set the volume of the media to a specified level. It will jump from it’s current level to the level set. This is often used for mute buttons.
Level – Set the volume. The maximum loudness is 100% or 1.00 in Expert Mode.
Target – Choose the media element that should be targeted:
-
main – Targets all media added to the project and the skin.
-
background – Targets background audio.
- ID – Targets the media item with the given ID.
Change Volume
Apply this action to a button to change the volume level.
Level – Set the volume. The maximum loudness is 100% or 1.00 in Expert Mode. Set the amount of change that should happen. For example, if the sounds is playing at 100% (maximum loudness), and you want to lower the volume by half, then use -50%. If the sound is currently playing at 80% and you want the volume to change to 100%, use 20%.
Target – Choose the media element that should be targeted:
-
main – Targets all media added to the project and the skin.
-
background – Targets background audio.
- ID – Targets the media item with the given ID.
Mute, Unmute, Toggle Mute
Mute lowers the sound to an inaudible level. Unmute will return the sound to its default level. Toggle Mute will toggle between mute and unmute. Choose which target should be muted:
-
main – Affects all media added to the project and the skin that is connected to the current node. This will stop or pause the sounds.
-
background – Targets background audio. Background audio is applied in the panorama properties.
- all – Targets all sounds in the project and skin but will keep sound muted during a node changed. This target will also pause sounds. For example, if you press a mute button for a narration on a node, and later unmute it, the narration will begin where it left off.
Set Variable Value
Use this action to set a Variable that has been defined in the skin properties.
Variable Name – Choose the variable to set. This list will be populated with the variables listed in the skin’s properties.
Operation – Choose the operation you want to apply to the variable. The available operations will depend on the variable type.
-
Set(=) (Expert:
0) -
Add(+) (
1) -
Sub(-) (
2) -
Mul(*) (
3) -
Div(/) (
4) -
Mod(%) (
5) -
Min(∧) (
7) -
Max(∨) (
6)
Value – Set a value for the operation. Only values that suit the variable type are possible.
Expert Mode – Use this to use numerical values for the operation type.
Learn how variables are used in the skin editor.