Object2VR Settings
Customize Object2VR's settings by changing the language, the theme, folder name defaults, and more.
Access Object2VR’s settings from the Menubar. Choose File > Settings on Windows and Object2VR > Preferences on macOS.
General
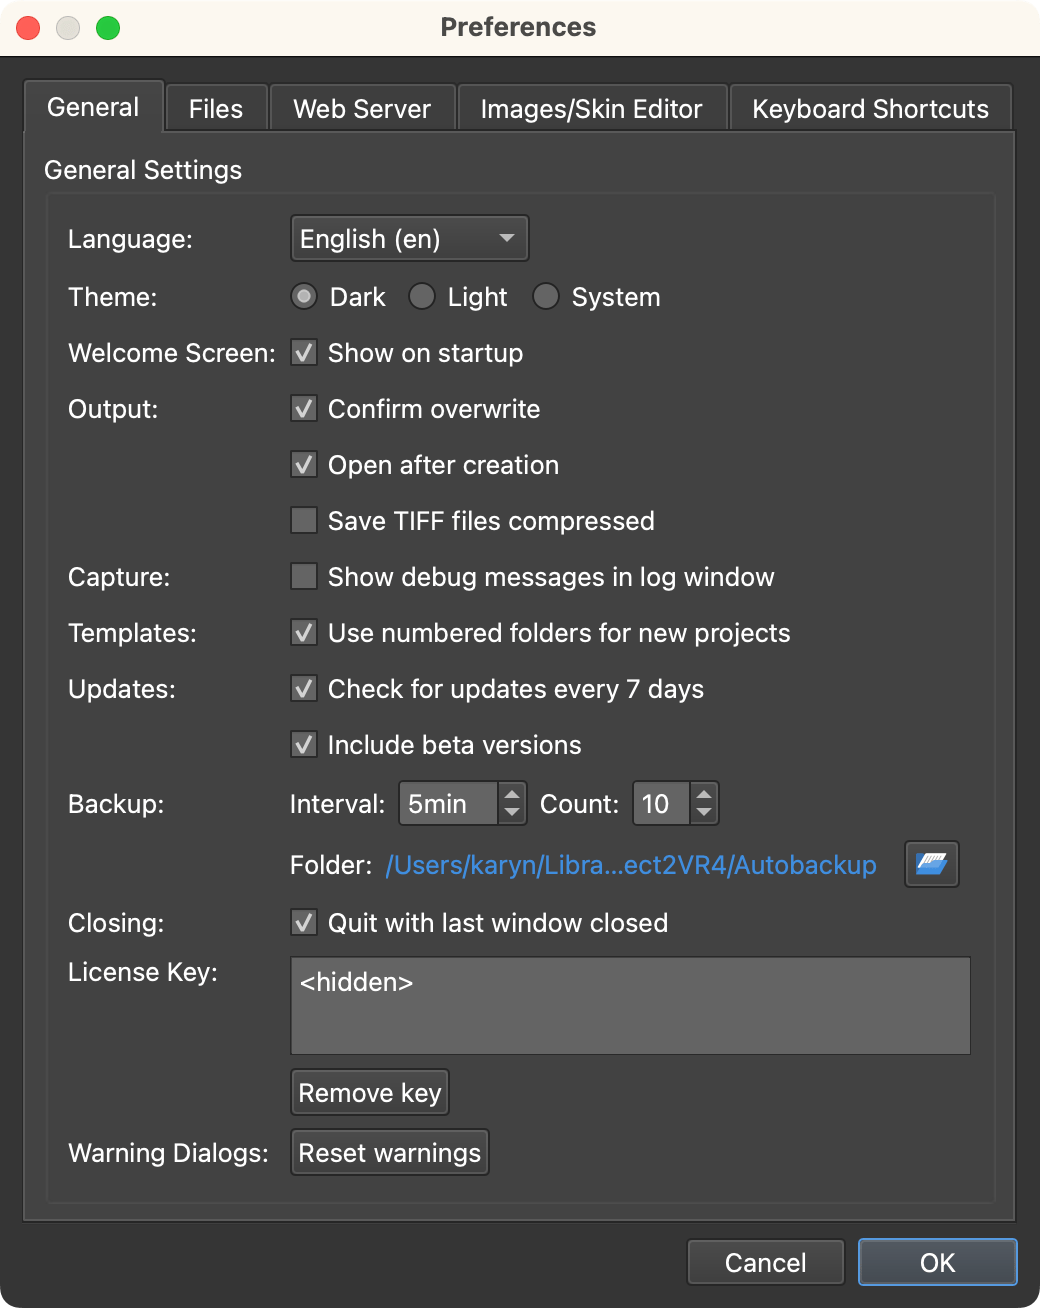
Language
Choose from the following languages:
- System Default
- English
- German
Theme
Select a dark or light interface theme or use your system’s theme. Restart Object2VR to see the change.
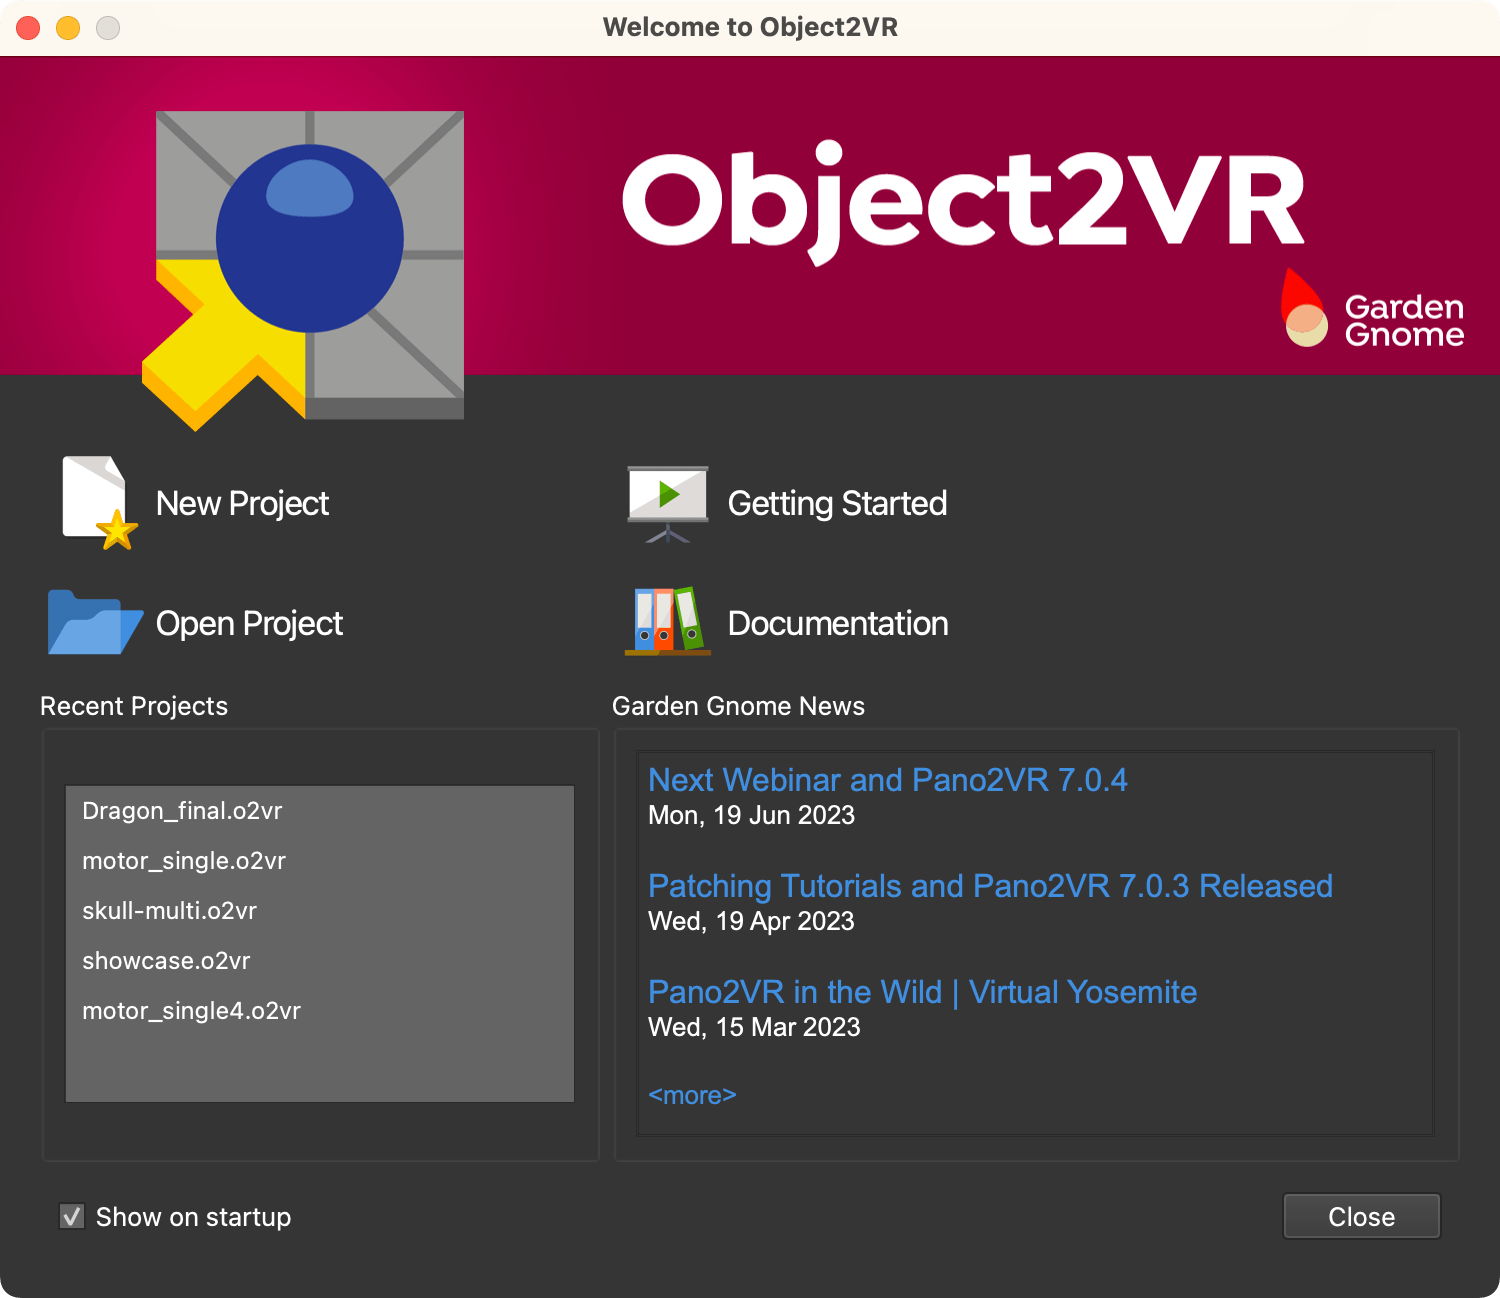
Welcome Screen
The welcome screen appears on startup by default and includes links to the documentation, the latest news and recent projects.
Show on startup – Deselect to not show the Welcome Screen on startup.
Output
Confirm overwrite – Choose this to have Object2VR confirm the overwriting of a previously saved file before saving. This option is selected by default.
Open after creation – Keep selected to have the project opened after creation.
Save TIFF files compressed – Choose this if you want TIFF files to be compressed on output.
Updates
Check for updates every 7 days – If selected, Object2VR will automatically check for software updates every 7 days. If an update is available, a dialog will alert you to download and install.
Include beta versions – Select to include beta versions when checking for software updates.
Backup
Object2VR automatically backs up your project files. To turn auto back up off, set the Interval to 0.
Interval – Set how often Object2VR creates a backup.
Count – Set how many backup instances should be saved.
Folder – This is the location of the backup folder. Click the folder icon to choose a new location. Right-click the file path to edit the path or to Open in Explorer/Show in Finder.
Closing (macOS only)
Quit with last window closed – Closing the last open project window will quit the program. This option is enabled by default.
Capture
Object2VR Studio
Show debug messages in log window – Debug messages are useful bits of information that can help identify problems that might occur during capture. Select to see these messages in the Capture Log window. You can find it in the Window menu of Object2VR.
Templates
Use numbered folders for new projects – Select to have Object2VR create numbered folders for each new project when using New Project from Template.
License Key
Add your license key here. When the license is added, <hidden> will be seen in the box. To remove the key, click the Remove key button. To add a new key (e.g when upgrading), remove <hidden> and paste the new key.
Warning Dialogs
Click Reset warnings to reset all warning dialogs so they are again displayed if selected to not pop-up again.
Files
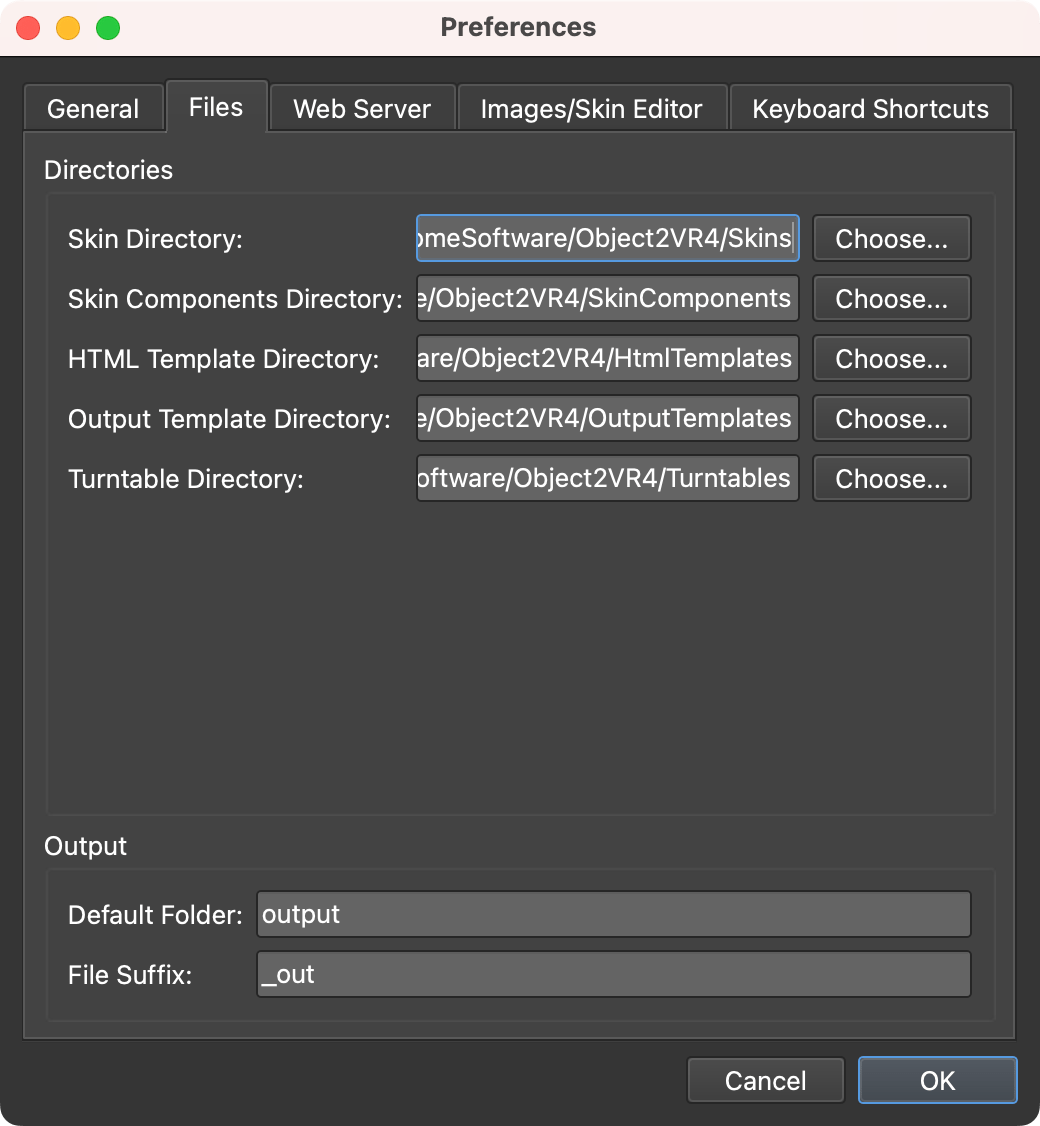
Directories
This section provides directory information. Click Choose to change where the following files should be stored. Right-click in the file path to open the folder in Finder or Explorer.
- Skin Directory – Skin directory location.
- Skin Component Directory – Default location of skin components.
- HTML Template Directory – HTML templates location.
- Output Template Directory – The location for output templates.
- Turntable Directory – Found in Object2VR Studio. This is the location for turntable specific files.
Output
- Default Folder – Object2VR places all the output files into one folder for better access and organization. The default name of the folder is
output, and this can be changed here. If left blank, no output folder will be created. - File Suffix – This option allows you to choose the suffix of the file name of your outputted files. The default is set to
_out, but this can be changed to anything you prefer.
Web Server
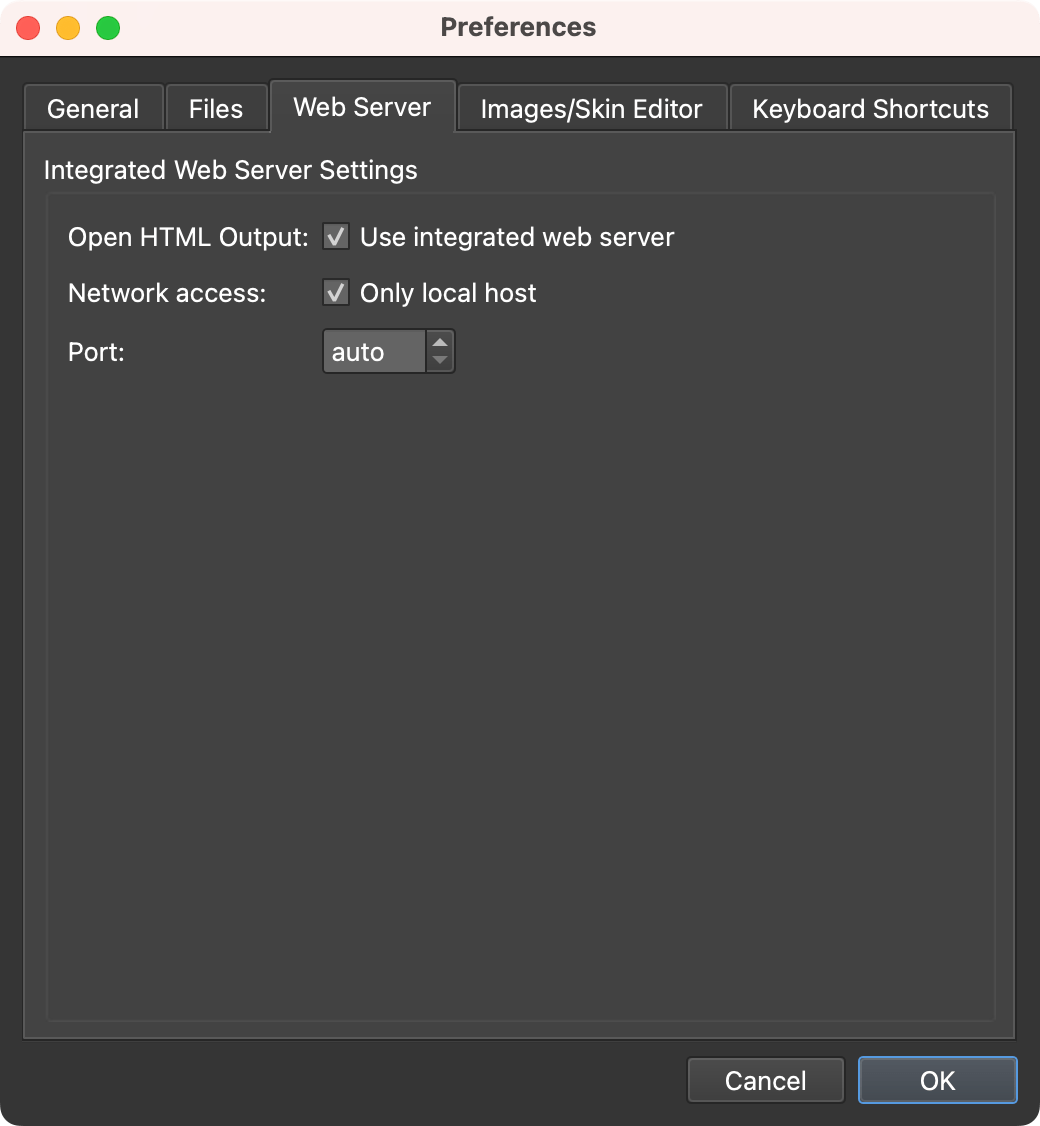
Object2VR has an Integrated Web Server that allows for local viewing of the project.
Open HTML Output
- Use integrated web server – When selected, and Open after creation is selected in the Output section, the integrated web server will open automatically displaying the HTML output. This option is enabled by default.
Network Access
- Only local host – Keep this selected to ensure that the web server is using the current local host. When not selected other devices and machines connected to the same network can also view the output. This option is enabled by default.
Application Launch
- Open server on startup – Select this to have the web server open and running when Object2VR opens.
Port
- Choose your desired port or leave it at auto. The server will use a new port number every time it is restarted or the program is opened. A fixed port number can also be used making it possible to bookmark the page. We suggest using ports 8000 or 8080. For more information on port numbers please see – List of TCP and UDP port numbers.
Images – Skin Editor
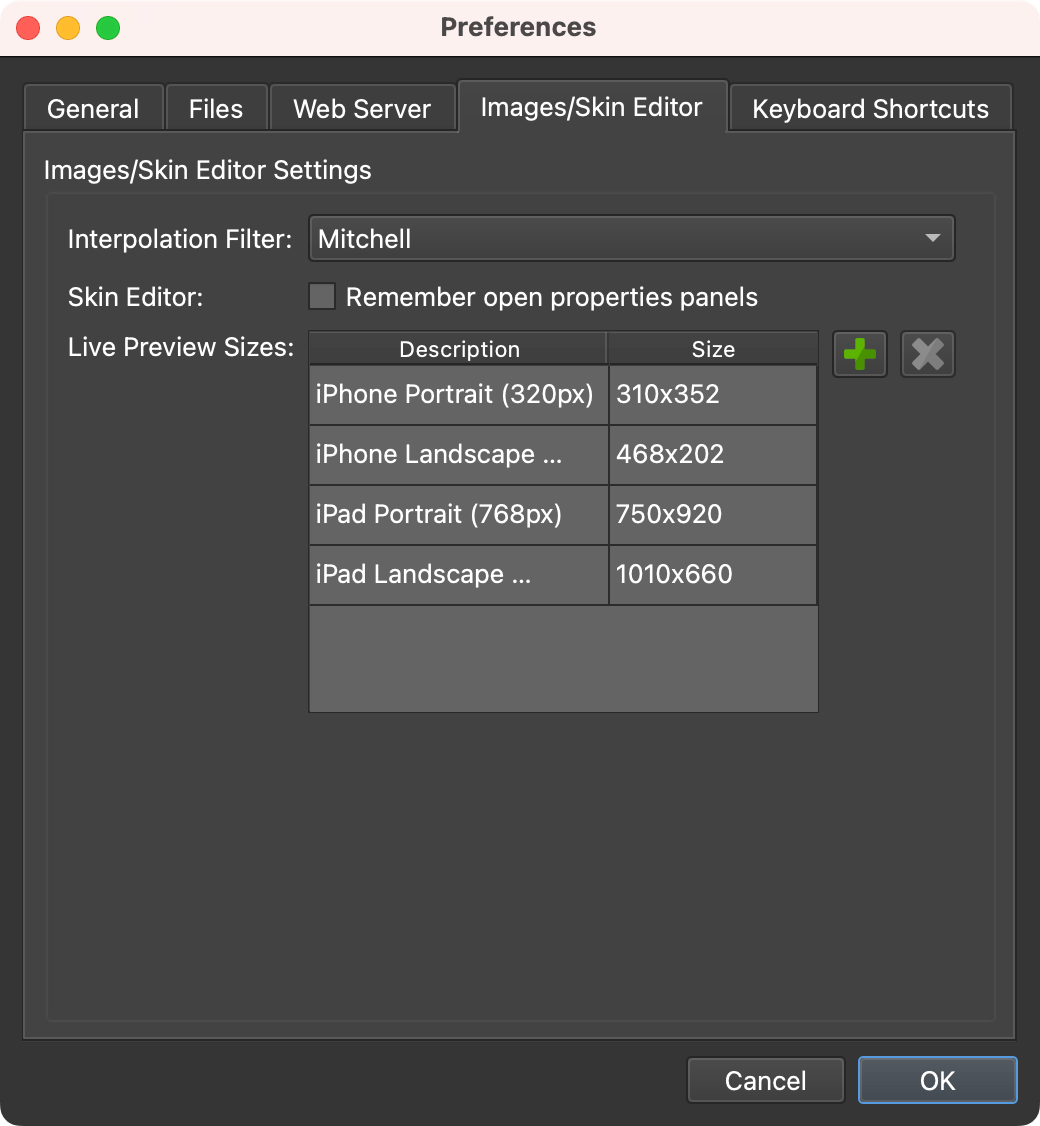
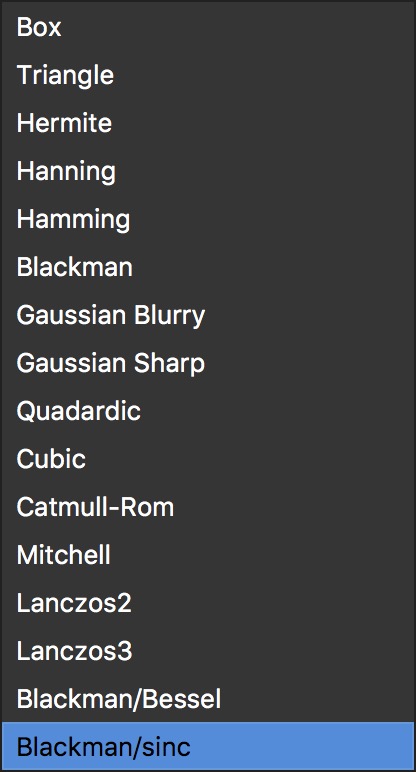
Interpolation Filter
- Select the filter that is used for remapping operations. The different filters can sharpen or blur the image. Mitchell is selected by default.
Skin Editor
-
Remember open properties panels – When opening the skin editor, the opened properties panels during the last session will be remembered and opened.
-
Live Preview Sizes – Here you can define window sizes for the Live Preview.
Keyboard Shortcuts
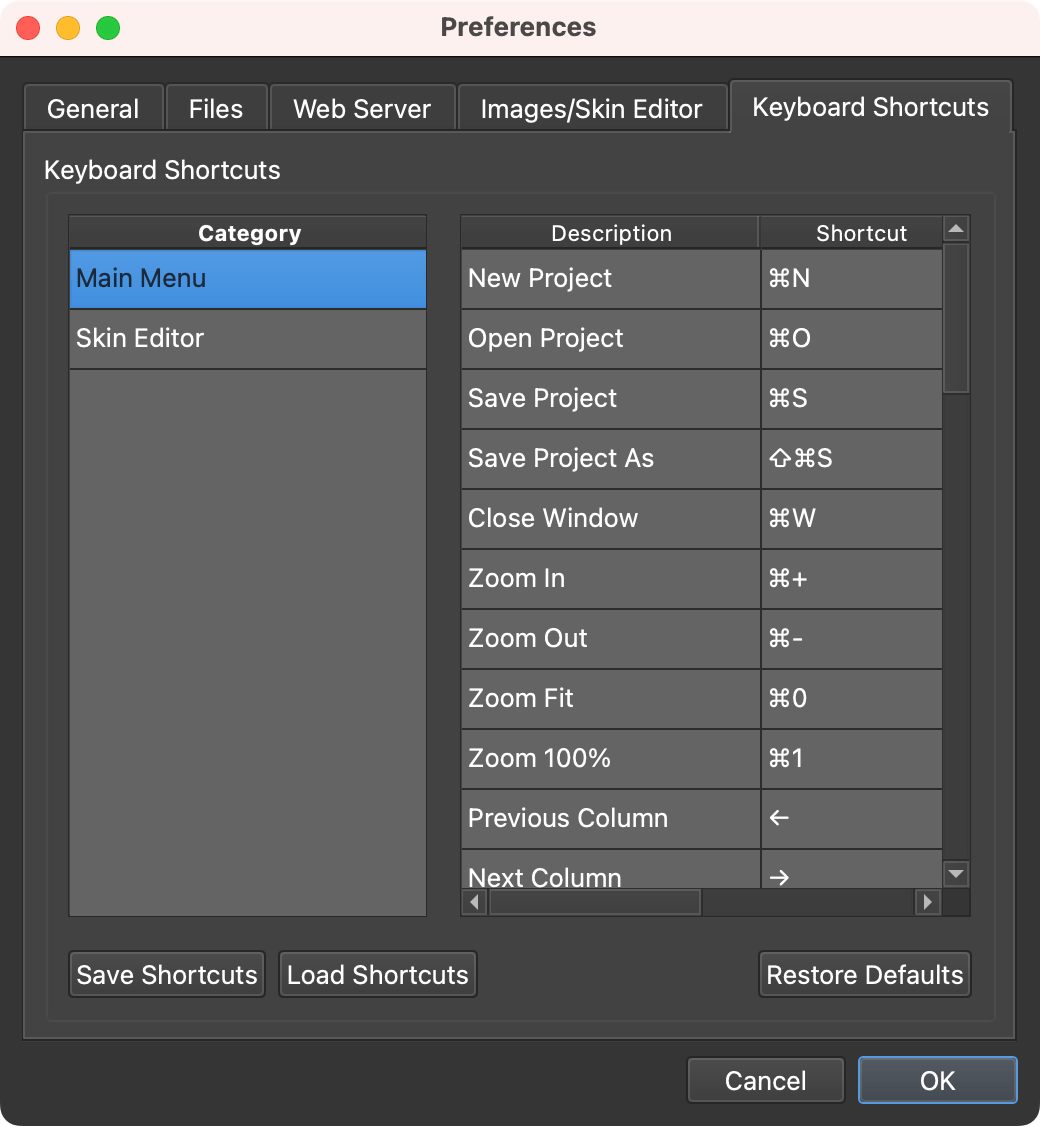
Add custom keyboard shortcuts to any of the options found in the main menu, and Skin Editor.
Use Save Shortcuts to save the current configuration. This will export a configuration file to save anywhere on your computer.
To load Shortcuts use, Load Shortcuts. Navigate to an INI file and import it to update the shortcuts.
To add a keyboard shortcut, double-click in the Shortcut column. Then press the key for shortcut. Modifier keys can be used. More than one shortcut can been added as well. Just press what the next option and they will be separated by commas.
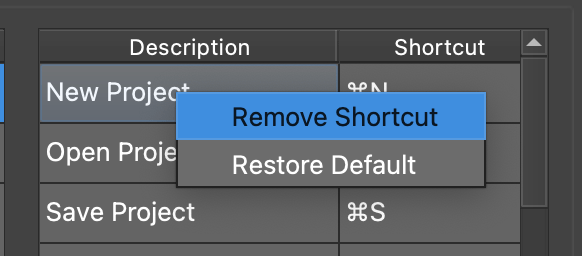
To remove the shortcut, right-click in the row and choose, Remove Shortcut. Choose, Restore Default to return the shortcut to the default setting.