Import Using the Light Table
Use the Light Table to bring images in the project.
Importing via the Light Table is the easiest way to import. However, if you have a large amount of images to import, you may find importing them via Image Sequence easier.
Importing a Single Row Image Series
A single row project consists of images that make up multiple columns and one row. Image filenames should follow a naming convention that is ordered.
- Define the project dimensions. Enter the number of columns the images make up. Leave Row and State at 1.
- Click Update. This will add image placeholders in the Light Table which represent the amount of columns and rows the images make up.
- Open the Light Table if not already opened.
- Add the images. Use the Add Images button in the Toolbar or drag the images in and drop them onto the first placeholder.
★ Tip Images can be moved, swapped, and deleted. And the images can be resized to make viewing all of them easier with the Image Size slider.
Importing a Multi-Row Image Series
A multi-row project consists of images that make up multiple columns and multiple rows. Image filenames should follow a naming convention that is ordered and discerns between the columns, rows.
- Define the project dimensions. Enter the number of columns and rows the images make up. For example, 10 columns and 4 rows. Keep State at 1.
- Click Update. This will add image placeholders in the Light Table which represent the amount of columns and rows the images make up.
- Open the Light Table if not already opened.
- Add the images. Use the Add Images button in the Toolbar or drag the images in and drop them onto the first placeholder.
★ Tip Images can be moved, swapped, and deleted. And the images can be resized to make viewing all of them easier with the Image Size slider.
Importing an Image Series with Multiple View States
A project with multiple view states can be multi-row or single row. Image filenames should follow a naming convention that is ordered and discerns between the columns, rows, states.
Multi-State Single Row Series
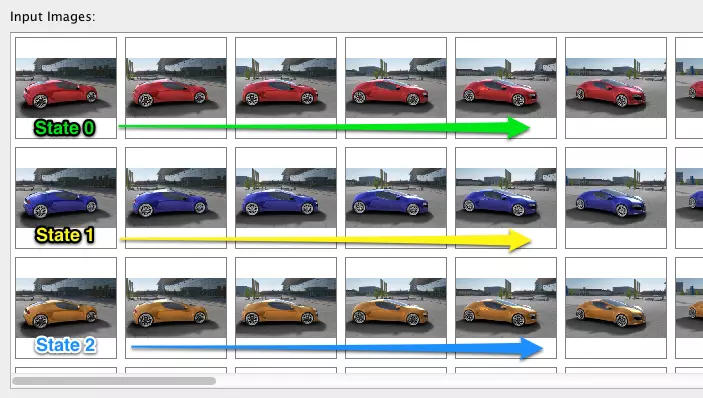
A single-row project will show the states as multiple rows as in this image:
- Define the project dimensions. Enter the number of columns and states the images make up. Leave Row at 1.
- Click Update. This will add image placeholders in the Light Table which represent the amount of columns and states the images make up. There will be a menu in the Light Table to switch states.
- Next, add the images. Click Add Images, navigate to the folder that holds the images, select them all and then click Open. Alternatively, drag the images to the first placeholder in the Light Table.
★ Tip Hover the mouse over an image to pop up the tooltip that provides the image’s information.
- If needed, drag the images around to rearrange them.
Multi-State Multi-Row Series
-
Define the project dimensions. Enter the number of columns, rows, and states the images make up.
-
Click Update. This will add image placeholders in the Light Table which represent the amount of columns and states the images make up. And a menu to change states will appear.
-
Choose a state from the states menu in the Light Table.
-
Add the images for that state either by the select and drag method or by choosing Add Images in the Toolbar.
-
Choose the next state and then add the images for that state.
-
Continue for each state.