Switching between View States
Learn how to switch view states by adding a few buttons to the skin.
In the Skin Editor, we’ll add buttons that when clicked, will change the View State. In our example, we have 3 view states and will use 3 buttons to change between them.
There are few ways to build this. For this example, we will use images to change the states. Our example is a computer generated object that has three materials: ceramic, glass, and gold. We will represent these states with images which will act like buttons to change the state of the object.

Add the images to the Skin
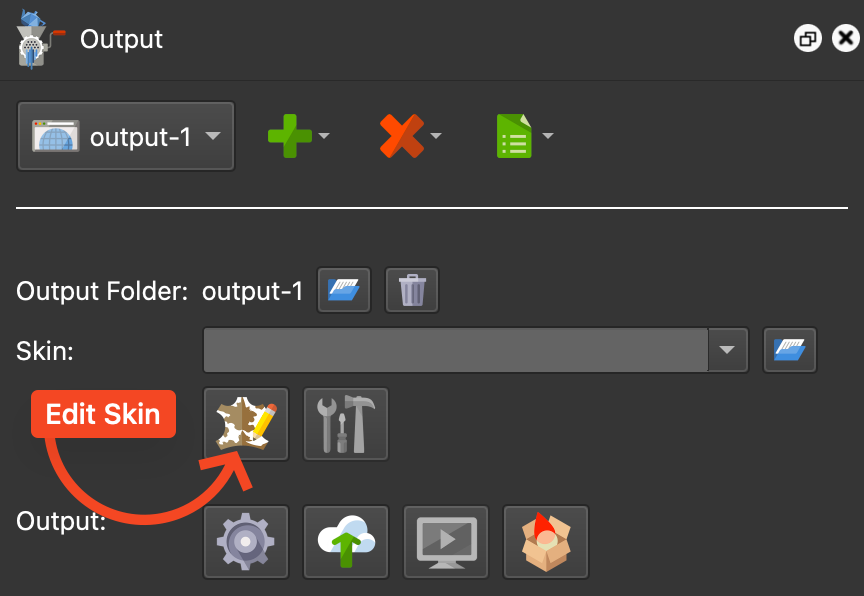
- Open the Skin Editor either from the Output panel or from the Toolbar.

Edit Skin button in the Output Panel. - Drag in the images that will be used for the buttons to the Canvas. The Skin Editor will recognize them as Image elements and they will be stacked on top of each other. We will line them up horizontally across the top edge using Align and Distribute.
- Roughly arrange the images in the Canvas across the top left corner
- Align and distribute them evenly.
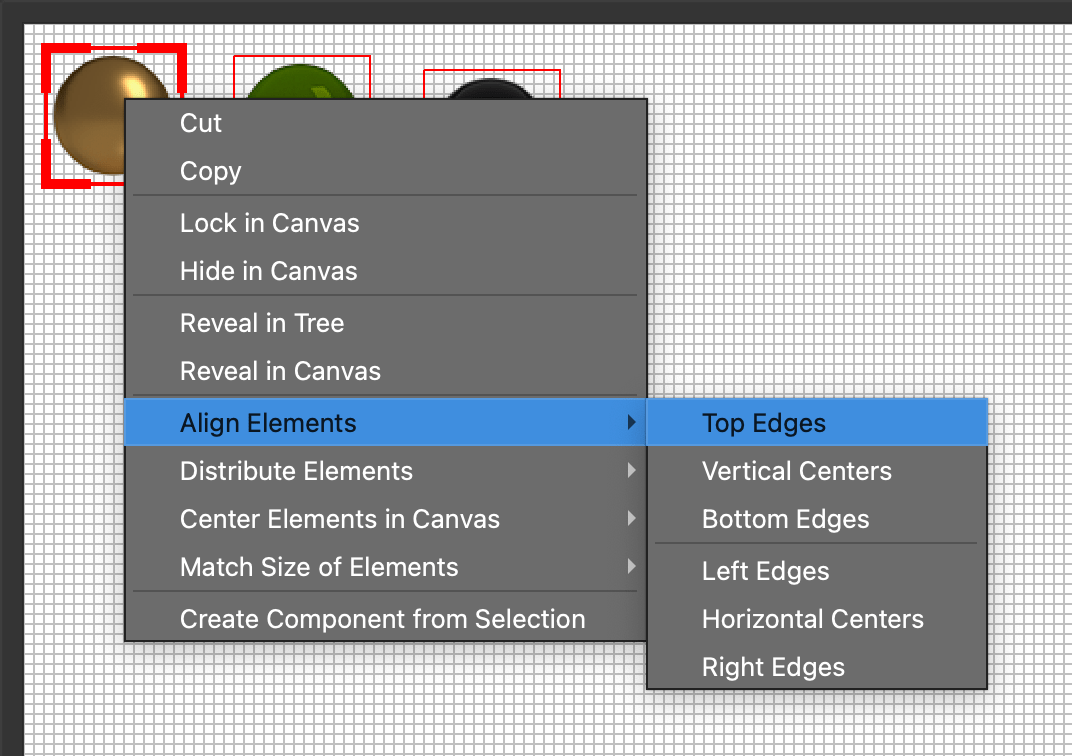
- Select all the images. The image with the bold red border is the anchor image and the others will be aligned and distributed to that image.

Select the loosely placed images. - To align them, right-click on the selected images in the Canvas, and choose Align Elements. Then choose, Top Edges.

Align the Top Edges - To evenly distribute them, right-click on them again while still selected and choose, Distribute Elements and choose, Horizontal Centers.
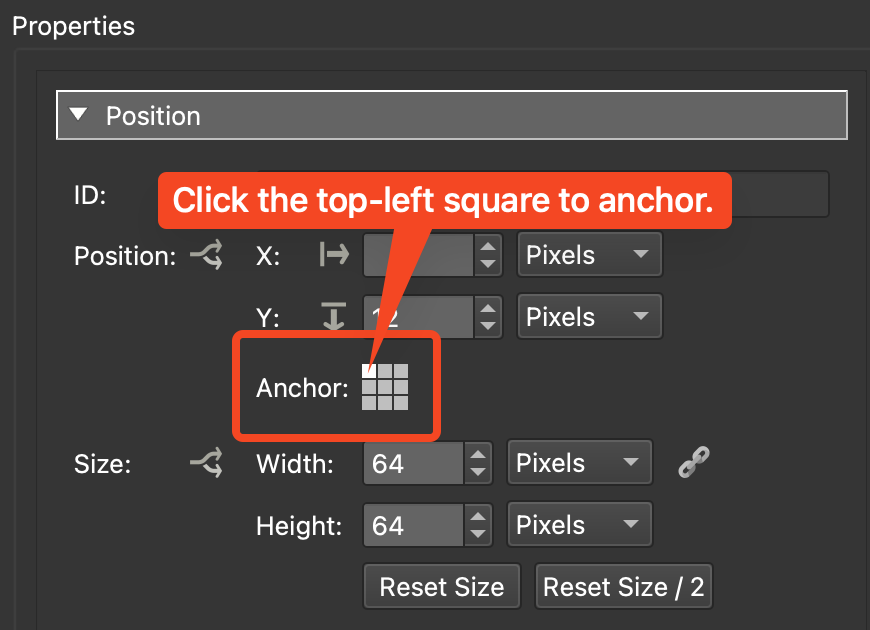
- Select all the images. The image with the bold red border is the anchor image and the others will be aligned and distributed to that image.
- While they are all still selected, align them to the top, left corner.

Anchor the buttons.

Give the buttons actions
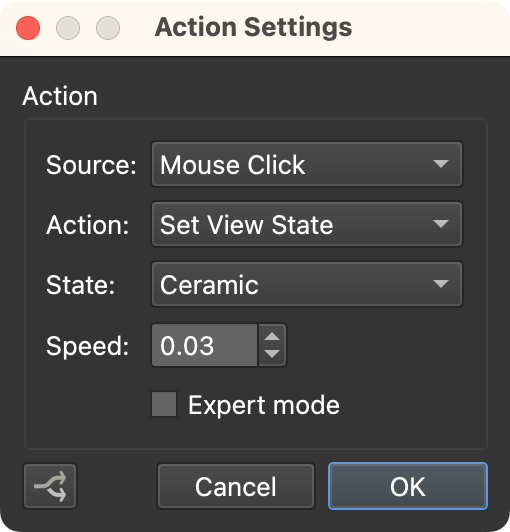
Select a button and open the Actions table in the Properties. Double-click in the table to add the following action:
- Source: Mouse Click
- Action: Set View State
- State: Choose the state this button will change to.
- Speed: Change the speed of the transition of the change. Try
0.03to start.
Add this action to each button. The action can be copied. Right-click the action in the Actions table and choose, Copy. Go to the next button, open the Actions table, right-click in the table and choose, Paste.

Open the action by double-clicking it in the table. Change the State for that button.
See an example (the Dragon) on our homepage.