Viewing Parameters
The viewing parameters section lets you choose which image will be the first to be viewed and how the object movie will be controlled.
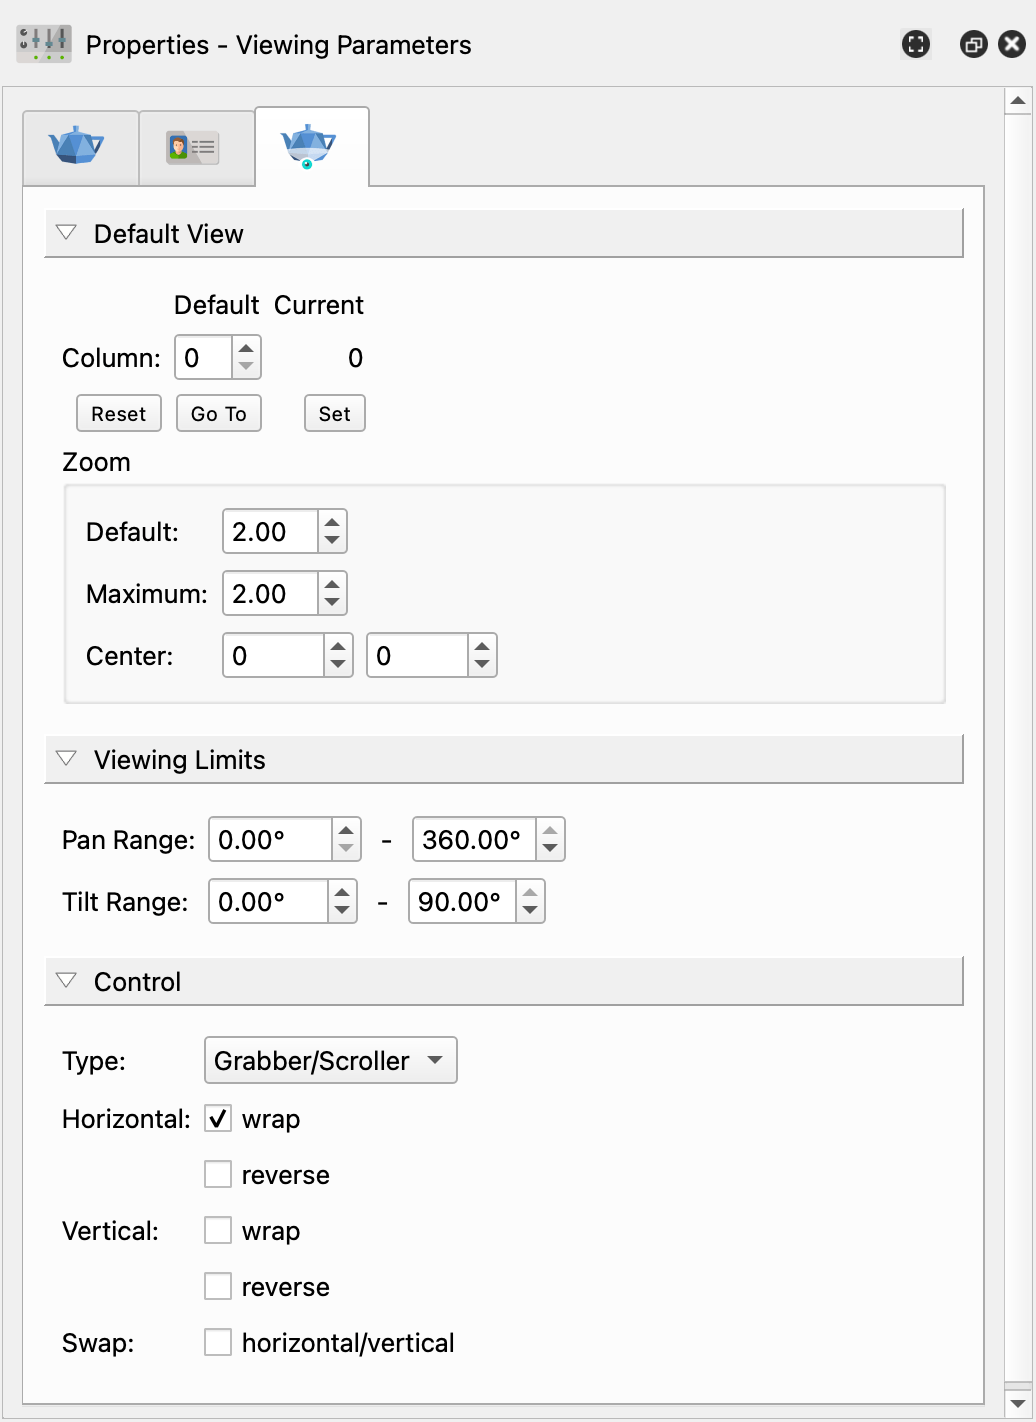
Default View
Set the default view. Use the preview window to the right to move the movie to the correct position. The Current column will update to the actual view in the preview window.
Column – Enter the column image number.
Row – Enter the row image number. Row is available if more than one row was defined in the Project Properties.
State – Enter the state the movie should open with. State is available if more than one state was defined in the Project Properties.
Reset – Clear all fields.
Go To – Click to go to the default view.
Set – Click to set the chosen view as the default view.
Default View can also be set via the context menu in the Viewer. Right-click and choose Set Default View.
Zoom
Set how far to zoom in to and out of the object.
Default – The initial zoom level. A default zoom of 1 means the image will be at its original zoom level (100%) (or have no zoom initially applied.)
Maximum – The maximum zoom level. The default is set to 2. This means the object movie can be zoomed in two times its default zoom.
Center – Adjusts the center when the default zoom is set to greater than 100% (1.0). Set the position for the X and Y axes using pixels.
Move — This toggles how the user interacts with the movie when zoomed in.
Auto move mode — Select to move the object movie as a flat image (no rotation) when zoomed in. De-select to rotate the movie when zoomed in.
Control
This section defines the movie interaction.
Type
Choose how the object movie will be moved.
Grabber/Scroller — Click and drag the movie. When the mouse leaves the movie window, the movie will stop rotating.
Absolute — The movie is moved by clicking on points within the movie.
Joystick — Similar to the Grabber/Scroller except that when the mouse leaves the movie window and the user continues to hold down the mouse button, the movie will continue to rotate.
Horizontal
Adjust the movie’s horizontal movement.
wrap – Select to enable a full horizontal rotation of the object movie when there are images to cover its full rotation. When deselected, the movie will not continue through its rotation. Rather it will stop at the first and last images.
reverse – Select to have the movement of the movie rotate in the opposite direction of the mouse movement.
Vertical
Adjust the movie’s vertical movement.
wrap – Select to enable a full vertical rotation when there are images to cover its full rotation. When deselected, the movie will not continue through its rotation. Rather it will stop at the first and last images.
reverse – Select this have the movement of the movie rotate in the opposite direction of the mouse movement.
Swap
Switch up the movie’s movement.
horizontal/vertical – Choose this to have the movie spin in the opposite movement of the mouse. If the mouse is scrolling vertically, the movie will movie horizontally and vice versa.