Animated Hotspots
Learn how to create an animated point hotspot in the Skin Editor using a skin variable with a Timer.
In this tutorial, we create a simple pulsing point hotspot graphic. To start, create a new skin or open an existing skin:
-
Add a variable called
ht_ani. Type = true/false, Init Value = false.Variable added. -
Add a timer to the skin. The animation is driven by the timer.
-
Remove the default logic block found in the Timer’s Visibility parameter.
-
Set the Timer’s Type to Start.
-
Set Timeout to
.5second. -
Set Repeat to Toggle. This ensures the actions will repeat.
-
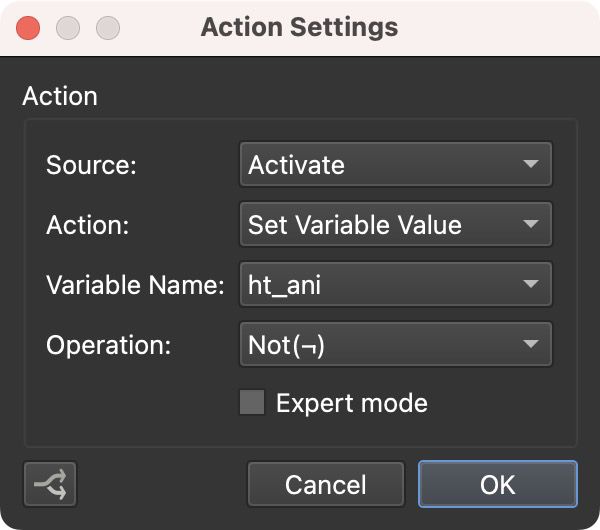
Add an action to change the variable’s value:
Now create the point hotspot graphic that will animate. We’re using two rectangles that will pulse.
-
Add a rectangle to the skin.
-
Change it’s size to 32px x 32px.
-
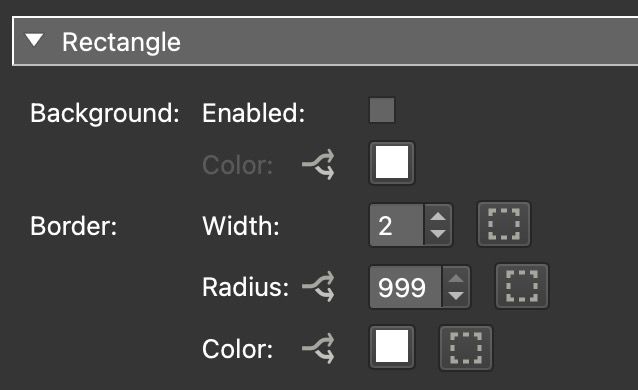
In the rectangle’s parameters, disable the background.
-
Set the Border to 2 px.
-
Set the Radius to 999.
-
Change the border color to white.
Action for the Rectangle -
Set the graphic’s Scaling setting for both X and Y to
50%to reduce it’s size by half. -
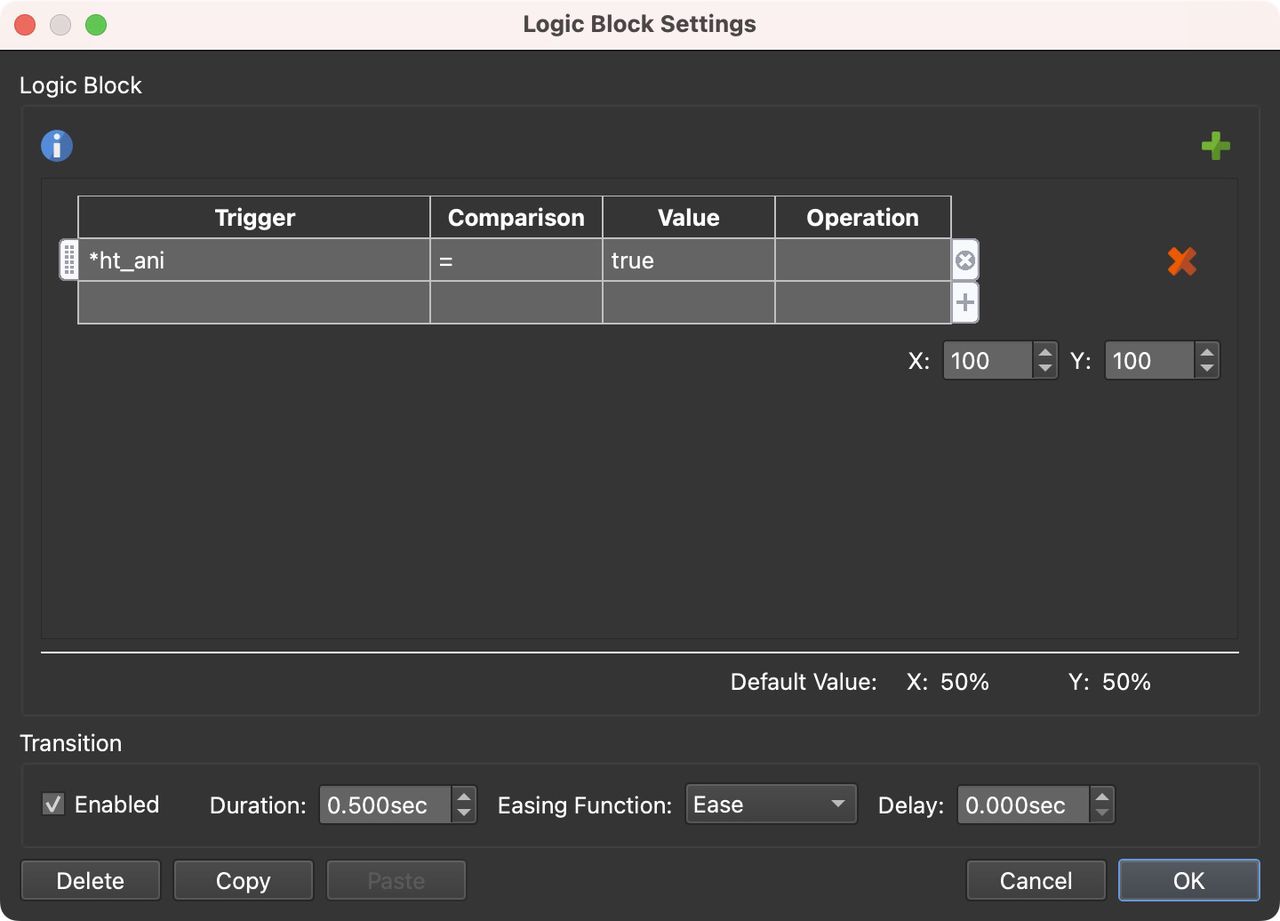
Add a logic block to Scaling:
- Trigger =
ht_ani - Comparison =
= - Value =
true - x/y =
100%
- Trigger =
-
Enable Transitions in the logic block. Set Duration to .5 second. Now is a good time to check the animation in the Live Preview. The circle should appear to be pulsating.
Scaling Logic Block with Transitions enabled. -
Change Alpha to
0. -
Add a logic block to Alpha to fade the icon in as it scales up.
- Trigger =
ht_ani - Comparison =
= - Value =
true - Alpha =
1.0 - Enable Transitions for .5 seconds
- Trigger =
-
Select Hand Cursor.
-
Copy and paste this Rectangle.
-
Change its ID to Rectangle 2. Now we will reverse the animation to go from bigger to smaller.
-
For this second rectangle, set Scaling to
100%. -
Change the Scaling logic block to
50%for X and Y. -
Set Alpha to
0. -
Change the Alpha logic block to have an Alpha of
1.00.
That’s the animation set. Now we need to apply this to a point hotspot template:
- Add a hotspot template.
- Give the template an ID. Use the default Skin-ID for node hotspots:
ht_node. Pano2VR will use this as the Skin-ID for all node hotspots. - Add the following action to the hotspot template:
- Source = Mouse Click
- Action = Open Next Pano
- URL = Hotspot URL
- View = Target View
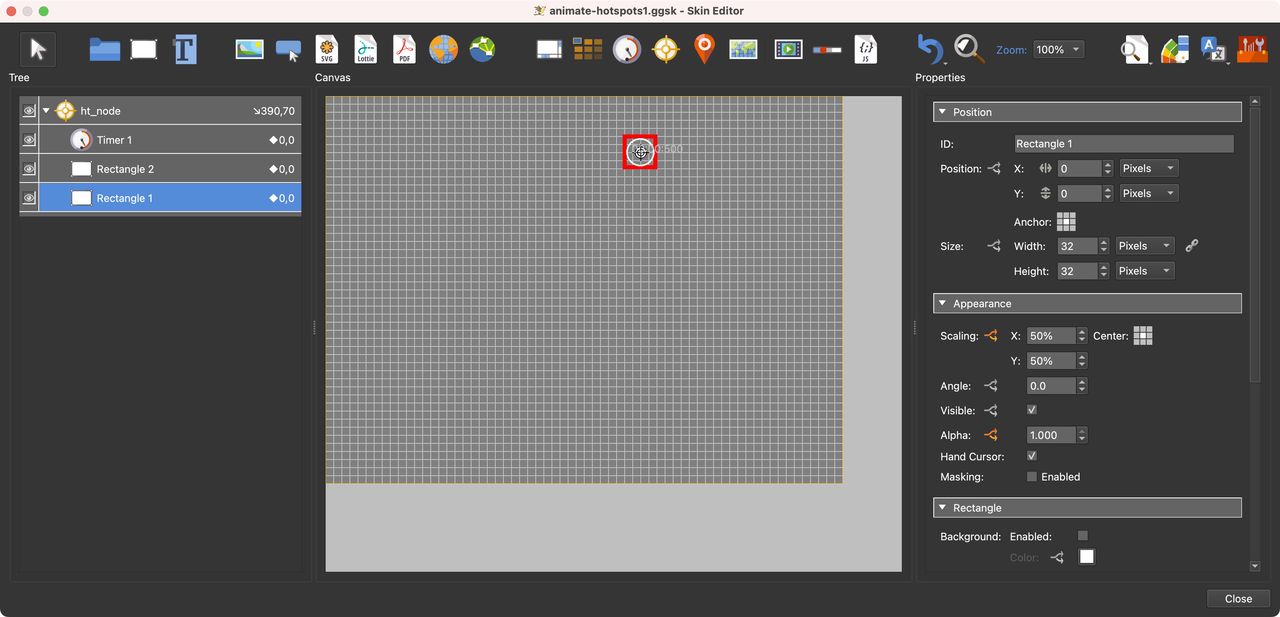
- Select both Rectangles and the Timer and drag them on to the hotspot template while holding ALT or Option in the Tree. This will position them over the hotspot template. While they are selected, change the Anchor to Center and double-click on the word, Position to center-align them to the template.
Rectangles Center Aligned
Save the skin and apply to the output.
If you get stuck, check out the original tutorial below. This tutorial was created with version 5 and the workflow is slightly different, but is still helpful.


