Filtering Images
Nodes in the Tour Browser can be filtered by tag, text, and distance.
Filter by Tag
Tags are added to nodes in the Tour Browser automatically (auto tags) or by the user. Both user-defined and auto tags will be listed in the Filter menu.
-
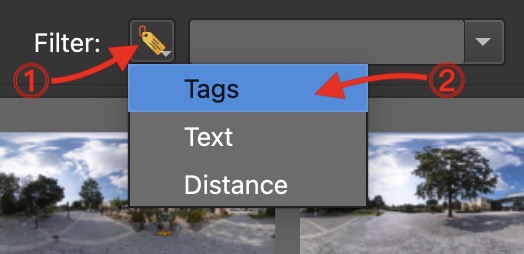
Click the Filter type button.
-
Choose Tags.

Filter by tags -
From the menu, select a tag you created or one of the auto tags.

Select a tag.

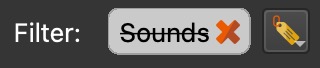
✭ Tags can be inverted. Click the tag to filter for all nodes that do not contain that tag. The tag below is currently filtering for all nodes that do no have sounds.
Filter by Text
-
Click the Filter type button.
-
Choose Text.
-
Enter text or a string and hit Return or Enter. The Tour Browser will automatically update as you type. Once you hit enter, a search tag is created. Now you can add more text tags or even invert the tags by clicking on them.
To search for specific text that has been added to either User Data or the filename, click Text and choose User Data or Filename.

Filter by Distance
To filter by distance, the nodes must have GPS.
-
Click the Filter type button.
-
Choose Distance. The filter icon will change and the menu will change to a field to enter distance.The default is set to unlimited.

Filter distances.

✭ Click the distance to toggle between < and > (lower than or greater than the specified distance).
To change the distance unit, go to the Preferences/Settings > General > Units, and choose between metric or imperial.
Filtering Images in the Tour Browser
Using Tags to Filter Levels
Tags can be added to each node in a tour to signify a specific level of a multi-story building. This is useful for tidying up the tour browser or for when adding levels to a Google Street View tour.
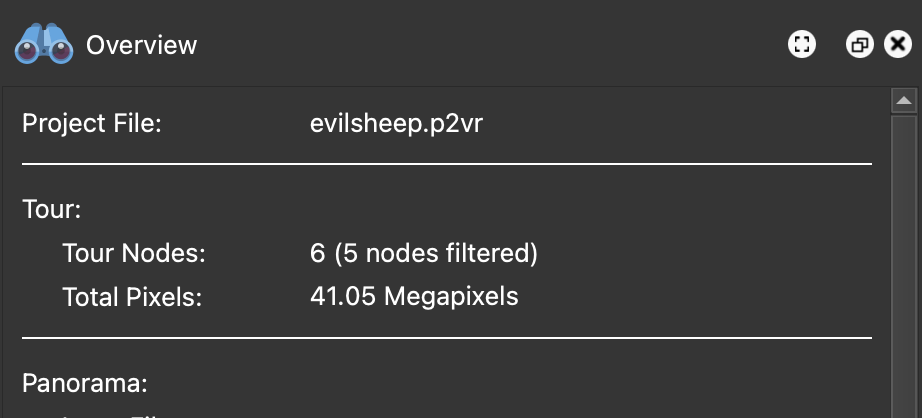
View Count of Filtered Nodes
To see the number of nodes filtered, open the Overview Panel. In the tour section, it will indicate the number of nodes that are currently filtered.