Add a Floor Plan
Learn how to add a floor plan to a tour.
The easiest way to add a Floor Plan to your project is to add it to the Tour Map and use a built-in skin. All built-in skins support Floor Plans.
If not using the built-in skins, Floor Plans can be added to a Map Element in the skin or they can be added directly to the skin.
An advantage to adding them directly to the skin is that radar beams won’t be cut off at the edges like they would in a Map Element.
The map element, on the other hand, will provide map pins, radar settings and options for handling the floor plan.
For both options, make sure to set the nodes’ headings before linking them to avoid misaligned links and views.
Add a Floor Plan
This simplest way to add a Floor Plan, is to add it to the Tour Map and use a built-in skin.
After adding your node images and user data:
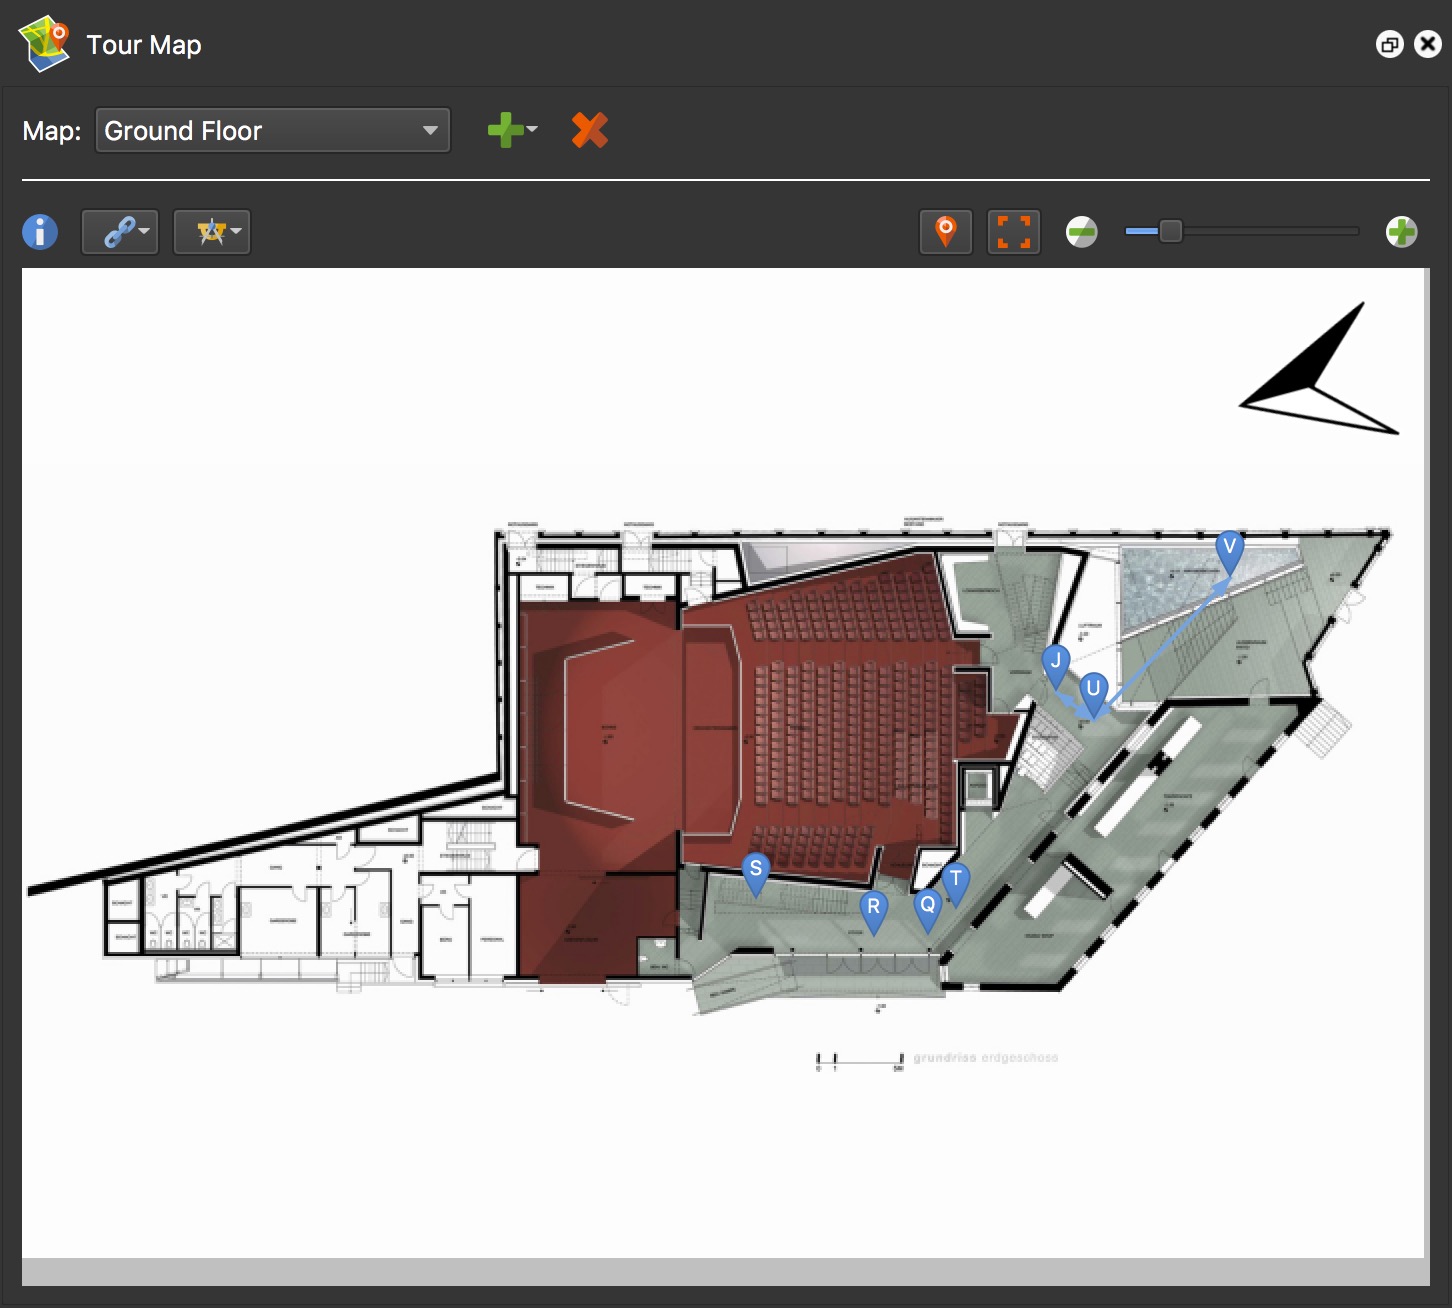
- Open the Tour Map.
- Add the floor plan by clicking the Add Map button and choose Add Floor Plan. Then, select the image that will be used as the floor plan.

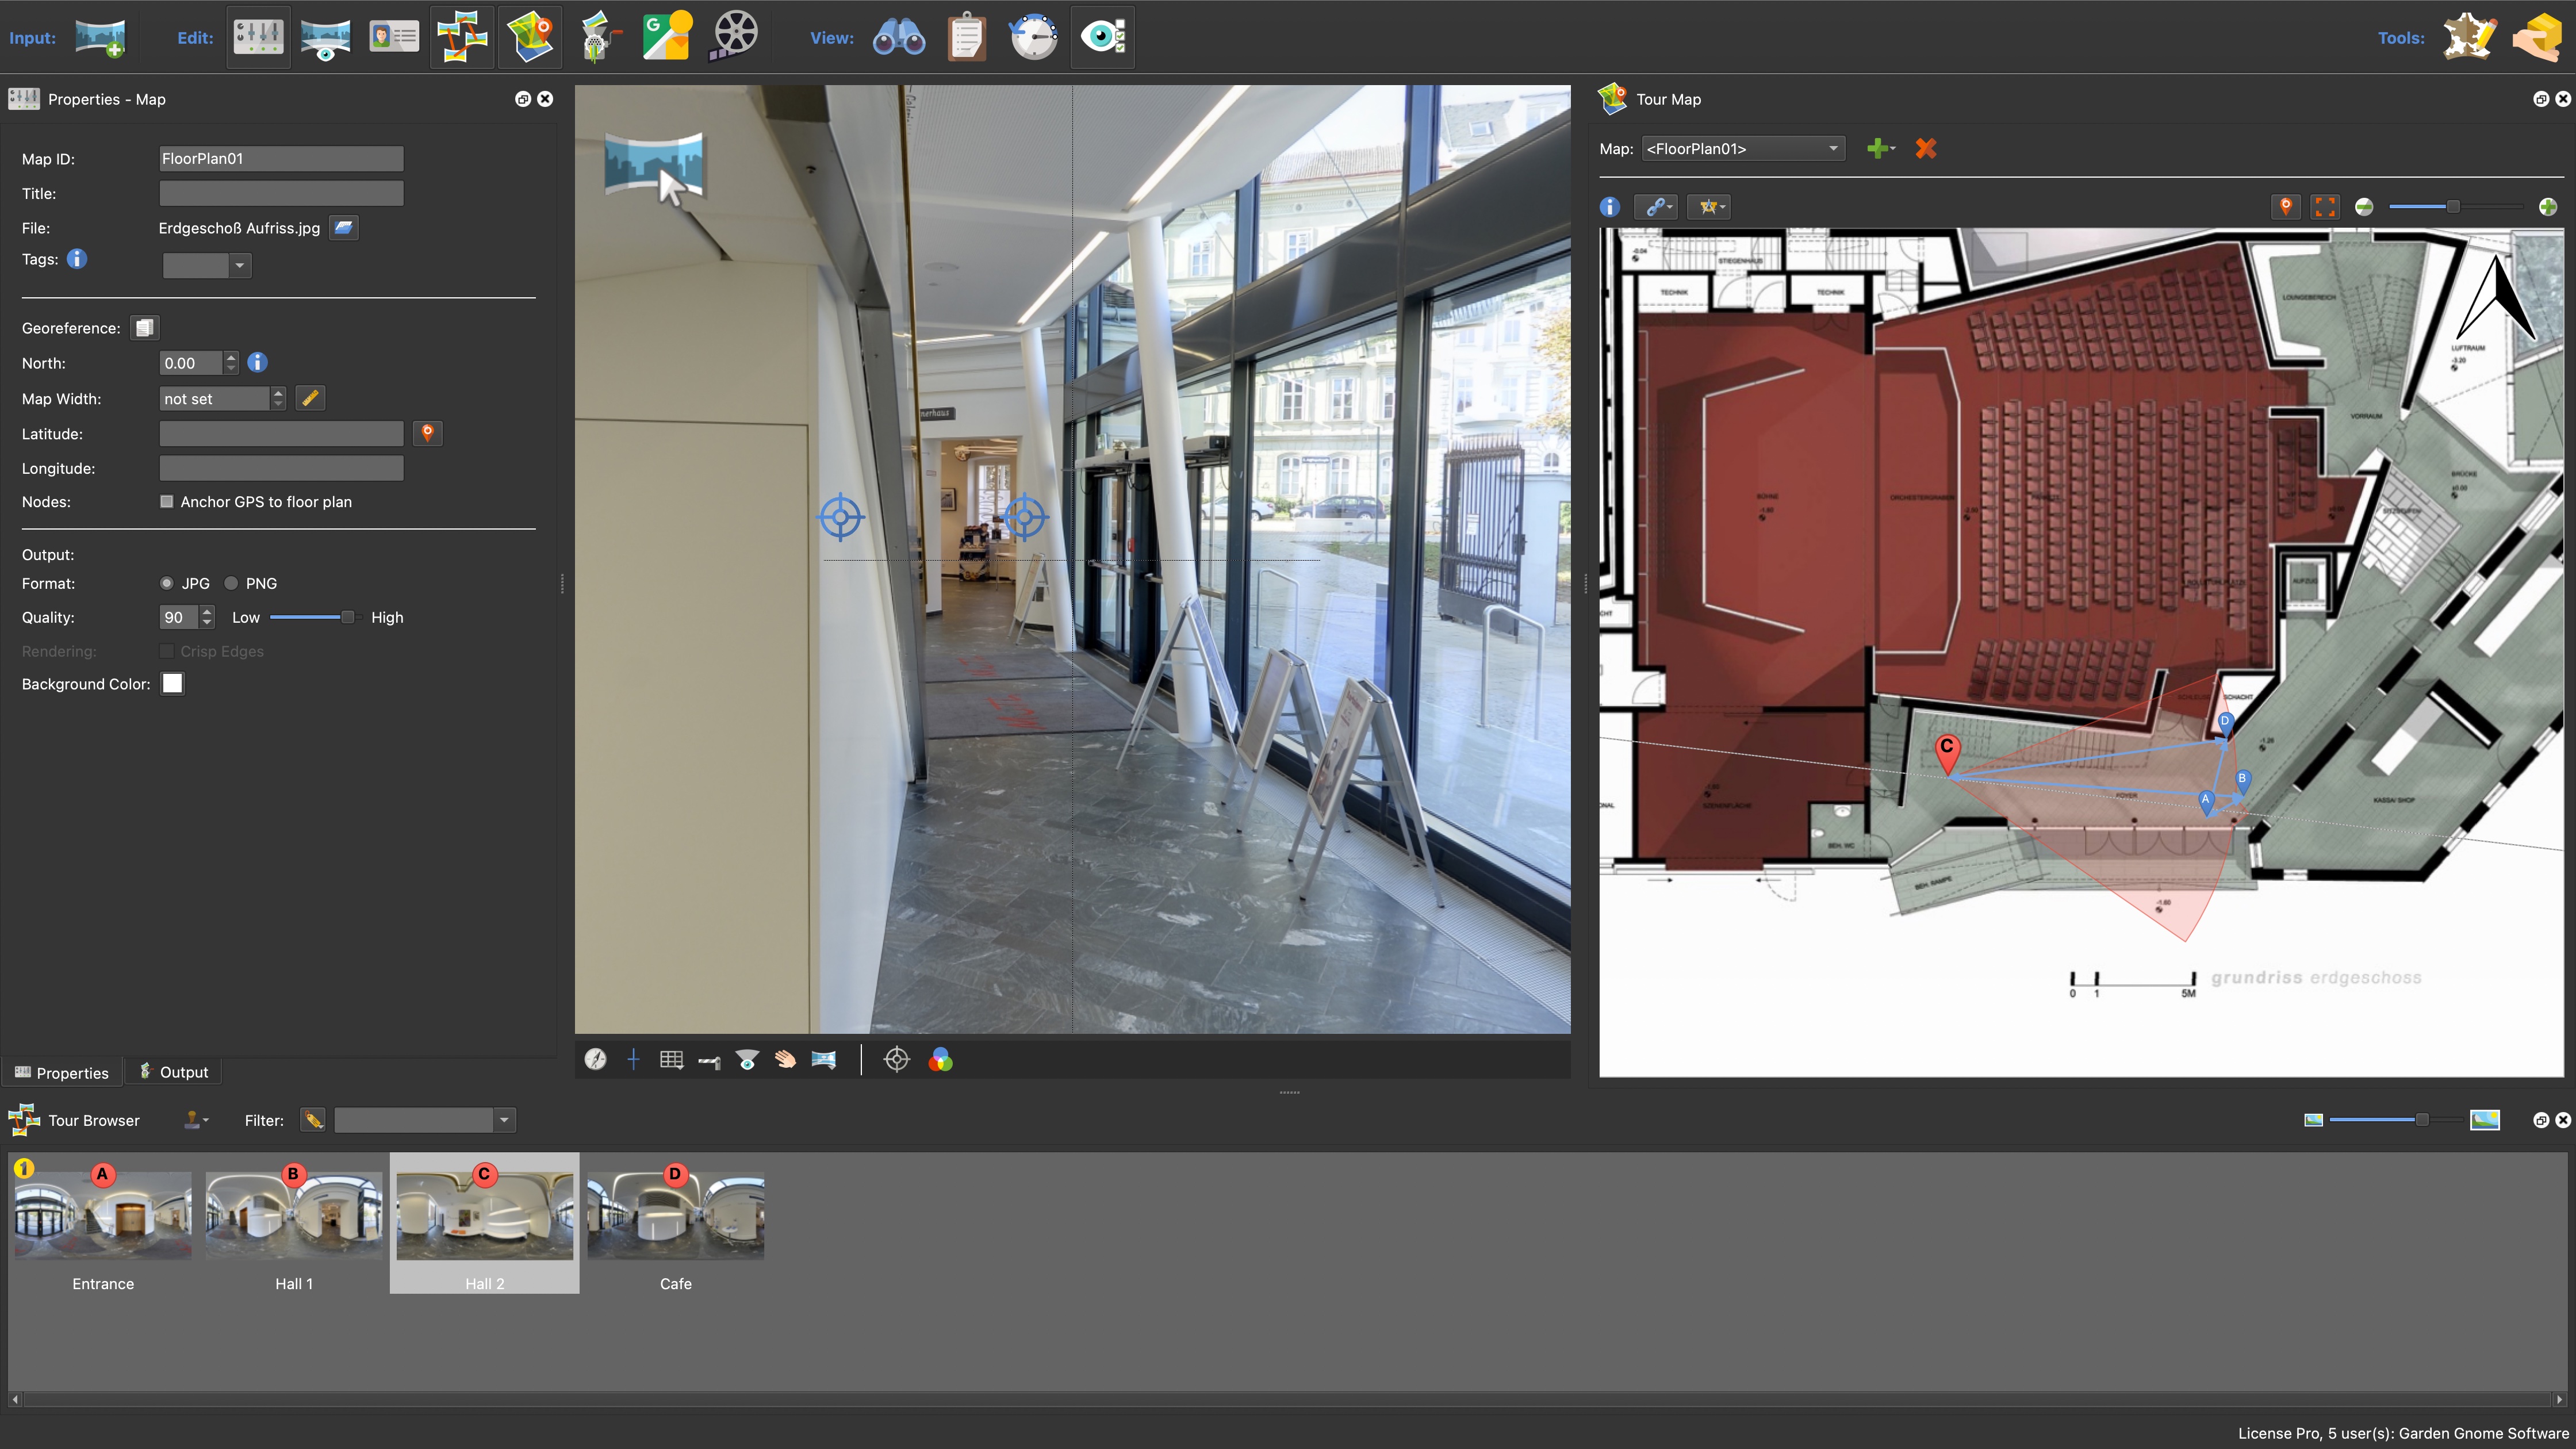
Floor Plan added to the Tour Map - In the floor plan’s properties, select the image format of the floor plan, JPG or PNG.
★ Tip If using PNG and you’d like to have a transparent background, set the Background Color’s alpha channel to 0.

Floor Plan properties - Drag the nodes from the Tour Browser to their places on the floor plan. If the Floor Plan and tour nodes are geolocated, select all nodes and and drop them on Auto Place to place them automactically. (see: Geolocating the Map to take advantage of the Auto Place function.)
★ Tip If using multiple floor plans for the same location, geolocate one and copy its data to the others by clicking, Georeference.
- If needed, set the directions (heading). Hold the N key down and drag the panorama in the Viewer to the correct heading. You’ll see direction markers in the Viewer and the radar in the Tour Map move.
- Add a Web Output.
- Add a built-in skin and output the project to test.
Use the Map Element to add a Floor Plan
All built-in skins use the Map Element and there is a component available. But, you can create a custom Map Element for your Floor Plans as well.
- Follow the instructions for adding a floor plan in the Tour Map.
- Add a skin to the Web Output.
- Open the skin and add a Map Element and draw the map on the Canvas.
- Set the element’s anchor. If the map should stick to the upper right corner, then select the corresponding section in the grid for Anchor. Then, refine the element’s position, if needed.
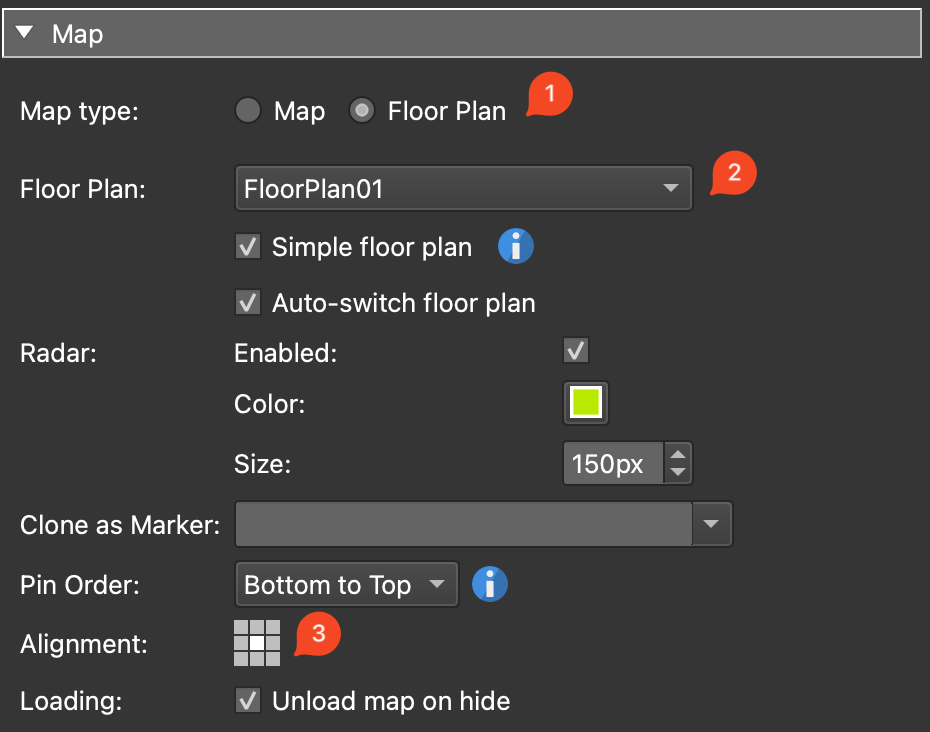
- Go to the Map properties and select Floor Plan.

Floor Plan Properties - Select the Floor Plan that was added to the Tour Map.
- Change the Alignment to center to keep the floor plan centered withing the map element.
- Save the skin. You could output it from here and then you can make some design decisions.
You’ll notice that the map element will add map pins. You can replace them with custom pins:
- Open the Components Toolbox. Find the Map Element Map Pin, then add it to the skin.
- Select the Map element and go to the Floor Plan properties. For Clone as Marker, select map_pin.
- Save the skin and output to test. You now have interactive map pins.
If you want different pins, you can swap these out in the Image parameters.
The option, Simple Floor Plan, is set by default. This keeps the floor plan from being zoomed or panned. It doesn’t require internet access. The floor plan will be scaled to fit the map element. If you want zoom enabled, deselect Simple Floor Plan. You’ll be presented with more options to refine how the floor plan behaves.
Adding the Floor Plan to the Skin
In this example, we’ll add a floor plan to the skin directly using a floor plan for one floor level.
- Add the tour nodes to the Tour Browser.
- Set the nodes’ headings. Hold the N key down and drag the panorama in the Viewer to the correct heading. You’ll see direction markers in the Viewer and the radar in the Tour Map move.
- Optional: Geolocate the floor plan.
- Link the nodes.
- Add Titles to the nodes in User Data.
- Open the Skin Editor.
- Drag in the Floor Plan to the skin’s Canvas.
- Set the Anchor to the top right (or wherever you’d like to keep floor plan pinned).
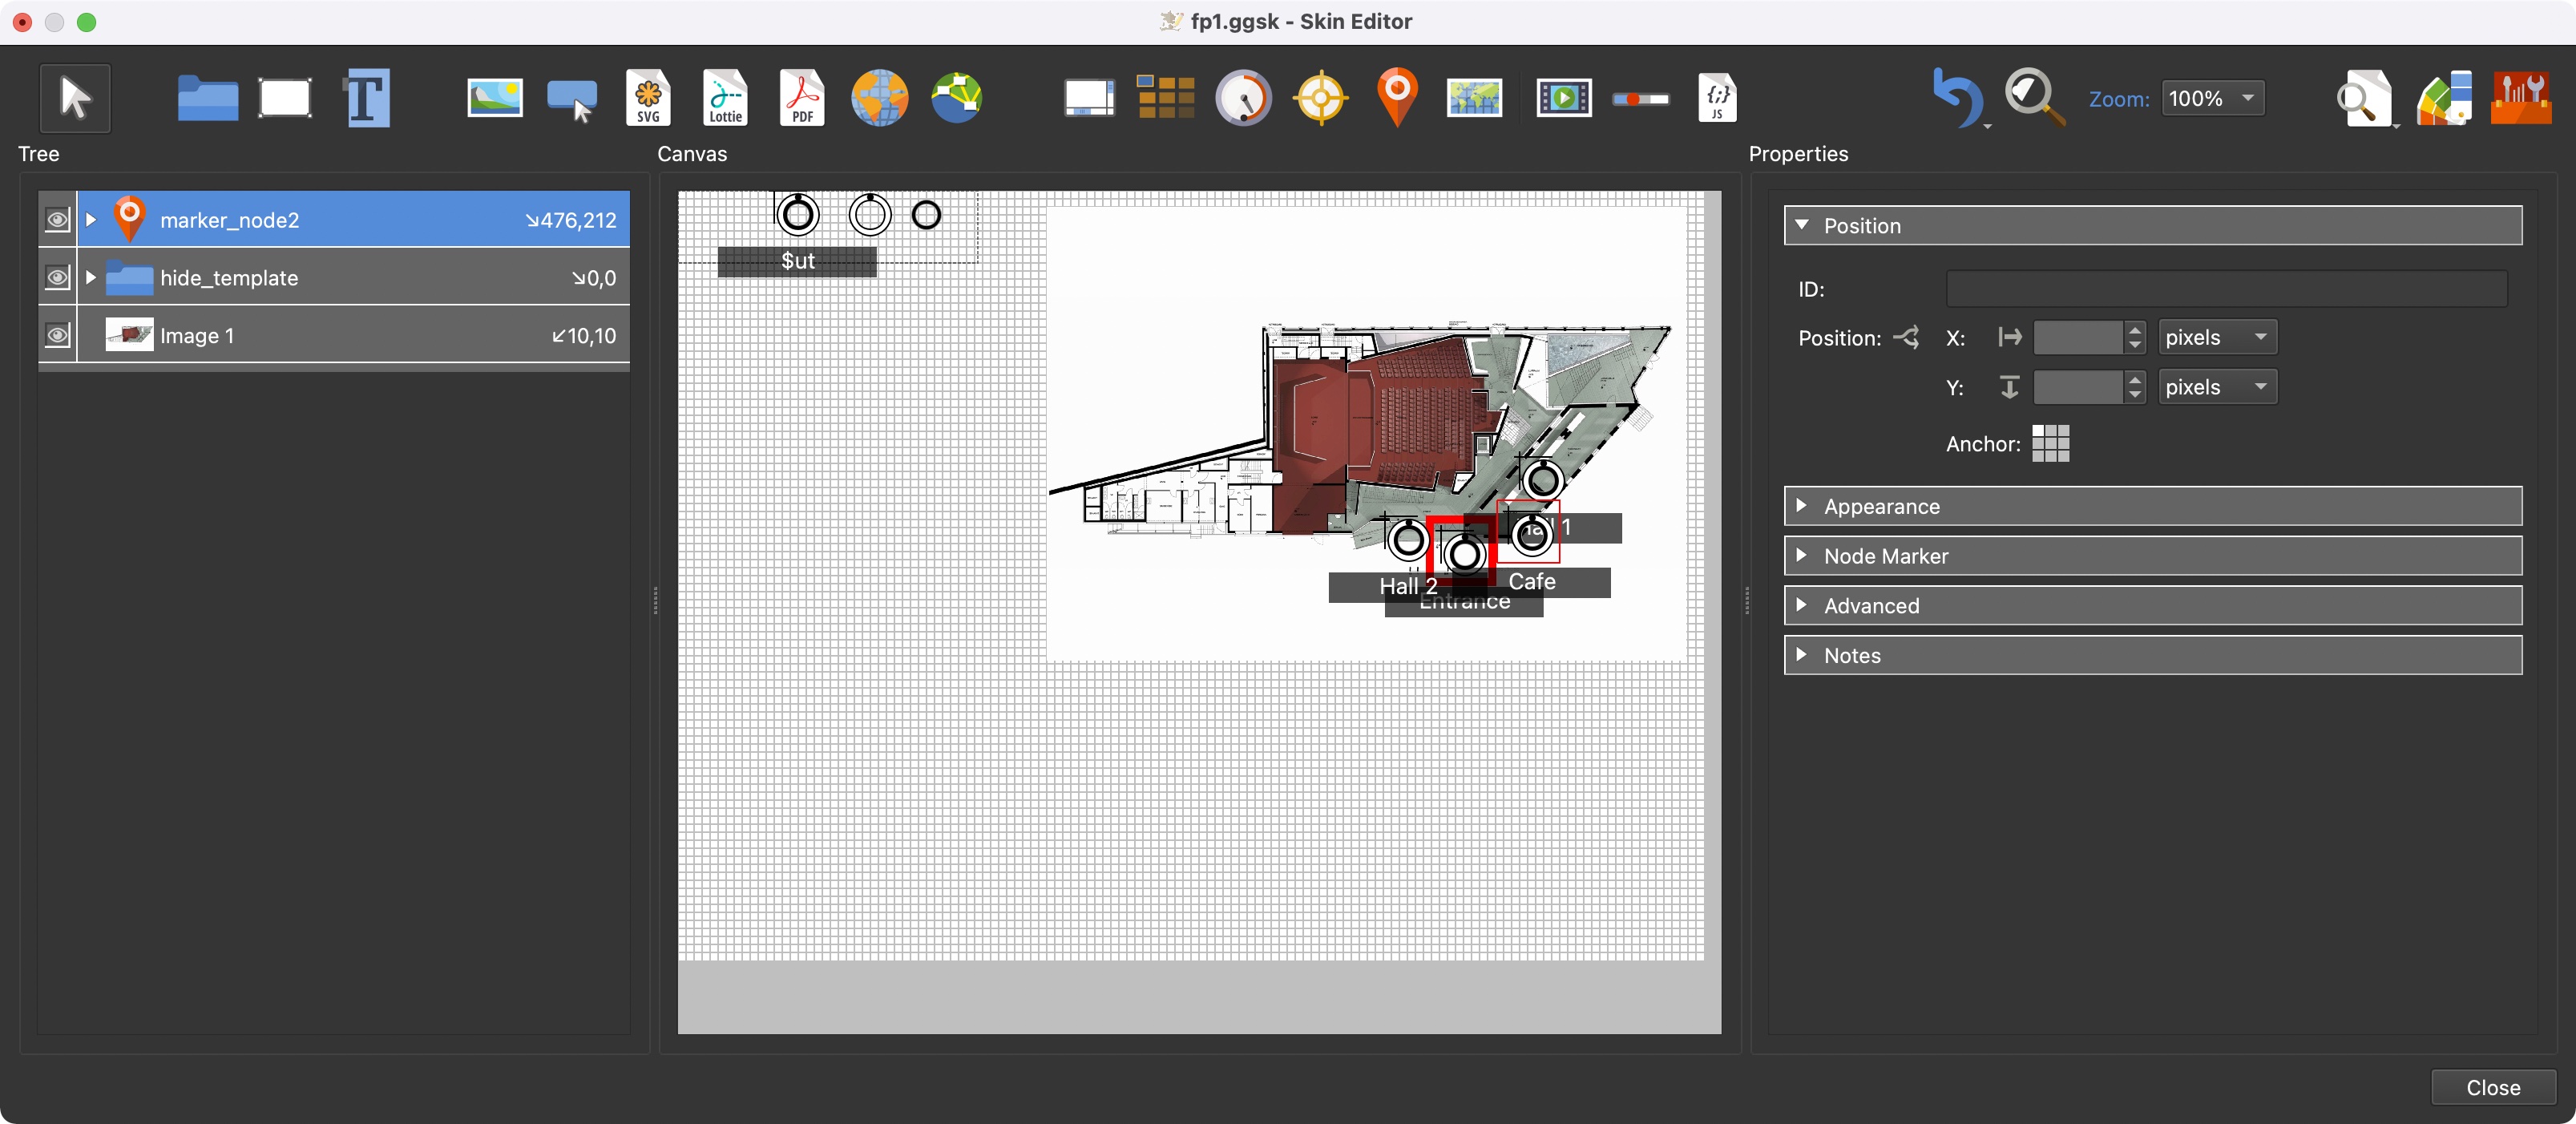
- Define a markertemplate. This is needed to add interactive map pins. Open the Components Toolbox and find Map Pin with Radar Silhouette (found in the Misc. Category). Double-click to add it to the Canvas. This component is a map pin with a built-in radar.
- Drag the nodes from the Tour Browser to the floor plan in the skin canvas (On a Mac, you’ll need to pop the Tour Browser out first and then bring the Skin Editor into focus.). This will add the map pins. To refine placement, click in the Canvas to deselect everything and then select the pin and drag.

Floor plan and markers added to the skin. - Save the skin.
- Output the project.