Add an Image Patch
The most common use for the patch tool is for retouching the nadir (down shot). Extract just a portion of the nadir, retouch that extracted image in your image editor and then update the patch.
Patch the Nadir
-
Choose the Patches Mode from the Viewer Modes (hover mouse over the icon in the top left corner of the Viewer).
-
In the Viewer, spin the panorama to the location to be patched. In this case, to the down shot to hide the tripod.
Patch location -
Double-click in the Viewer to add the patch. The patch will be represented by a checkerboard. You can move the patch by dragging the center. The patch can also be resized by dragging on the red handles. Patches will snap to the zenith and nadir.
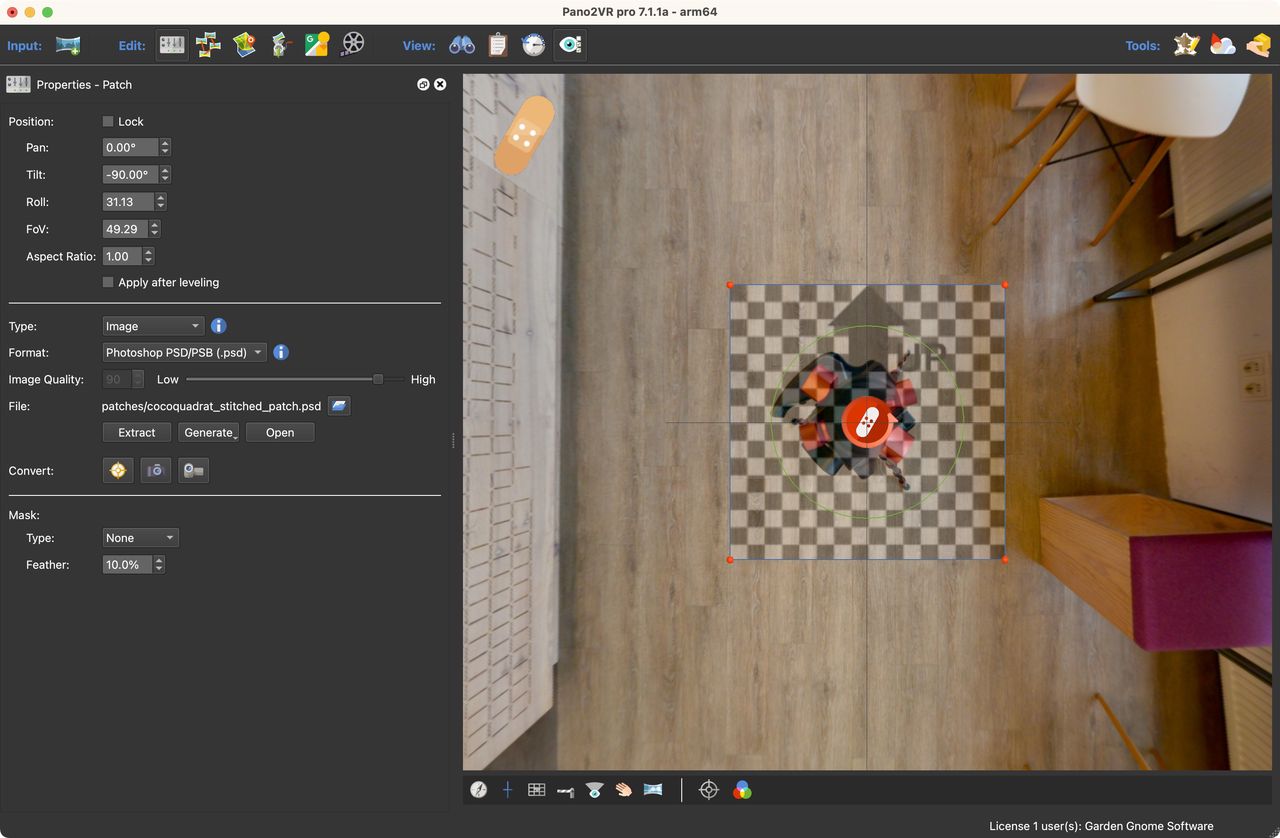
Added patch The Properties panel opens and shows the Patch’s properties.
-
For the Type, select Image. (Image is the default selection.)
-
Keep the Format as a Photoshop file.
-
Click, Extract. If Photoshop is installed (or any photo editor that accepts a photoshop file), the patch will open in Photoshop once Extract is hit.
-
Edit the extracted patch in the photo editor and then save it, overwriting the original, extracted patch.
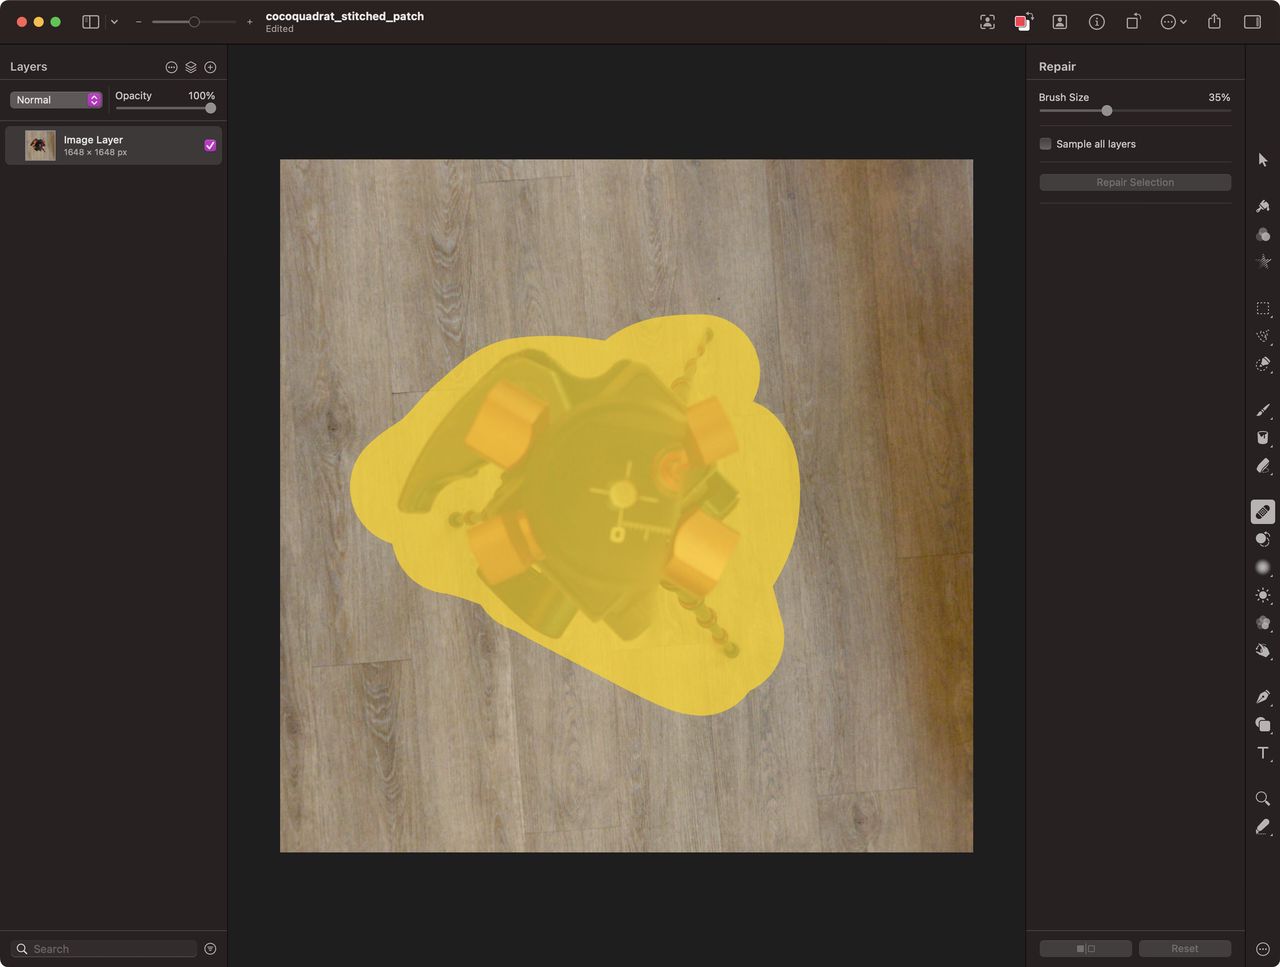
Editing the image patch in Pixelmator Pro. -
Go back to Pano2VR. The panorama will be automatically updated with the edited patch.
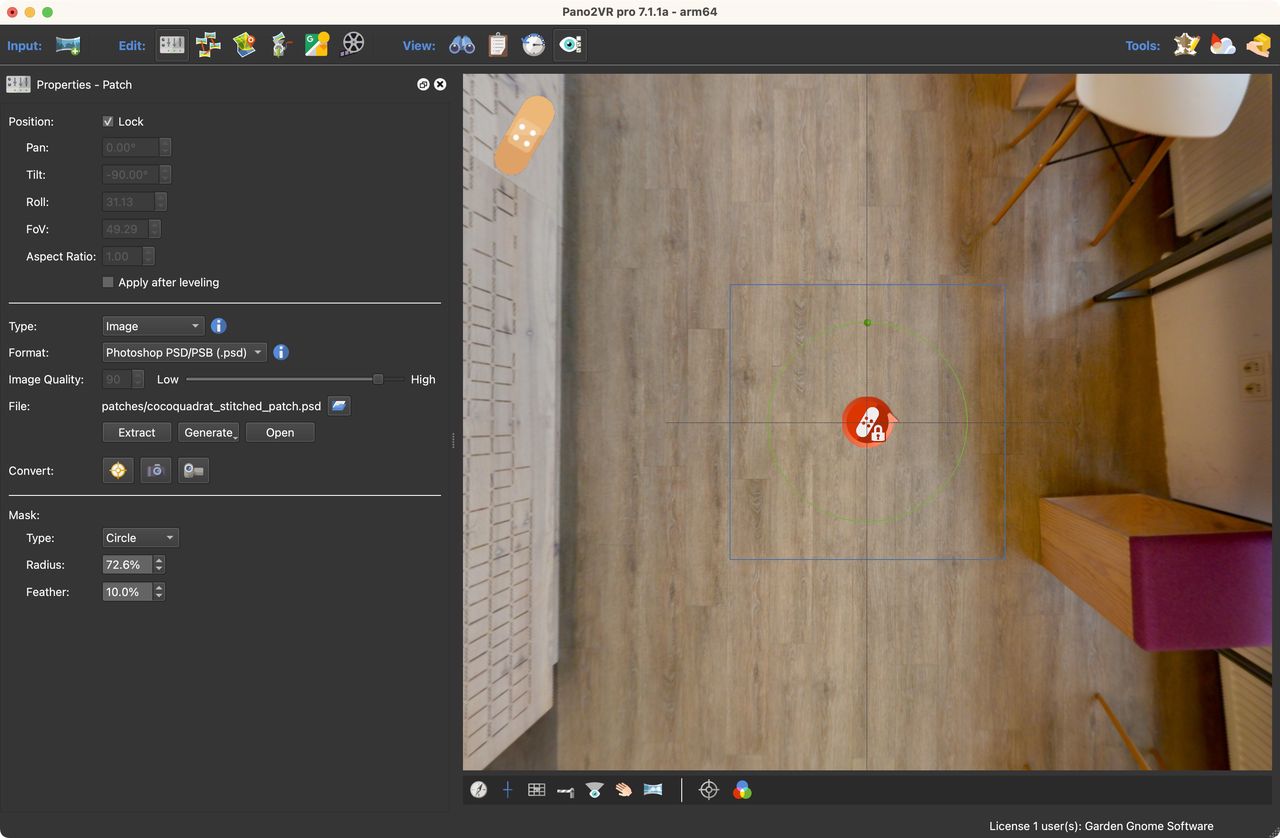
Updated patch -
Adjust the Feather Mask if needed. For this, example, choose Circle as the type. Drag the green handle inside the patch to adjust the Radius. Change the amount of Feathering if needed by dialing in the percentage. The Patch will update. If it doesn’t update right away, give the mouse a little wiggle.
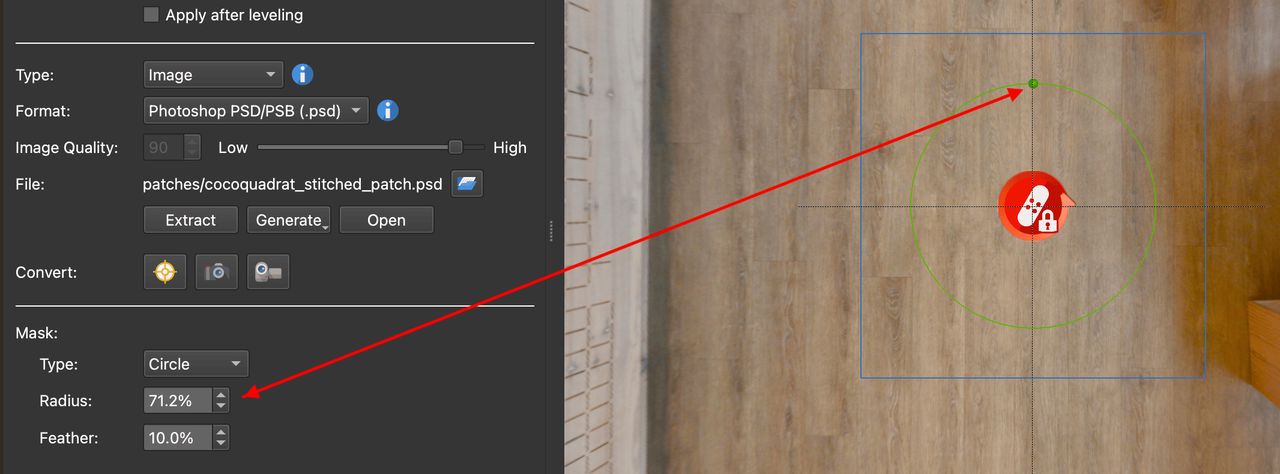
Adjust the Mask.


Copy Patches
There are multiple ways to copy patches. Copy and paste in the Viewer for precise placement or use List View.
Using the Viewer
- Activate the patch to be copied (red).
- Right-click anywhere in the Viewer and choose Copy Active Patch.
- To paste, right-click anywhere in the Viewer and select Paste Media Element to paste.
Using List View
- Open List View.
- Right-click the patch and choose copy or use Control-C (win)/Command-C (macOS).
- Right-click the patch and choose copy or use Control-V (win)/Command-V (macOS).
See also…
-
Converting Patches to Point Hotspots (for creating roll-over effects)