Animation Editor
Use the Animation Editor to create self-playing interactive panoramas, 3D model flights, and 360º panoramic videos, and to export animated 2D videos.
An animation is made of keyframes on the tracks of a clip. Each clip belongs to one node, and clips are strung together into sequences. The same animation drives an exported video in the Animation output, the autorotation of a web tour, and skin elements through variable tracks.
Properties
When you click in the Animation Editor, the Properties panel shows the sequences and the settings of the clip that is loaded in the editor.
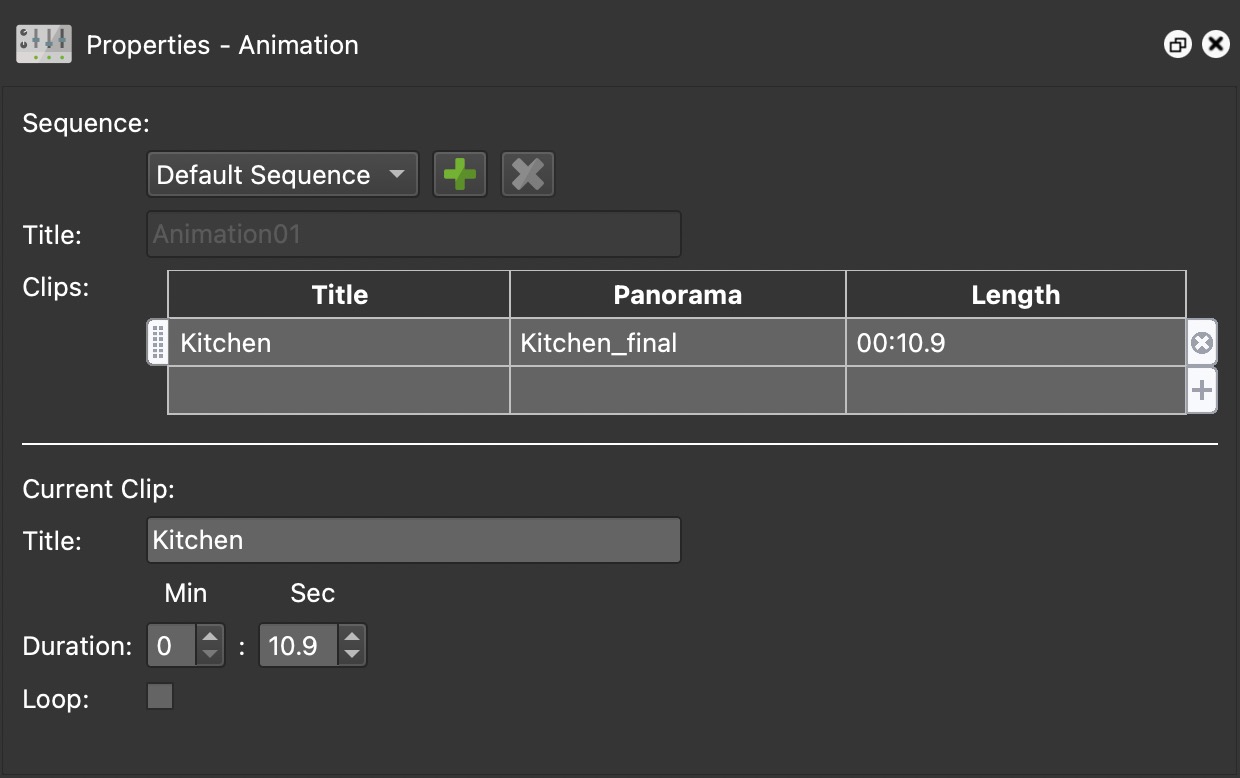
Sequence
A sequence is a group of clips that play one after the other. If you animate a tour, for example, each clip can show one node.
Sequence – Choose a sequence, or click Add Sequence to create a new one. Click Duplicate Sequence to copy the selected sequence, or Delete Sequence to remove it. The Default Sequence is created automatically and can be neither renamed nor removed.
Title – The title of the sequence. Sequence titles must be unique.
Clips – The clips of the sequence, in the order they play. New clips are added to the selected sequence automatically. To add an existing clip, double-click an empty row (or click the plus icon) and pick the clip in the Pick a Clip dialog. Drag the handles on the left to change the order, and click the “x” on the right to remove a clip from the sequence. The table lists each clip’s title and length. In Pano2VR Pro, the table also lists each clip’s panorama, and you can add clips from any node of the tour. Otherwise, only the current panorama’s clips can be chosen.
Current Clip
Title – The clip’s title. Clip titles must be unique within a node.
Duration – The clip’s length in minutes and seconds. The duration cannot be 0.
Loop – Select to play the clip over and over. A looping clip does not stop at its last keyframe: it continues to the end of the clip and arrives back at the values of the first keyframe, taking the shortest way round for the pan. Leave some time between the last keyframe and the end of the clip for this return movement. A warning symbol appears next to Loop when a pan, tilt, or field of view keyframe sits at the very end of the clip. The loop plays the same way in the Viewer and in the exported web tour.
Fly In clips and video panorama clips cannot be renamed or looped. The duration of a video panorama clip is taken from the video and cannot be edited.
To frame the view for a video, use the Frame Overlays in the Viewer Settings bar. The overlay color is set in Viewer Colors.
Editor
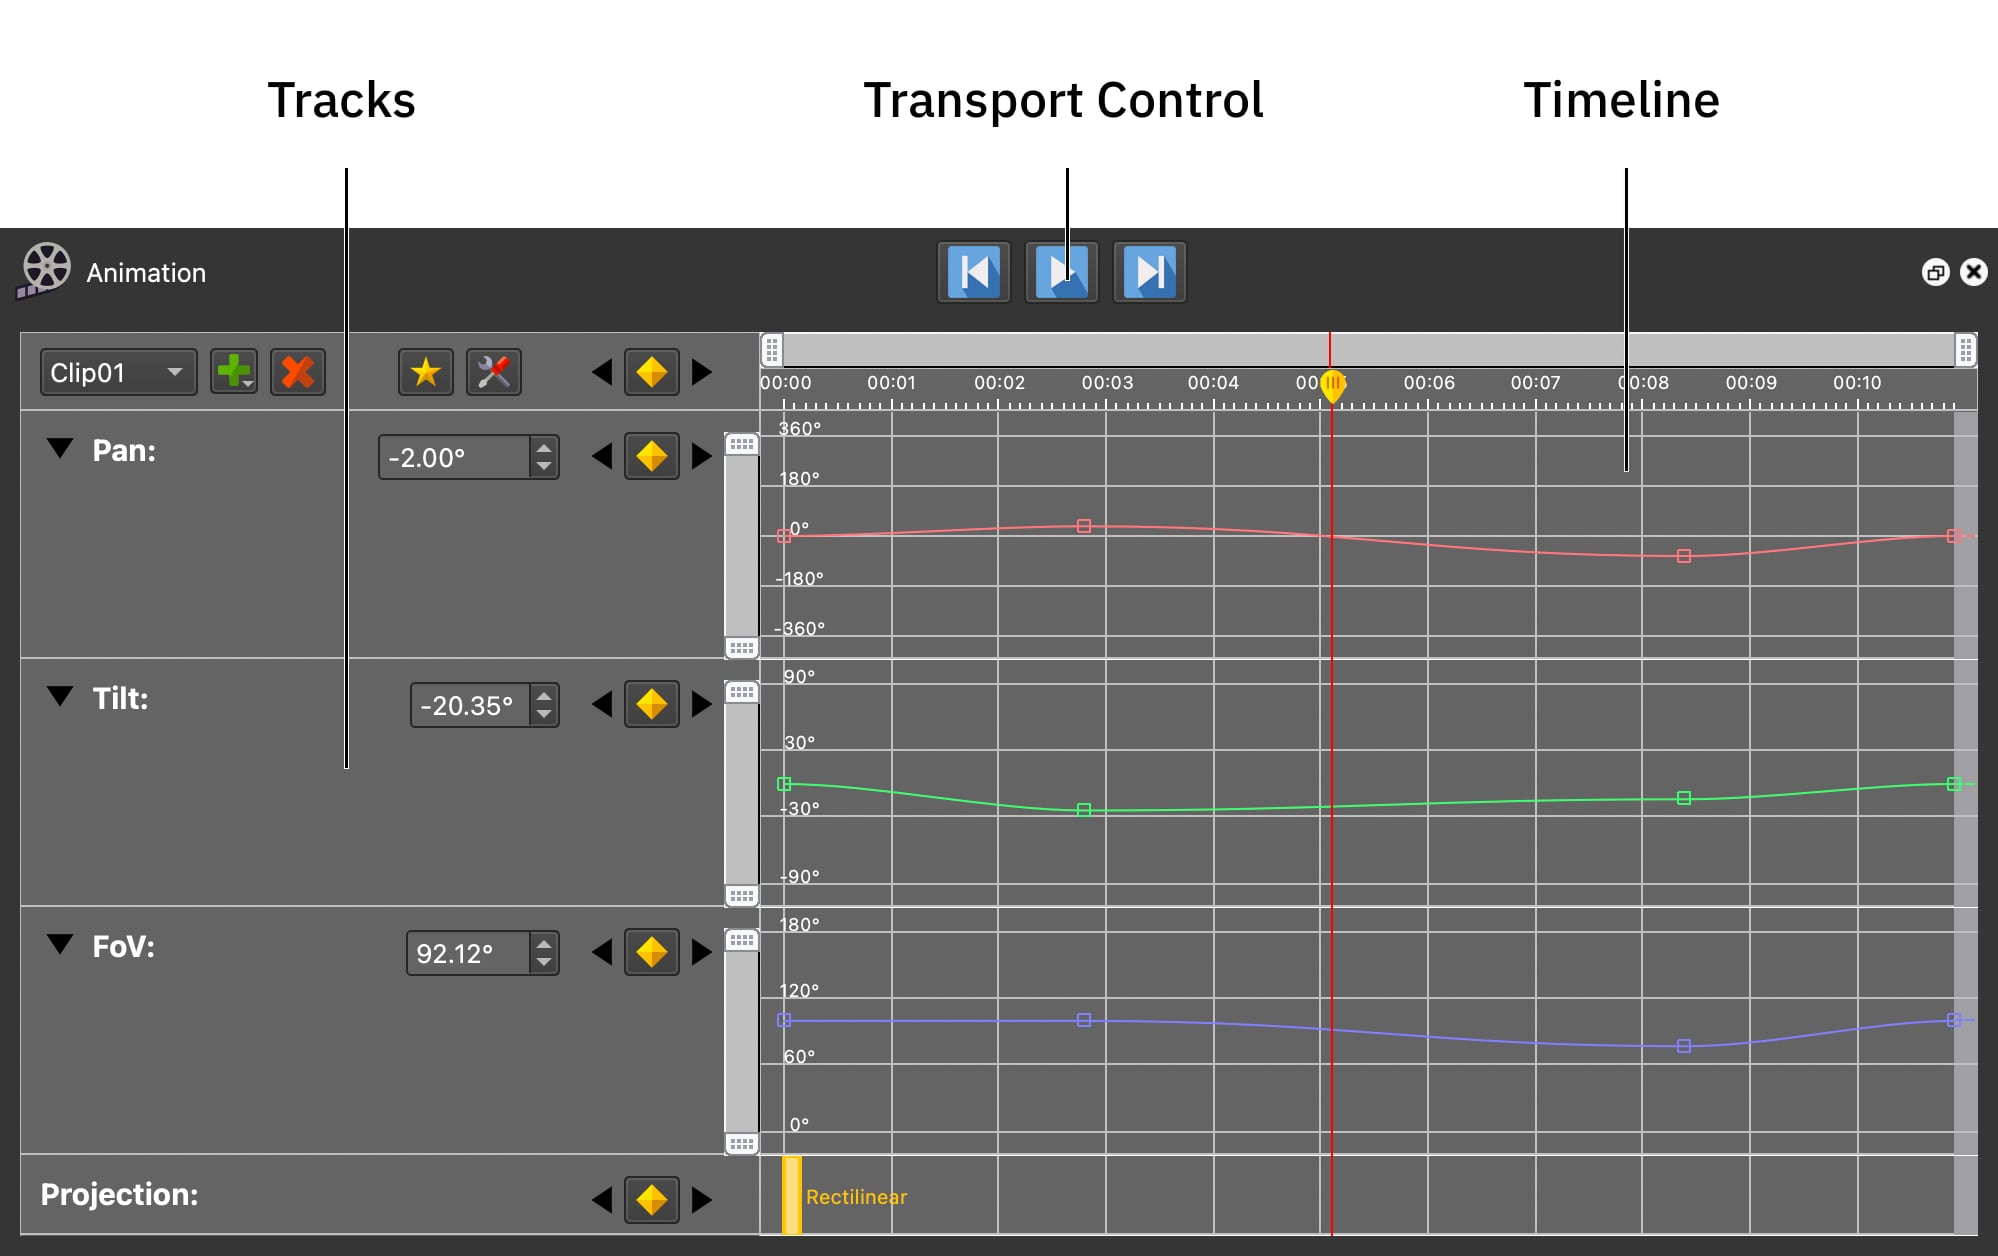
The editor opens at the bottom of the program window by default. Its header holds the transport controls, the clip menu, the keyframe buttons, and the time ruler. Below the header, each track of the clip has a row with its name, its current value, and its keyframes.
Transport Controls – The buttons in the panel’s title bar go to the beginning of the clip, play or pause it, and go to its end. The same commands are in the Animation menu:
-
Play/Pause – Space bar. You can change this shortcut in the Keyboard Shortcuts settings.
-
Begin – Page Up
-
End – Page Down
-
Back One Frame and Forward One Frame – Left Arrow and Right Arrow, while the Animation Editor has focus.
Loop Playback – Choose Animation > Loop to set what happens when playback reaches the end of the clip: Current Clip plays the clip again, All Clips continues with the next clip of the current sequence, and Off stops. These commands have no default keyboard shortcut, but you can assign one.
Clips – Choose the clip to edit from the menu at the top of the editor. It lists the clips of the node selected in the Tour Browser. Click the Add/Duplicate Clip button to add a clip, or click and hold it to choose from its menu:
-
Add Clip – A regular clip. It starts with keyframes for the node’s default view and is added to the current sequence.
-
Add Fly In Clip – A clip that plays when the node opens. It replaces the Fly In of the Viewing Parameters and is not part of any sequence. A node can have one Fly In clip.
-
Add Video Panorama Clip – A clip that runs alongside the node’s video panorama. It has no pan, tilt, field of view, or projection tracks, only additional tracks such as subtitles. This entry is available only when the node has a video input, and a node can have one video panorama clip.
-
Duplicate Clip – Copies the current clip, adds a number to its title, and adds the copy to the current sequence.
Click Delete Clip to remove the current clip. It is also removed from every sequence. See Clips, Sequences, Keyframes.
Toggle Keyframes – Click Toggle Keyframes (Shift-Return on macOS, Shift+Enter on Windows) to set keyframes for the current view at the playhead: pan, tilt, and field of view, plus the camera position on a 3D model node. If you have changed the projection in the Viewer, a projection keyframe is added too; when the clip already has an earlier projection keyframe, Pano2VR asks first. Click the button again without changing the view to remove the keyframes at the playhead (the keyframes at the start of the clip stay). Use the arrow buttons on either side to jump to the previous or next keyframe.
Add Magic Keyframes and Toggle Keyframes are unavailable for video panorama clips.
Magic Keyframes
Magic keyframes let you build a clip by looking around: set up a view in the Viewer, then click Add Magic Keyframes (Return on macOS, Enter on Windows). Pano2VR adds keyframes for that view after the last keyframe of the clip and works out how much time the move takes, so the animation runs at a steady speed. The clip gets longer when the new keyframes need more room.
The time is based on how far the view turns, with some extra time for a change in the field of view. A turn while zoomed in takes longer than the same turn while zoomed out, so the image moves across the screen at a similar speed. The pan always takes the shortest way round from the last keyframe, so a view a little past 180º does not send the camera almost a full turn the other way. If the projection in the Viewer differs from the one at the last keyframe, a projection keyframe is added too, and the move takes at least one second. On a 3D model node, the camera position is keyframed as well, and the move takes long enough to cover the distance at the walk or fly speed.
Magic keyframes are Continuous Bezier keyframes, so the camera moves smoothly through them.
Click Magic Keyframes Settings to set the speeds:
Speed – How fast the view turns, from 1 to 360 degrees per second. The default is 10º/s.
3D Walk Speed – How fast the camera moves through a 3D model in every camera mode except Fly, from 0.1 to 99.9 meters per second. The default is 1.5 m/s.
3D Fly Speed – How fast the camera moves in Fly mode, from 0.1 to 999.9 meters per second. The default is 10 m/s.
The camera mode that counts is the one the Camera Mode track has at the last keyframe or, if the clip has no camera mode keyframes, the mode of the Viewer.
The 3D speeds are real meters: Pano2VR converts the model’s own units with the model’s Units / Meter setting. When a 3D move takes longer than the turn, the longer time wins.
Timeline
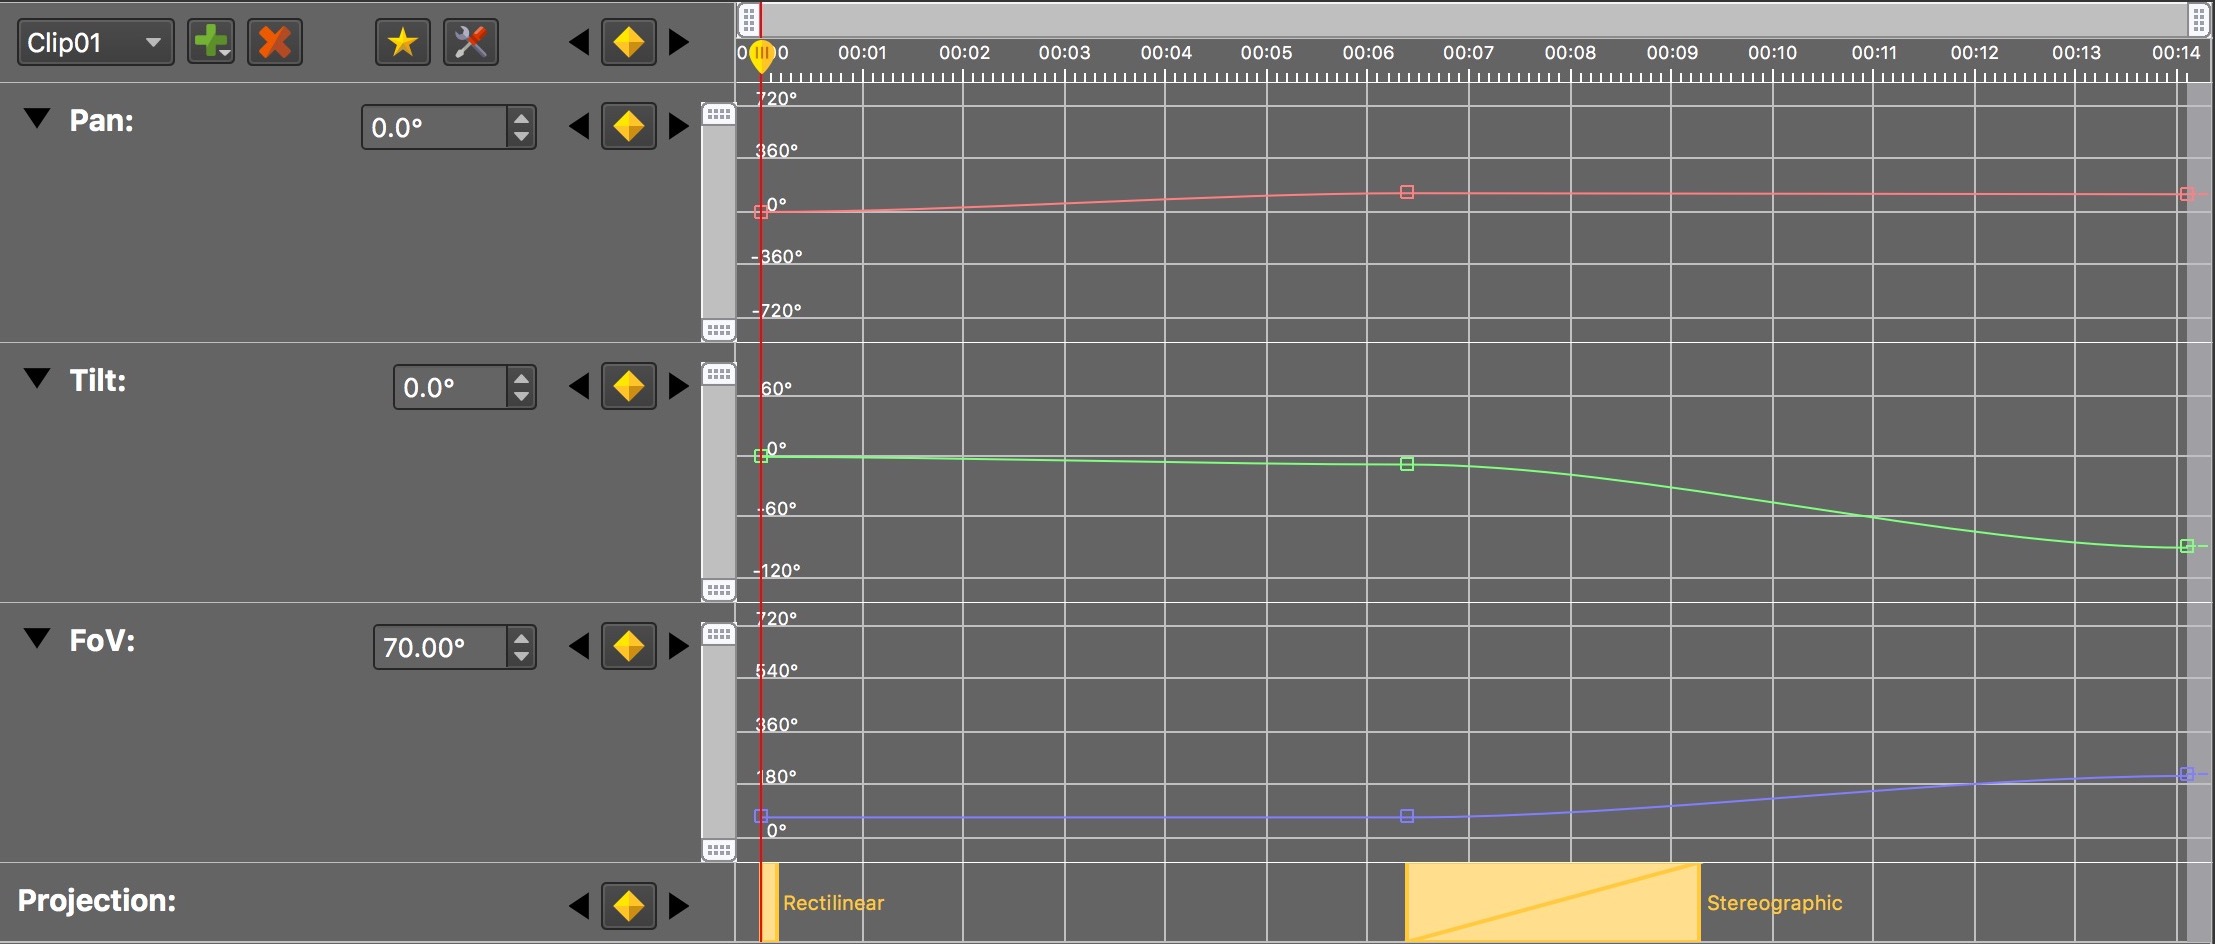
Tracks – A panorama clip starts with the Pan, Tilt, Field of View (FoV), and Projection tracks. The Projection track is not shown for flat panoramas. A 3D model clip has X, Y, Z, and Camera Mode tracks instead of the Projection track; see Animating 3D Model Nodes. You can add tracks for skin variables, tracking hotspots, and subtitles; see Additional Tracks.
Each track shows its current value at the playhead in a field that you can edit. Click the track’s Toggle Keyframe button to add or remove a keyframe on that track only, and use the arrow buttons on either side of it to jump to the track’s previous or next keyframe. Click the triangle next to a track’s name to collapse or expand it.
Viewing Limits – When the animation leaves the Viewing Limits of the node, that part of the track turns red and a warning symbol appears next to the track name. The check uses the same field of view as the Viewer, so a track is only marked when the view really leaves the limits. On a 3D model node, only the tilt and field of view limits apply.
Zoom – Each graph track has a vertical scroll bar. Drag its top or bottom handle to zoom in or out vertically. Right-click the scroll bar and choose Reset Scrollbar to reset it, or Fit Graph to fit all of the track’s keyframes into view.
The timeline has one horizontal scroll bar. Drag its handles to zoom the time scale in or out. Right-click it to choose from:
-
Reset Timeline – Resets the scroll bar to its default position and scale.
-
Trim Timeline to Last Keyframe – Shortens the clip so that it ends at its last keyframe. Not available for video panorama clips.
Clip Length – To change the clip’s length, scroll the timeline to its end and drag the right edge of the tracks. The pointer turns into a double arrow. Dragging a keyframe past the right edge scrolls the timeline and, once it reaches the end, makes the clip longer. The length of a video panorama clip follows the video.
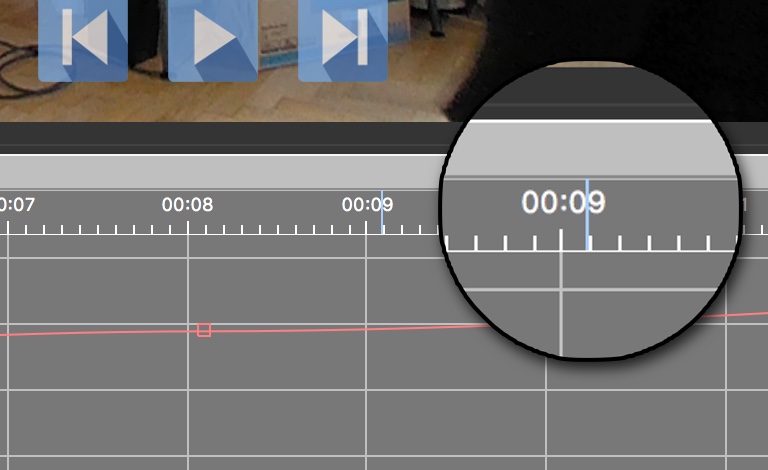
If the clip is a 360º video panorama that is shorter than the timeline, a blue indicator shows where the video ends. If the video loops, the indicator repeats.
Editing Keyframes
Click a keyframe to select it, and drag to move it in time. On a graph track, drag it up or down to change its value, and drag the handles of a Bezier keyframe to shape the curve. Drag a rectangle to select several keyframes, also across tracks, and Command-click (macOS) or Ctrl+click (Windows) to add a keyframe to the selection. To select all keyframes of the clip, choose Edit > Select All while the Animation Editor has focus. Press Delete to remove the selected keyframes.
With several keyframes selected, Option-drag (macOS) or Alt+drag (Windows) one of them to stretch or compress the whole selection in time.
Double-click a keyframe to edit its value. Double-click an empty spot of a track to add a keyframe there.
Right-click a keyframe to open its shortcut menu. On graph tracks, such as Pan, Tilt, and FoV, it offers:
-
Linear Keyframe, Bezier Keyframe, Continuous Bezier Keyframe, and Hold Keyframe – Change the keyframe type. See Editing Keyframes.
-
Smooth Continuous Bezier Keyframes – Lays the curve of the selected Continuous Bezier keyframes along the movement, so the animation flows through them instead of slowing down at each one. On a looping clip, this also works on the last keyframe, which is smoothed into the return to the start.
-
Stretch Keyframes – Opens the Set Stretch Value dialog, where you enter a percentage from 1% to 1000%. Values above 100% spread the selected keyframes over more time, values below 100% move them closer together. The first selected keyframe stays in place. Available when more than one keyframe is selected.
-
Invert Keyframes – Reverses the order of the selected keyframes in time.
-
Edit Value – Opens the Edit Value dialog. The graph and the Viewer follow the value while you change it, and Cancel restores the old value.
-
Copy Keyframe and Delete Keyframe – Copy or remove the keyframe, or all selected keyframes.
On the Projection track, Edit Value opens the Edit Projection Value dialog, where you choose the Projection Type (Rectilinear, Stereographic, or Fisheye) and the Transition Time of the change.
Copy and Paste – Copy the selected keyframes from the shortcut menu or with Command-C (macOS) or Ctrl+C (Windows). Move the playhead, then right-click an empty area of a track and choose Paste Keyframe(s), or press Command-V (macOS) or Ctrl+V (Windows). The first copied keyframe lands at the playhead and the others keep their spacing. Each keyframe goes back onto the track it was copied from, and a keyframe that already exists at that time takes the pasted value. You can paste into another clip too. If the copied keyframes belong to an additional track that the clip does not have, Pano2VR asks whether to create the track.
Additional Tracks
Right-click the track names on the left to open the tracks menu:
-
Add Track – Choose New to open the Add Track dialog, or pick a skin variable to open the dialog with that variable filled in. The list contains the variables of the skins used in your web outputs and the variables of tracks in other clips. When there are many, a searchable variable picker appears instead of a list.
-
Edit Track – Change the description or variable name of the variable or subtitle track under the pointer.
-
Remove Track – Removes the track under the pointer.
-
Hide Projections Track or Show Projections Track – Hides or shows the Projection track of a spherical panorama.
-
Hide Additional Tracks or Show Additional Tracks – Available when the clip has additional tracks.
Adding, removing, and hiding tracks is also possible from the Animation menu.
Keyframes on skin variable tracks are hold keyframes: the variable keeps its value until the next keyframe. Double-click a keyframe, or an empty spot of the track, to open the Edit Value dialog. Depending on the variable type, it shows a number field, a text field, or a true/false menu. Hover over the track to see the name of its skin variable.
Pano2VR keeps the track’s variable with the project. When you open the skin of a web output, the variable appears among the skin’s variables, with the value of the track’s first keyframe as its initial value. See Connecting to a Skin.
A hotspot track moves a point hotspot along with a video or an animation. It adds a pan and a tilt track for the hotspot. Move the playhead, drag the hotspot to its new place in the Viewer, and press Option-Return (macOS) or Alt+Enter (Windows) to set keyframes for its position. See Tracking Hotspots.
Add Track
The Add Track dialog creates an additional track for the current clip. Edit Track opens the same dialog, without the track type.
Track Type – Choose the kind of track:
-
Skin Variable – Sets a skin variable over time, for example to show and hide skin elements.
-
Hotspot – Animates the position of a point hotspot.
-
Subtitle Track – Fills a text variable from a subtitle file. Available only for video panorama clips.
Hotspot ID – The point hotspot to animate. The list shows the point hotspots of the current node that do not have tracks in this clip yet. Available for the Hotspot type.
Subtitle File – The .srt or .vtt file to read. Each subtitle becomes a
keyframe on the track, and the text is cleared when a subtitle ends. Available
for the Subtitle Track type.
Description – The track’s name in the editor, also used as the variable’s description in the skin. It cannot be empty.
Variable Name – The name of the skin variable the track sets. Spaces are removed, and each variable can have only one track per clip.
Variable Type – Choose Number, Text, or Boolean. Subtitle tracks are always text. The type cannot be changed later.
If the variable is already defined in the skin of a web output, the track’s first keyframe starts with the variable’s initial value.
Animating 3D Model Nodes
3D model nodes are animated like panorama nodes, with a few differences:
-
Next to Pan, Tilt, and FoV, the editor shows X, Y, and Z tracks that animate the camera’s position in the model’s own coordinates, so the camera can travel through the model. There is no Projection track.
-
The Camera Mode track switches the camera between Orbit, Fly, Walk, and Fly Over during the clip. Choose the mode in the track’s menu, where other tracks show their value, and click the track’s Toggle Keyframe button, or double-click the track. These are hold keyframes: the mode changes at the keyframe and stays until the next one.
-
Toggle Keyframes and Add Magic Keyframes also keyframe the camera position. Magic keyframes time the move with the 3D Walk Speed or 3D Fly Speed from the Magic Keyframes Settings.
-
The viewing limits check only tilt and field of view.
3D model clips play in the Viewer and in the web output, including looping clips. The Animation output cannot render a 3D model, so it leaves these clips out and tells you which ones.
See Animating a 3D Model for a step-by-step example.