Tour Browser
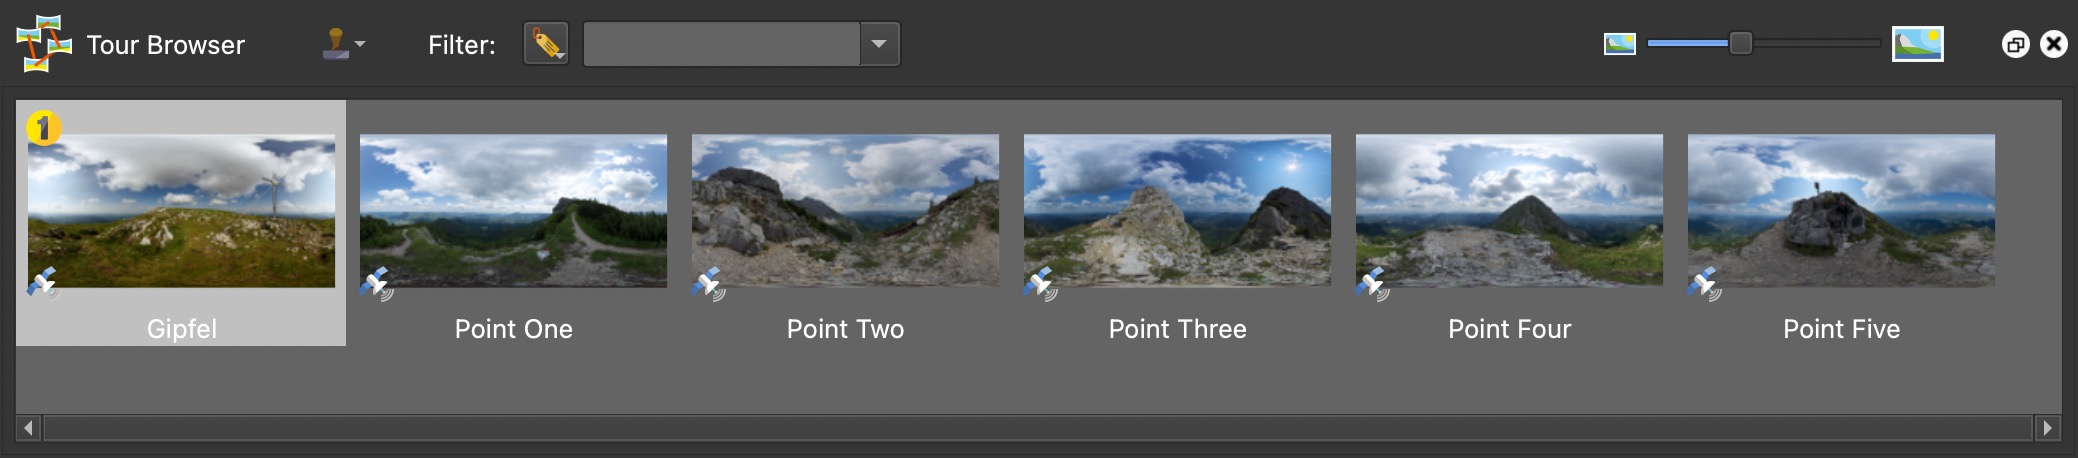
The Tour Browser holds and organizes all the nodes of a tour, each shown as a thumbnail. Add, sort, tag, and filter nodes here.
★ The Tour Browser is available in Pano2VR Pro only.
The Tour Browser shows every node of the tour
as a thumbnail. Add nodes by dragging images, videos, or 3D models from your
file system into the Tour Browser, or by dropping a folder. From a folder,
Pano2VR adds the images and .mov videos inside it; subfolders are not
included. While the Tour Browser is empty, it shows a large add icon as a
reminder that you can drop panoramas there.
Selecting and Arranging Nodes
Click a thumbnail to open that node in the Viewer. Select more nodes by Command-clicking (macOS) or Ctrl+clicking (Windows) additional thumbnails, by Shift-clicking to select a range, or by dragging a selection rectangle in an empty area of the Tour Browser. Hold Command (macOS) or Ctrl (Windows) while dragging the rectangle to add to the current selection.
Drag a thumbnail to a new position to change the order of the nodes in the tour. If several nodes are selected, they move together as a block. You can also drag thumbnails to the Viewer, for example to create a hotspot that links to the node, or onto the Tour Map to place them.
Press Delete or Backspace to remove the selected nodes from the tour. Pano2VR asks you to confirm first.
Shortcut Menus
Right-click (or Control-click on macOS) a thumbnail or an empty area of the Tour Browser to open a shortcut menu.
Thumbnail Image
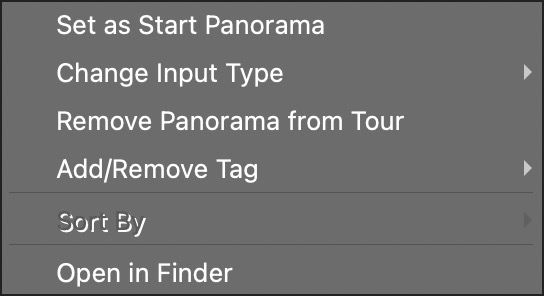
Right-click any thumbnail to bring up the following options. When the node you right-click is part of the selection, Change Input Type and Add/Remove Tag apply to all selected nodes; otherwise they apply to that node only.
-
Set as Start Panorama – Makes this node the one the tour starts with.
-
Change Input Type – Change the input type: Auto, Equirectangular, Cube Faces, Cylindrical, Flat, Strip, Strip VR, Cross, Tee, or VR180. See the properties page to learn more about the different types. For example, if you added several flat images but want to change their input type, filter the nodes by the Flat auto tag, select them all, and choose the new input type.
-
Remove Panorama from Tour – Removes the node and its settings from the tour. With several nodes selected, this reads Remove Selected Panoramas from Tour.
-
Add/Remove Tag – Add a tag to the nodes, or remove it. The menu lists the tags added in the User Data (auto tags aren’t listed); tags the nodes already have carry a checkmark. Choose Add New Tag to type a new tag.
-
Sort By – Choose how the selected nodes are sorted: User Data Title, User Data Description, User Data Source, User Data Capture Date & Time, Node ID, or User Data Custom Node ID. This is available when more than one node is selected; to sort the whole tour, select all nodes first (Command-A on macOS, Ctrl+A on Windows). A Cloner in the Skin Editor lists nodes in this order, so to build a menu sorted by title, sort by title here.
-
Open in Finder/Show in Explorer – Shows the image file in the Finder (macOS) or File Explorer (Windows).
Tour Browser
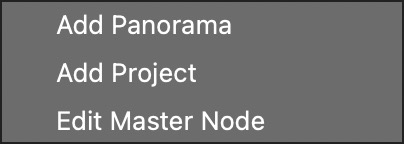
Right-click an empty area of the Tour Browser to bring up these options:
-
Add Panorama – Add another panorama to the tour. This opens a dialog where you can pick the file.
-
Import Project – Add the nodes of another Pano2VR project file (
.p2vr) to this one, including their settings, maps, and floor plans.★ Tip Move all assets from both projects to the same folder before combining projects. -
Edit Master Node – Edit the master node. The Viewer shows an empty panorama to indicate that you’re editing the master node. This option is available only when the project contains more than one node.
Image Tooltip
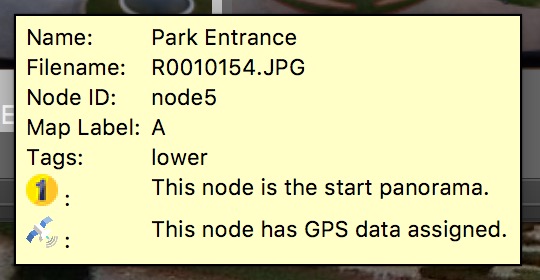
Hover the pointer over a thumbnail to see a tooltip with the following information:
-
Name – The node’s title from the User Data, or its file name.
-
Model – For 3D model nodes, the file name and path of the model file.
-
Filename – The file name and path of the image. For cube faces, this is Filenames and lists all faces.
-
Node ID – The internal node ID. To see it, select Show internal node ID on the Advanced tab of the Settings.
-
Map Label – The node’s label on its pin in the Tour Map. To see it, select Show map labels in tour browser & map on the Advanced tab of the Settings. The label is also shown in a red circle at the top of the thumbnail.
-
Custom Node ID – The custom node ID, if one has been entered in User Data.
-
Size – The size of the input.
-
Tags – The User Data tags and floor plan tags of the node. Tags with an assigned color are highlighted in that color. Tags with a color or symbol assigned in User Data are also shown as a colored dot or symbol on the thumbnail itself.
-
Start Panorama – The symbol with the number one marks the start node of the tour.
-
GPS – The satellite symbol shows that GPS data is assigned to the node.
-
Warning – In a tour, a warning symbol appears on the thumbnail and in the tooltip when the node has no incoming hotspots, no outgoing hotspots, or broken auto place point hotspots. The tooltip tells you which is the case.
While a node’s image data is still loading, an hourglass symbol displays on the thumbnail.
Filtering
Filters help you find and organize nodes in a large tour. Tags are the main tool: when you import an image, the name of its folder is added as a tag, which is a fast way to tag a lot of images at once. On a Mac, your Finder Tags are imported as well. You add more tags in the User Data, with Stamp Tags, or by dragging a tag onto a thumbnail.
Click the button next to Filter to add a filter:
-
Tags – Show only the nodes with a certain tag. Choose from the tags used in the project, including floor plan and 3D model tags, and the auto tags.
-
Text – Show only the nodes whose text contains what you type (at least 2 characters). Click the Text label with the small arrow at the start of the filter to choose where to search: User Data (the title, description, author, date and time, copyright, source, information, and comment) or Filename.
-
Distance – Show only the nodes within a certain distance of the current node. Enter the distance in kilometers or miles; unlimited (0) turns the limit off. This needs latitude and longitude in the nodes’ User Data. There can be one distance filter at a time.
You can combine filters, for example tags and distance: a node must pass all of them to be shown. Click the × of a filter to remove it.
< changes to >.You can also click a tag in the Overview panel to filter the Tour Browser by it.
Learn more: Filtering Nodes
Stamp Tags
Click Stamp Tags to create a new tag with New Tag, or to pick an existing tag from the menu. This puts the Tour Browser in stamp tags mode: click a node’s thumbnail to add the tag, and click it again to remove it. Click Stamp All Nodes to add the tag to all nodes currently visible in the Tour Browser (or, when several nodes are selected, only to the selected nodes), and Remove Tag from all Nodes to remove it from them. To leave stamp tags mode, click Exit Stamp Tags Mode or press Esc (Escape).
Learn more: Adding Tags
Dragging Tags
You can drag a tag from the Tags field of a node’s User Data onto another node’s thumbnail in the Tour Browser to add the tag to that node. The tags of a floor plan, a 3D model, and a Tour Map can be dragged the same way. Drop the tag on the thumbnail image itself. The tag is added only to the node you drop it on, even when several nodes are selected; a node that already has the tag stays unchanged.
Thumbnail Size
Drag the slider between the two image icons to change the size of the thumbnails. The Tour Browser automatically arranges the thumbnails in rows or columns to fit the panel’s shape.