Pinning Images
Learn how to pin images to the panorama with correct distortion.
-
In the Viewer, choose Images from the Viewer Modes. Or by using the keyboard shortcut
I. -
Drag an image to the Viewer. Or double-click in the Viewer and navigate to your image to add it.
Once added, a transparent version of the image will appear. It is only transparent in the Viewer to help aid placing and positioning. And the Properties panel will populate with the image properties.
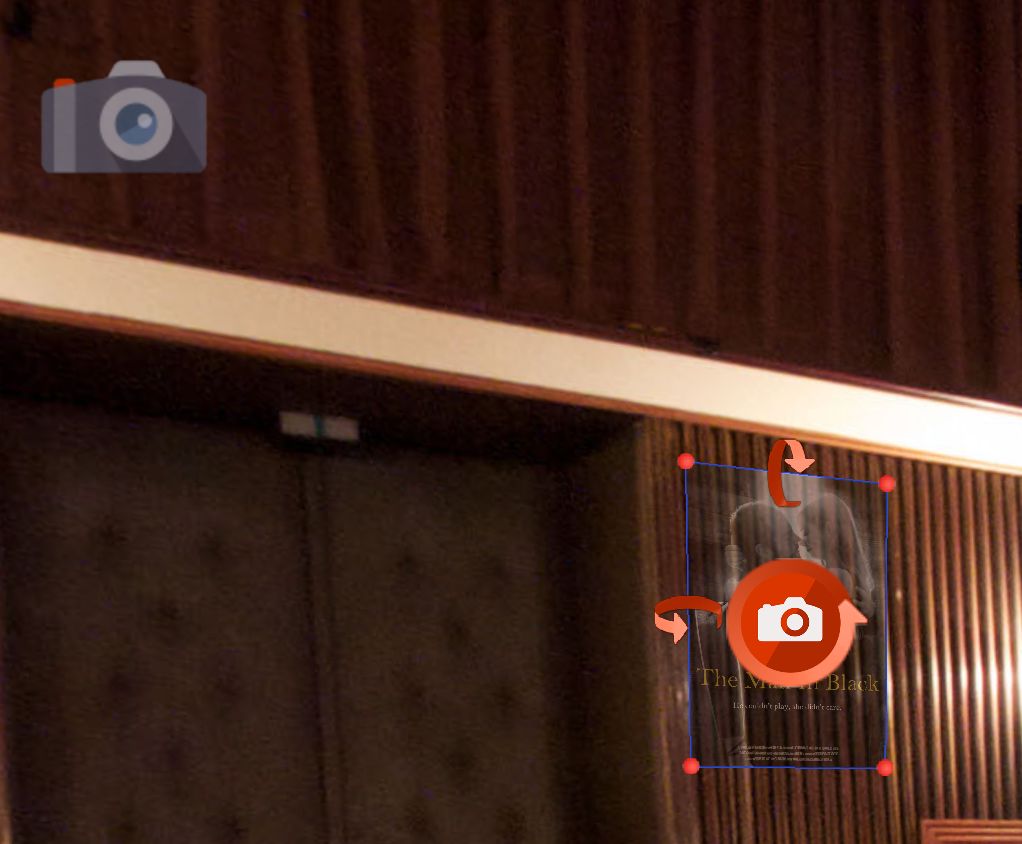
Pinned Image -
Adjust the image to the panorama by doing one or all of the following:
- Drag the center icon to move the whole element into position.
- Drag the red corner handles onto the corners of the spot where the image belongs, for example a picture frame. Pano2VR fits the image’s position, rotation, field of view, and vertical stretch to the four corners. Select Lock next to Vertical Stretch to keep the image’s aspect ratio while it’s fitted.
- Option-drag (macOS) or Alt+drag (Windows) a corner handle to resize the whole image. Dragging toward the center makes the image smaller.
- Drag the top arrow up or down to tilt the image forward or backward on the horizontal axis.
- Drag the left arrow up or down to turn the image on its vertical axis.
- Drag the center arrow up or down to rotate the element.
★ Tip Command-drag (macOS) or Ctrl+drag (Windows) the arrows for finer adjustments. -
To make the image interactive, choose a Click Mode.
Pop Out Original – When the image is clicked on, the image will animate forward and appear in its original size which could extend beyond the browser window.
Pop Out Fit – When the image is clicked on, the image will animate forward and will scale to the size specified in Scaling. The next click will return the image to its original position.
To show that the image is interactive, enable the Hand Cursor. When the mouse is over the image, the cursor will change to a hand, indicating interactivity.
Select Hide when pinned to keep the image hidden in the panorama while it isn’t popped out.