Learn how to add a subtitle track to your virtual tour using the video panorama clip in the Animation Editor.
The Video Panorama Clip provides three types of tracks. The Subtitle Track is a
text variable track filled from a subtitle file. You can then use the variable
created here in a Text Box to show the subtitles.
Add a video panorama to the project.
Open the Animation Editor.
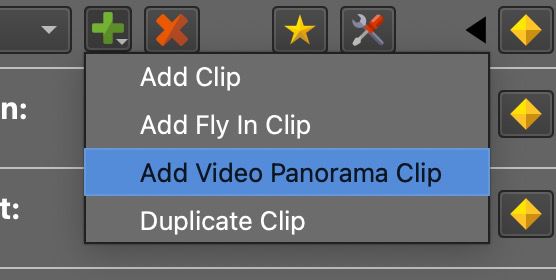
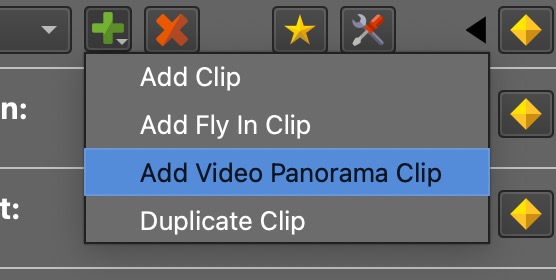
Add a Video Panorama Clip.
Hold the Add Clip button to add a Video Panorama Clip.
Right-click in the Animation Editor and choose Add Track > New.
Add a new track for a Video Panorama clip.
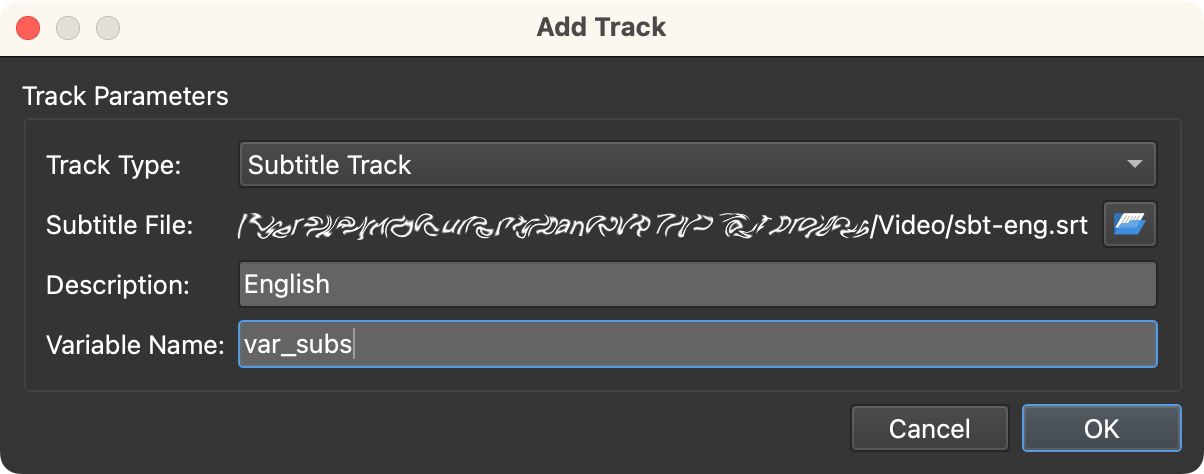
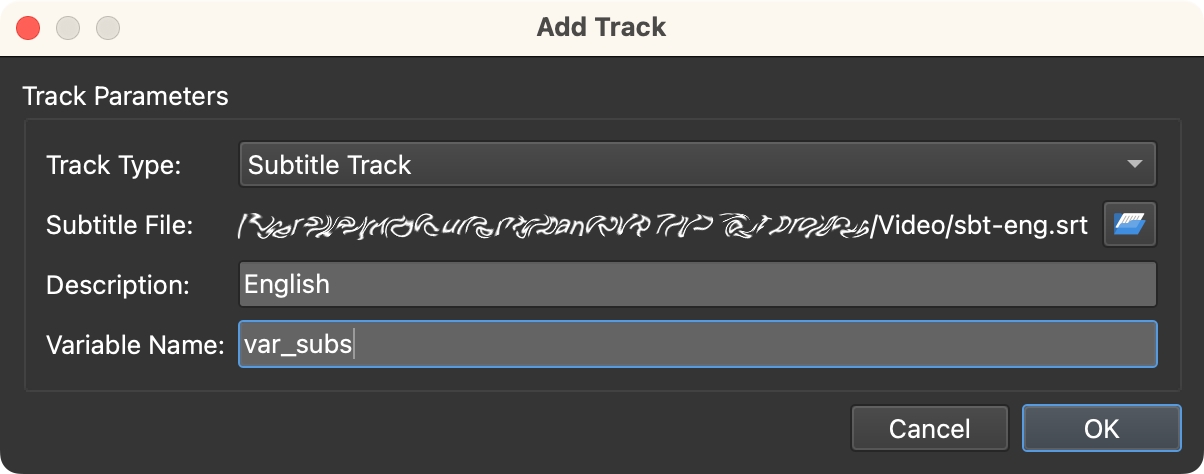
In the Add Track dialog, choose Subtitle Track for Track Type.
Choose your subtitle file. Pano2VR reads .srt and .vtt files.
Add a short description and provide a variable name like var_subs. Then
click OK.
The Add Track dialog with the subtitle track settings.
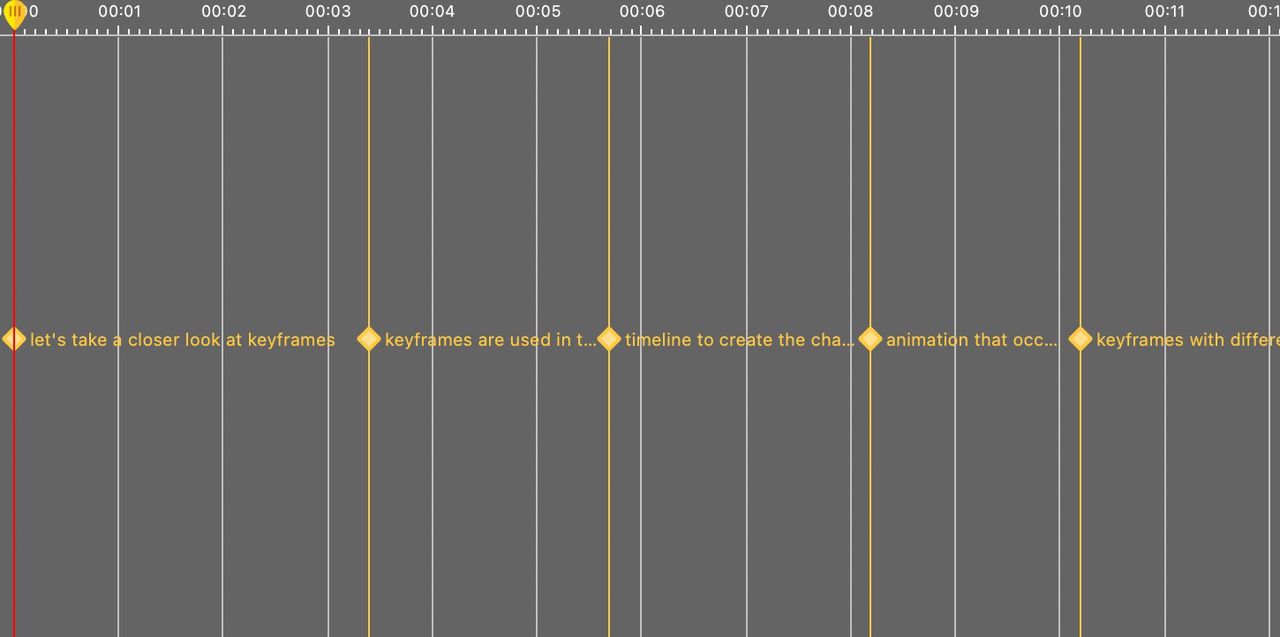
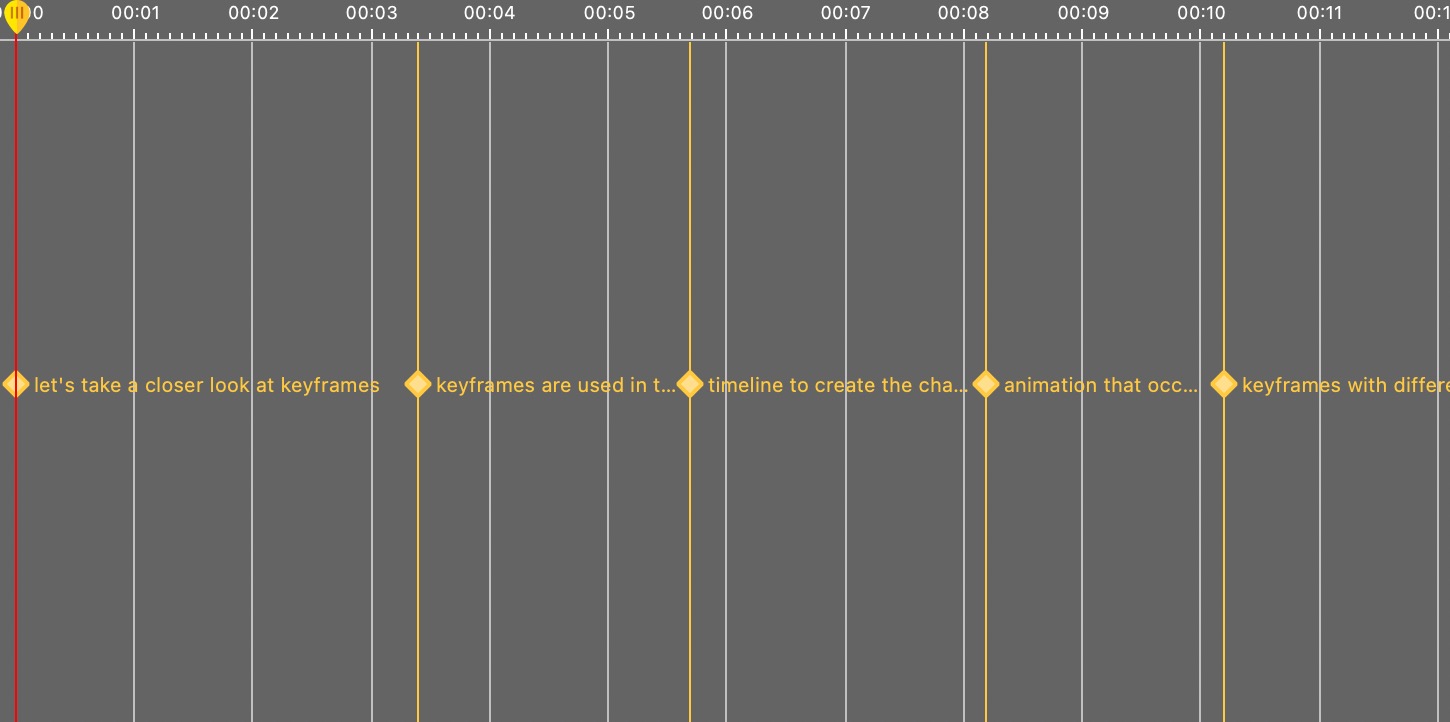
When the file is added, the track is populated with keyframes: one for each
subtitle, and an empty one where a subtitle ends and no other begins. If you
zoom in to the track, you’ll see the text of each keyframe.
Subtitle track with keyframes.Subtitle track zoomed in.
Open the Skin Editor or go to the Web Output and choose a skin.
In the skin properties (click outside of the Canvas to show the properties)
and expand the Variables pane. There, you’ll see the Subtitle variable
you added in the Animation Editor.
Subtitle Track as variable in Skin Editor.
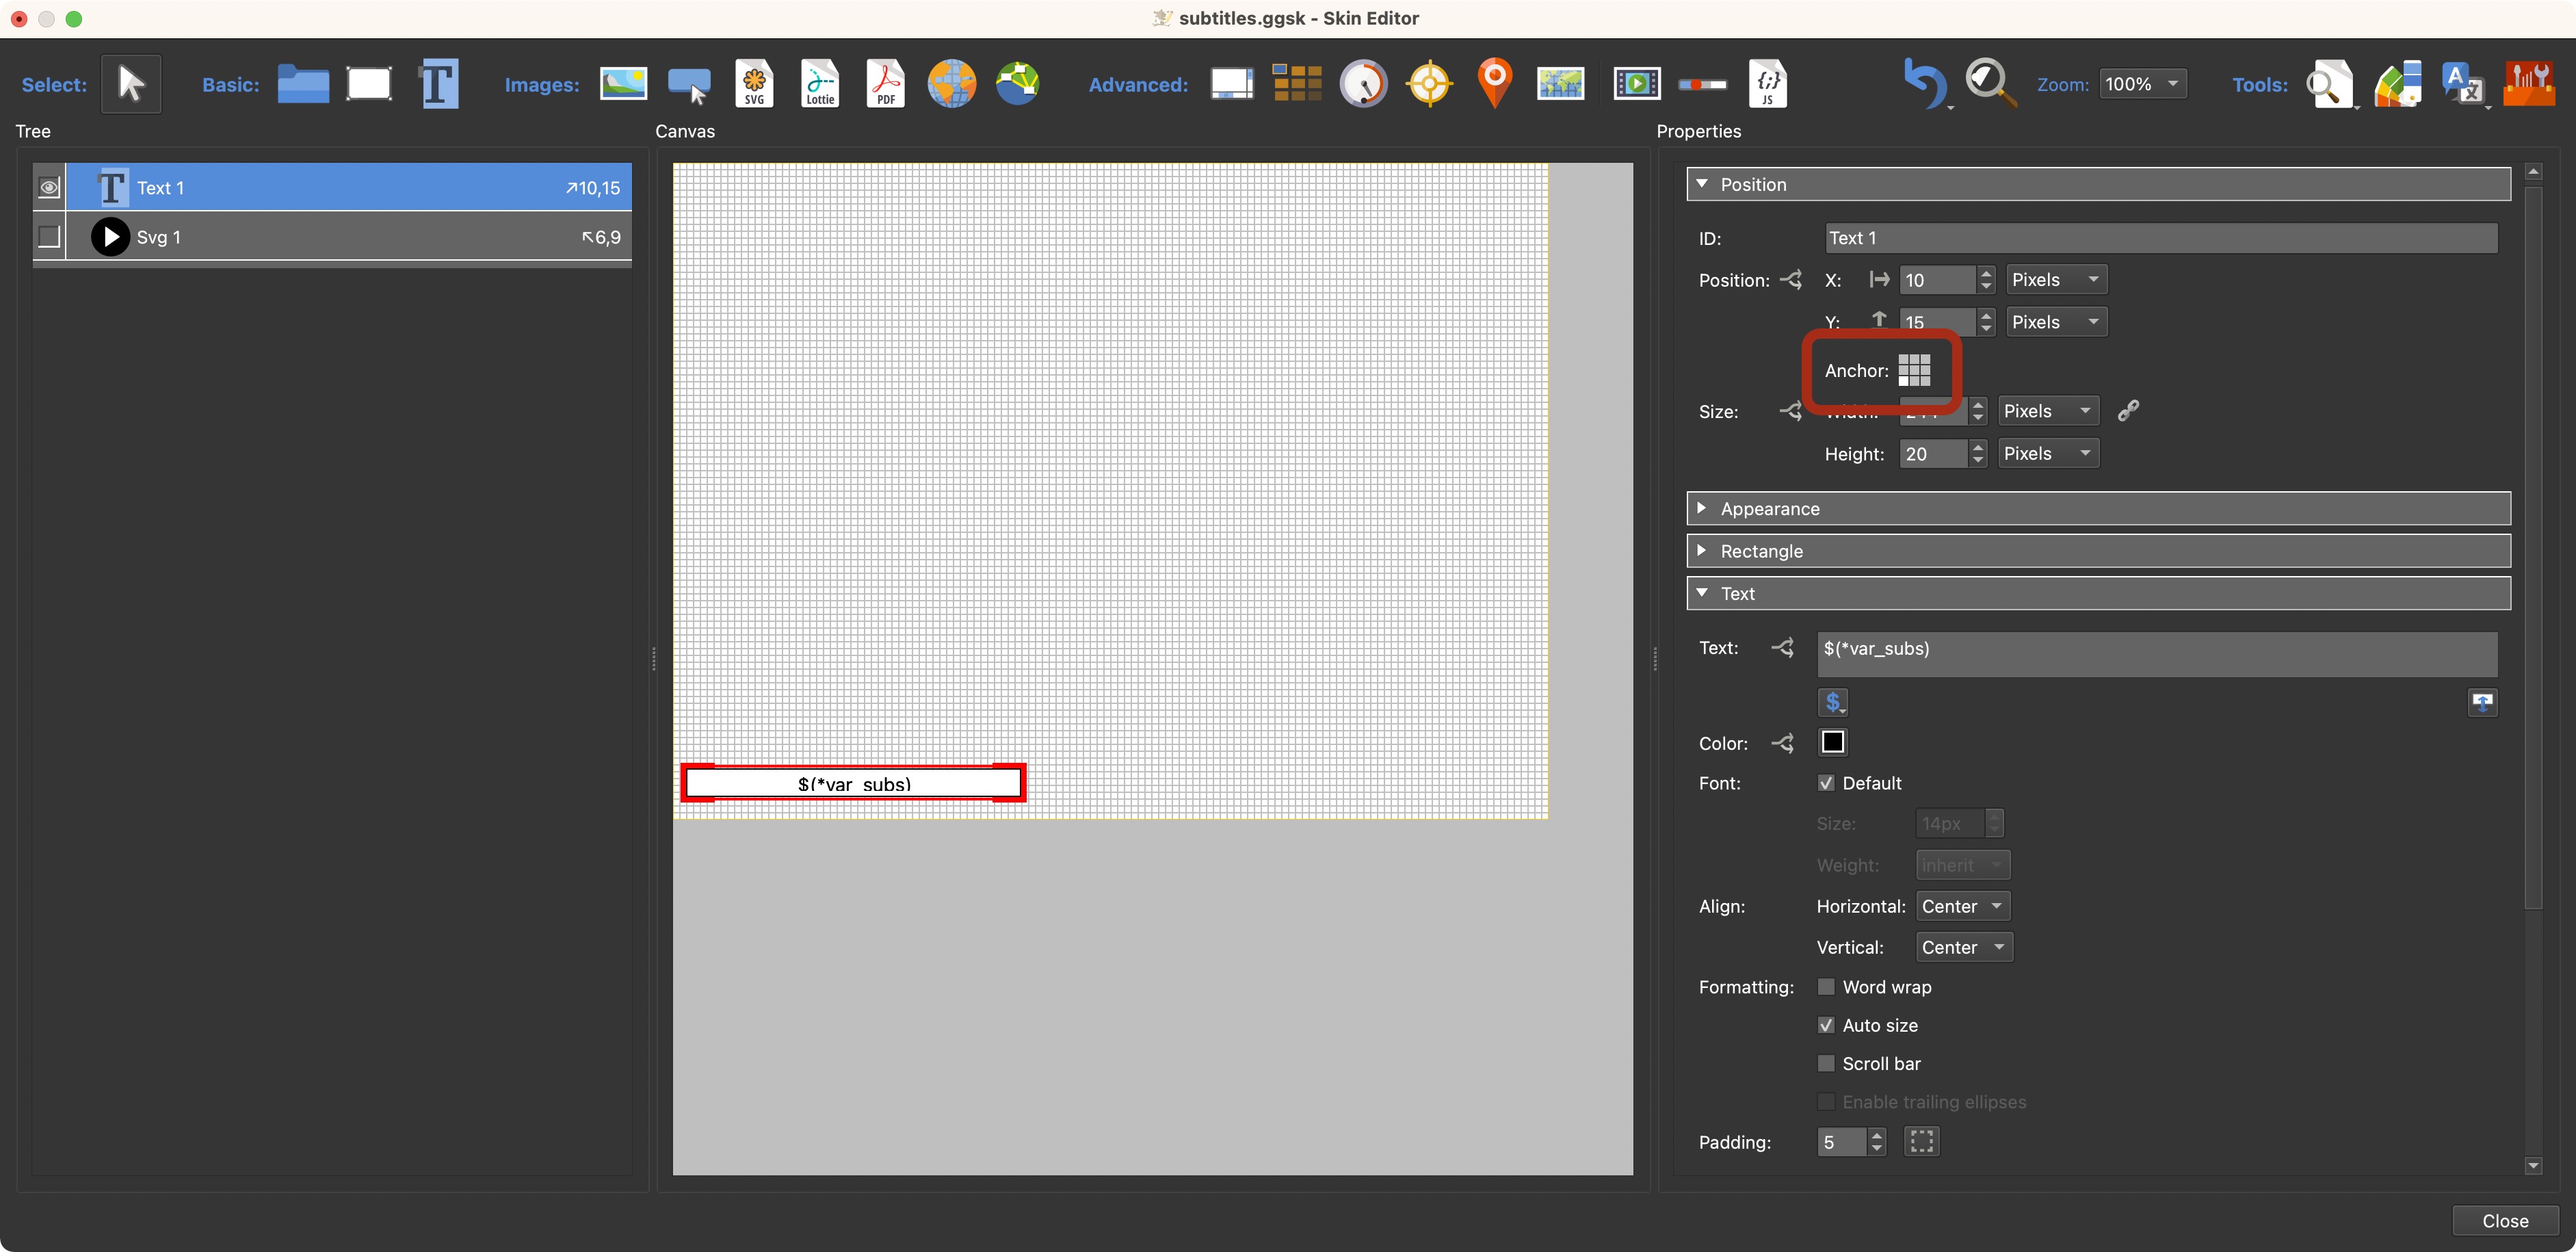
Add a Text Box. This shows the subtitles.
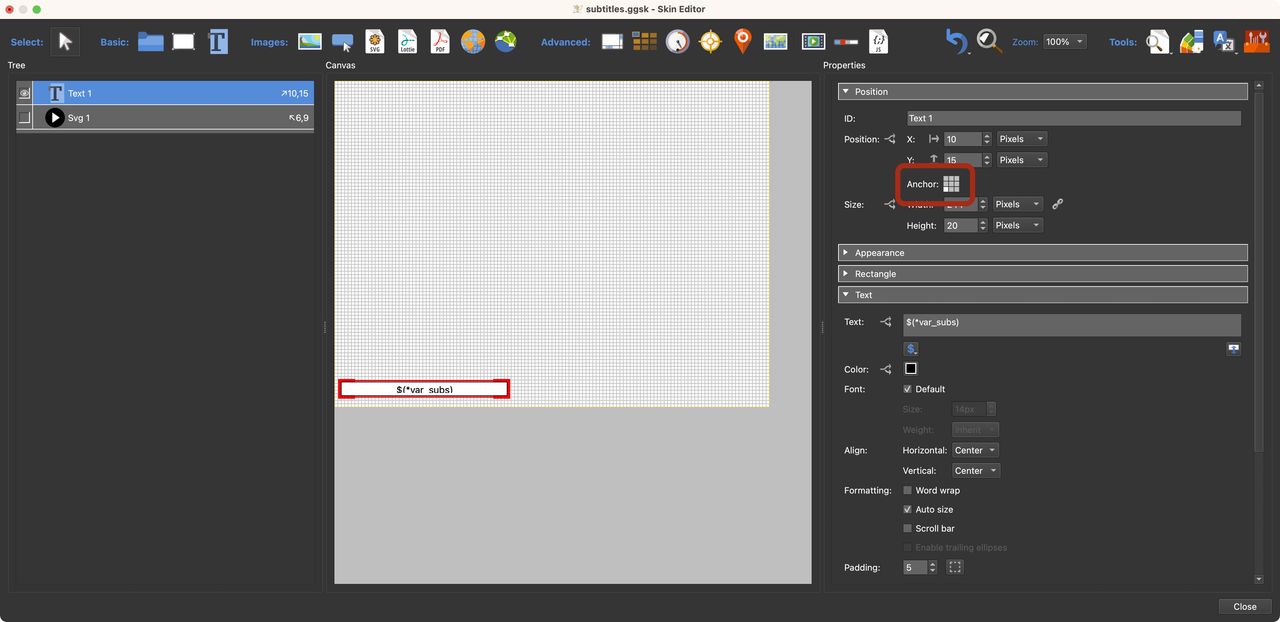
Place the text in Canvas and anchor it. For example, place the text box in
the lower left corner and change the Position anchor to the lower left
corner.
Text Box positioned and anchored to the lower, left corner.
Make any changes to the text box’s background or border.
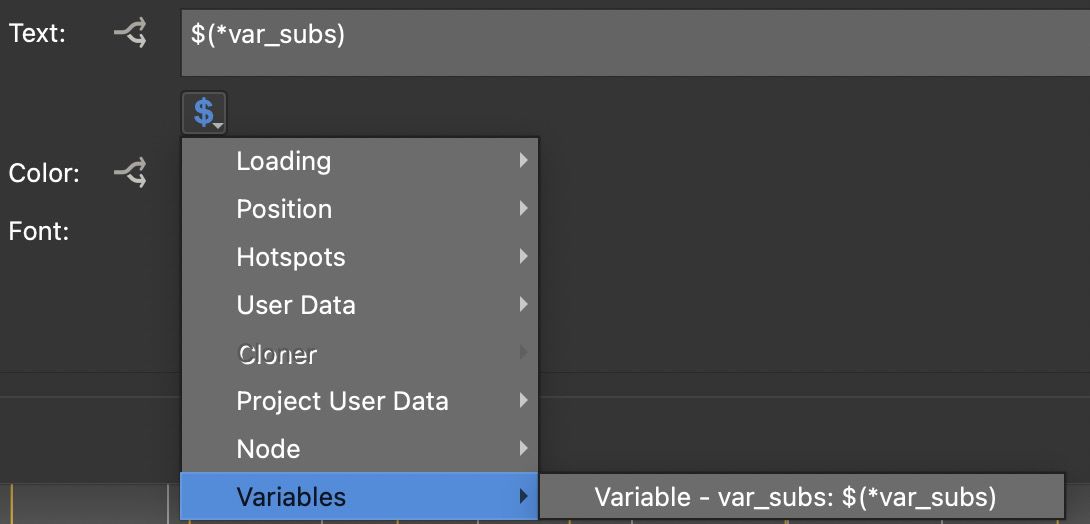
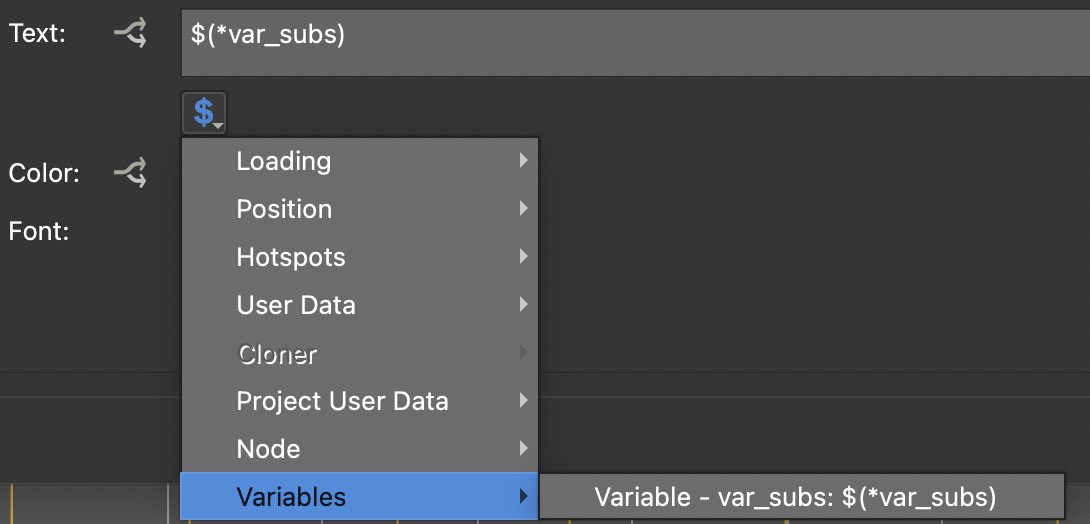
For Text, add your subtitle variable. Go to the placeholders button at the
bottom of the text field. Go to Variables and then to the variable you
added. Add the variable to the text.
Choose Autosize for formatting.
Optionally, add some padding to the text box. Try a setting of 5.
Add anything else you may need to the skin.
Save the skin.
Output the project.
You should now have subtitles or captions appearing in time with the video.
★ Tip Since Pano2VR 8.1, videos can also carry a WebVTT subtitle track directly. The browser keeps the cues in sync with the video, no animation clip needed. The Animation Editor workflow described here remains useful when subtitles should follow an animation rather than a single video.