Clips, Sequences, and Keyframes
Clips, Sequences, and Keyframes are all the elements that we use to create animations.
The Editor is where the animation is created with Keyframes. To create an animation you first add clips. Depending on the type of animation you create, depends on which type of clip you’ll need. Clips get added to a Sequence which you can build to create a series of clips.
Clips
The first step in creating an animation is to add a clip. A clip is created for the node selected in the Tour Browser. Pano2VR has three kinds of clips. A regular clip is added to a sequence, which you can play in the web output or render in the Animation output. The Fly In and Video Panorama clips run in the background: they are not added to a sequence and are not used in the Animation output.
Add a New Clip
-
Click the Add/Duplicate Clip button in the animation panel (green plus) in the top, left corner of the Editor or double-click in the timeline if it’s the first clip.
-
Enter a Clip Title in the Enter Clip Title dialog, or click OK to accept the suggested title.
Any clips added here are added to the current sequence in the Animation Properties.
Click and hold the Add/Duplicate Clip button to add a clip, a Fly In clip for the current node or to duplicate the current clip.
Clip titles and lengths can be edited in the Animation Properties.
Add a Fly In Clip
A Fly In clip is used to create an overview or dramatic introduction to the project. For example, a fly usually starts with a little planet projection and then spins to a rectilinear projection.
This Fly In clip replaces the Fly In set in the Viewing Parameters. It is not part of any animation sequence and is not used in the Animation output.
-
Click and hold the Add/Duplicate Clip button in the animation panel (green plus) and choose Add Fly In Clip. The first keyframes are added to the timeline.
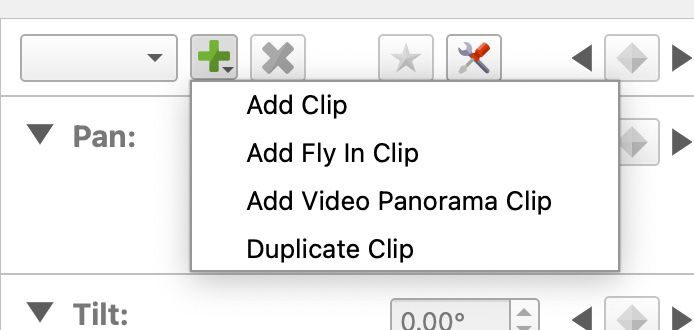
Menu for adding clips. Click and hold the button. -
Create a little planet for the first keyframe. In the Viewer, change the projection to Stereographic. Then zoom out and angle down (or up). Once you’ve got the image you want to begin with, click the Toggle Keyframes button. This updates the keyframes at the location of the playhead.
-
In the Viewer, change the end view of the fly in clip. Change the panorama to a Rectilinear projection and then move to the view on which it’ll end.
-
Click the Magic Keyframe button. Or move the playhead forward and then click the Toggle Keyframes button.
Add a Video Panorama Clip
The Video Panorama Clip runs concurrently with the current video panorama whenever no other clip is running. It is different from regular clips in that it does not interfere with the user’s ability to interact with the panorama, nor does it have tracks for pan, tilt, FoV, or projection. Use this clip to add subtitles, track hotspots, or to add variables.
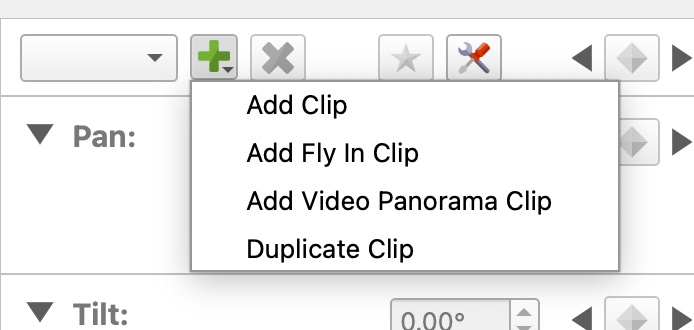
- Click and hold the Add/Duplicate Clip button in the animation panel (green plus) and choose Add Video Panorama Clip. This entry is available only when the node has a video input.
- Right-click in the Animation Editor and choose Add Track > New.
- In the Add Track dialog, choose a Track Type: Skin Variable, Hotspot, or Subtitle Track.
Sequences
A sequence is a collection of clips. Each clip that is created or added is added to the currently selected sequence. A single node can have numerous clips within one sequence.
The clips that make up the sequence are played back in the order they are listed in the Clips List.
-
In the Animation Output, you can choose which sequence to export.
-
In the Web Output, you can choose which sequence to use for autorotation.
-
In the Skin Editor, you can also choose which sequence to use for the Start Animation action. Mouse Click > Auto Rotate > Play/Restart Animation > Choose a sequence.
Create a New Sequence
-
In the Animation Properties, click the Add Sequence button (green plus).
-
Give the new sequence a title in the dialog that pops up.
With the new sequence added and selected in the sequence list, new clips are added to this sequence.
Build a Sequence
-
There are two ways of adding clips to a sequence:
- new clips that you create in the Animation Editor are automatically added to the current sequence
- you can add existing clips to the current sequence via the Clip Table in the properties panel:
Double-click the empty row or click the Add Clip button in the sequence’s clips list.
Choose a node and clip from that node to add.
-
Arrange the clips by dragging on the handles to the left.
-
Add an Animation Output.
-
In the Animation panel, choose the sequence from the list.
-
Output.
Keyframes
Keyframes are used in the animation timeline to create the animation that occurs between two keyframes with different values.
In Pano2VR there are two ways of creating keyframes, Normal and Magic.
Add Normal Keyframes
Move the playhead forward in the timeline and spin the panorama to the desired location. Then do any of the following:
-
Click the Toggle Keyframes button.
The Toggle Keyframes button at the top section of the editor adds a keyframe at the playhead’s current position for the Pan, Tilt, and FoV tracks in the Timeline, and for the X, Y, and Z tracks of a 3D model node.
The Toggle Keyframes button is also found in each animation track in the Timeline. Clicking one adds a keyframe only for that animation track.
Click the button again to remove the keyframe.
-
Double-click in any track. A single keyframe is added in the track.
Add Magic Keyframes
Magic Keyframes are added after the last keyframe of the clip and timed so that the view moves at a steady speed. The default speed is 10º per second. You can change it with the Magic Keyframes Settings button next to Add Magic Keyframes.
-
Spin the panorama to the desired view. You can also change the projection in the Viewer; Magic Keyframes then create a projection keyframe as well.
-
Click the Add Magic Keyframes button, or press Return (macOS) or Enter (Windows).
-
Repeat for the next view. Each new set of keyframes is placed after the last one, and the clip gets longer as needed.
The pan always takes the shortest way round, and on a 3D model node the camera position is included. See Magic Keyframes for how the timing is worked out.
Projections
The projections track also has keyframes but they are represented by a yellow band that shows the duration of the projection change.
To change Projections:
-
Place the playhead to where you want the projection to change.
-
Click the Toggle Keyframe button in the Projection track header or double-click in the track.
-
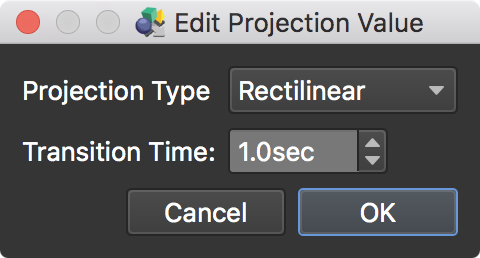
The Edit Projection Value dialog appears. Choose the projection (Projection Type) and the length (Transition Time) of the transition.
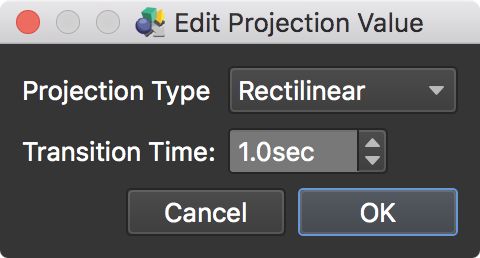
Edit Projection Value -
Click OK. You’ll see a yellow region representing the transition from the previous projection to the new one.
If the timeline is red in one of the animation tracks, this means that the animation extends beyond the viewing limits set in the Viewing Parameters. Adjust the keyframes to keep the animation within the viewing limits.
-
Add keyframes for Pan, Tilt and FoV to achieve the view you want.