Logic Blocks
When building a skin, sometimes you need a little more control over how elements react to user input or other events.
Logic Blocks will, for example, allow you to target a specific element to scale to a specific size depending on the player’s width, creating a responsive skin.
What is a Logic Block
Logic blocks are a way of automatically altering values of skin elements, making it possible to react to certain circumstances – using logic. These value changes can be activated by a wide range of triggers, from window size to user interactions, events from the panorama player, and much more.
Logic blocks can be applied to any skin element. Element properties that can have logic blocks will have an arrow button next to their name in the properties panel. If the element has a logic block applied the arrow will be orange, otherwise it is gray. To add a logic block, just click the gray arrow.
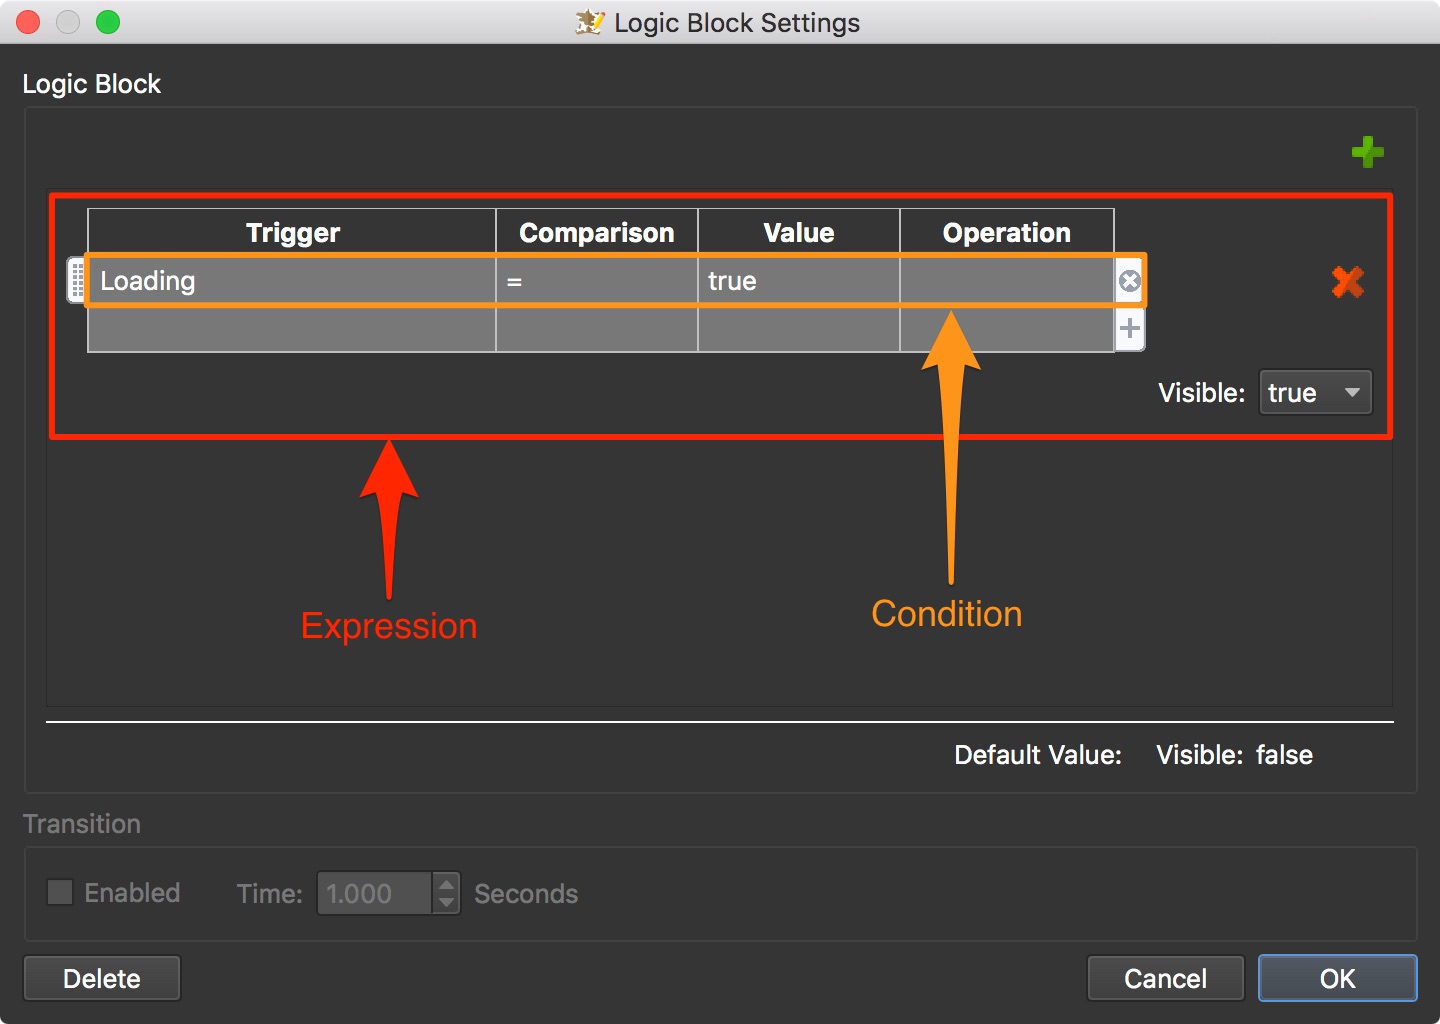
A logic block consists of expressions. Each expression consists of conditions. You can have multiple expressions in a logic block and you can have multiple conditions in an expression.
The Default Value is whatever was set in the properties panel of that property. In the above image, the logic block was applied to the Visible property and Visible was set to false. So, that element is initially not visible. It will only become visible when the panorama is loading.
The lower section is for Transitions and is made available for expressions that will change their size, appearance, location, etc. Just select Enabled to enable a smooth change and set the amount of time it should take to make that change.
Use the Delete button to remove the logic block.
Use the Copy and Paste buttons to copy and paste logic blocks to other elements.
Click Cancel to close the logic block without saving changes.
Click OK to save and apply the logic block.
To add a new expression, click the Add Expression button in the upper right corner. To delete an expression, click the red “x”.
Expressions are read from the top down. This means that the first expression found to be true will be used. If you need to change the order of the expression use the green arrows found next to each expression.
✭ For logic blocks that have two values (size, position, and scale), one value can can be left empty to use the parameter’s default value.
Hide elements when player is active
A simple example of using a logic block is to hide elements when the player is active (when interacting with the panorama or skin). You use a timer that has a logic block by default.
-
Open the Skin Editor.
-
Add an element. A Text Box, for example.
-
Select the Timer element in the Toolbar.
-
In the Canvas, drag around the Text Box. The Text Box will become a child of the Timer.
-
In the Timer properties, open the Timer panel and select Player inactive for Type.
-
In the Appearance panel, notice that the arrows next to Visible are orange. This means there is already a Logic Block applied. Click on the orange arrows.
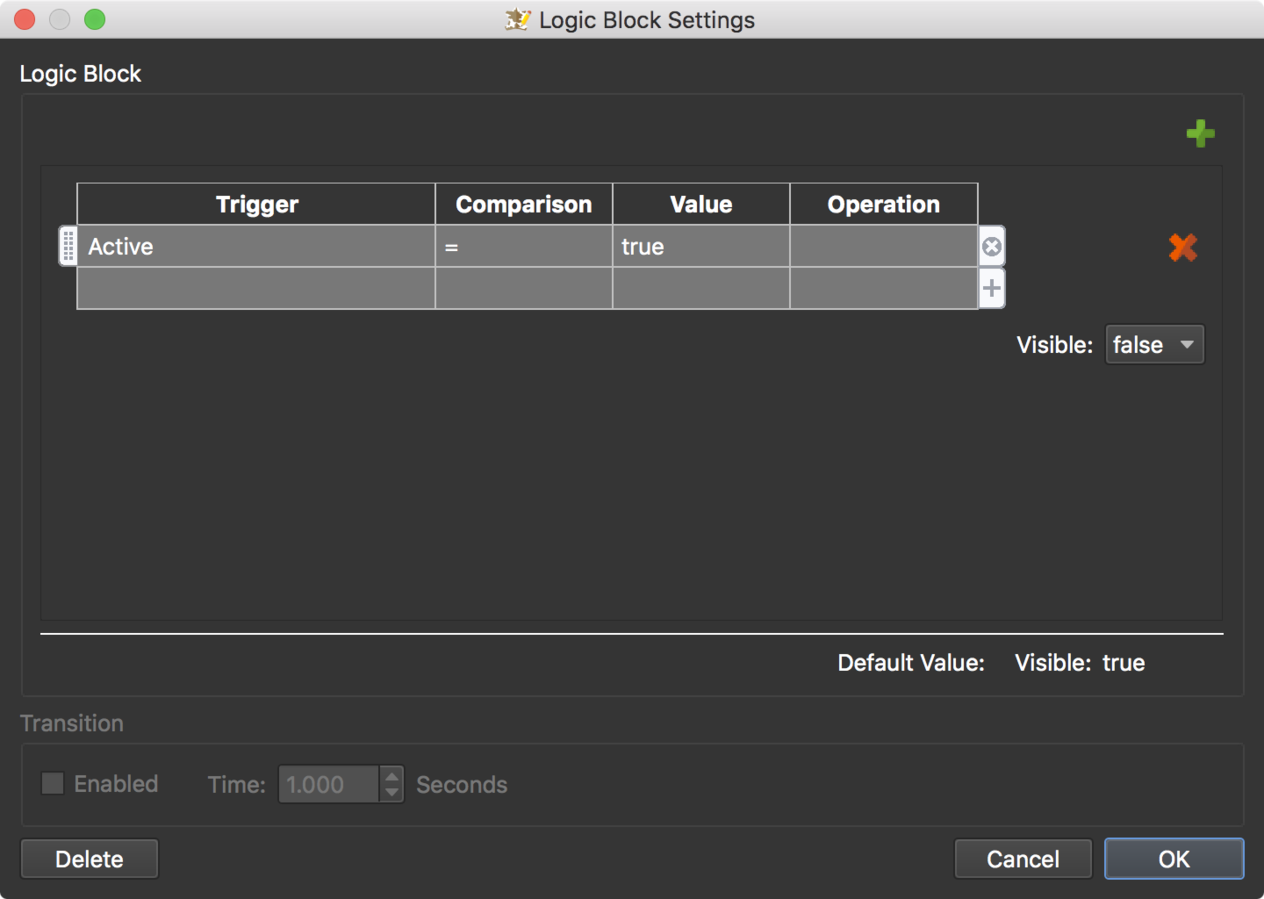
The Logic Block Settings opens and describes that if the timer is not (Value is false) active (Trigger is Active), the timer (and all of its child elements) won’t be visible. This is an expression with one condition.
We just need to make one adjustment to the expression. Change the value from false to True. Now it expresses, if the player is inactive (meaning, no user interaction) and therefore the active trigger of the Timer is true, then the Timer and all its children are invisible. Then, after 5 seconds (the timeout set in the Timer properties) the Timer becomes inactive and the Logic Block falls back to the default value of Visible = true.
Click OK to close the settings.
-
Use Live View to see it in action. When you spin or interact within the player, the text box will hide and when you stop interacting, the text box will appear again.
-
Save the skin.
Scale an element based on player width
You can use logic blocks to create a responsive skin (where the skin elements scale to the player’s width). This will require a logic block with multiple expressions.
Let’s scale a text box to twice its size when the player is wider than 1000 pixels and to 1.5 times its size when the player is wider than 600 pixels.
-
Open the Skin Editor.
-
Add a Text Box.
-
Go to the Appearance panel for the Text Box.
-
Click on the arrows next to Scaling. This will open the Logic Block Settings dialog.
-
Double-click in the table to add the first condition to the first expression (for when the player width is greater than 1000 pixels). The default Trigger will show up, which is exactly what we need, Player Width.
Set the Comparison to Greater Than (>). And set the Value to 1000.
Set the target value to 2 for X and Y.
So far, this explains if the player width is wider than 1000 pixels, then scale up the text box twice its size.
-
Add a second expression (for when the player width is greater than 600 pixels).
Click the green plus sign to add another table (expression). Add Player Width for the Target and set the Comparison to Greater Than (>). The value is 600.
Set the target value to 1.5 for X and Y.
This expression explains that if the width is greater than 600 pixels, then the text should be scaled up 1.5 times its size.
-
Select Enabled under Transition so it’s a smooth scale.
-
Save the skin.
✭ Note: The expressions are read top down. This means that the first expression found to be true will be used. In this example, if the screen width is greater than 1000 pixels, then the first expression will be used and the rest below will be ignored.
With scaling you have to be a little careful that images don’t become pixelated. You can also use the Is Mobile trigger to create responsive skins. Go here to read how and download a sample project.
Create a Multi-lingual Skin
Logic blocks can react to changes in skin variables. Here’s an example of how you would use variables with logic blocks.
-
Click in the Canvas to open the Skin Properties.
-
Double-click in the Variables table.
-
Add a variable:
Give the variable a Name. We used, language.
Select text for Type and give it an Init Value of English. This will be the default language. -
Draw a text box and add some text to it in the default language (our example uses English). In our example, this is the only element that will change languages.
-
Create some buttons to toggle different languages. For example, one for English, one for German and another for Spanish.
-
Give each button an action to change the value of the skin variable (change the language) when they are clicked:
This is the button to change the language to German. Add the same actions for each button, but change Value to the corresponding language. -
Select the text box that was created earlier. Go to the Text panel. Add a logic block to the Text property by clicking the gray arrows.
-
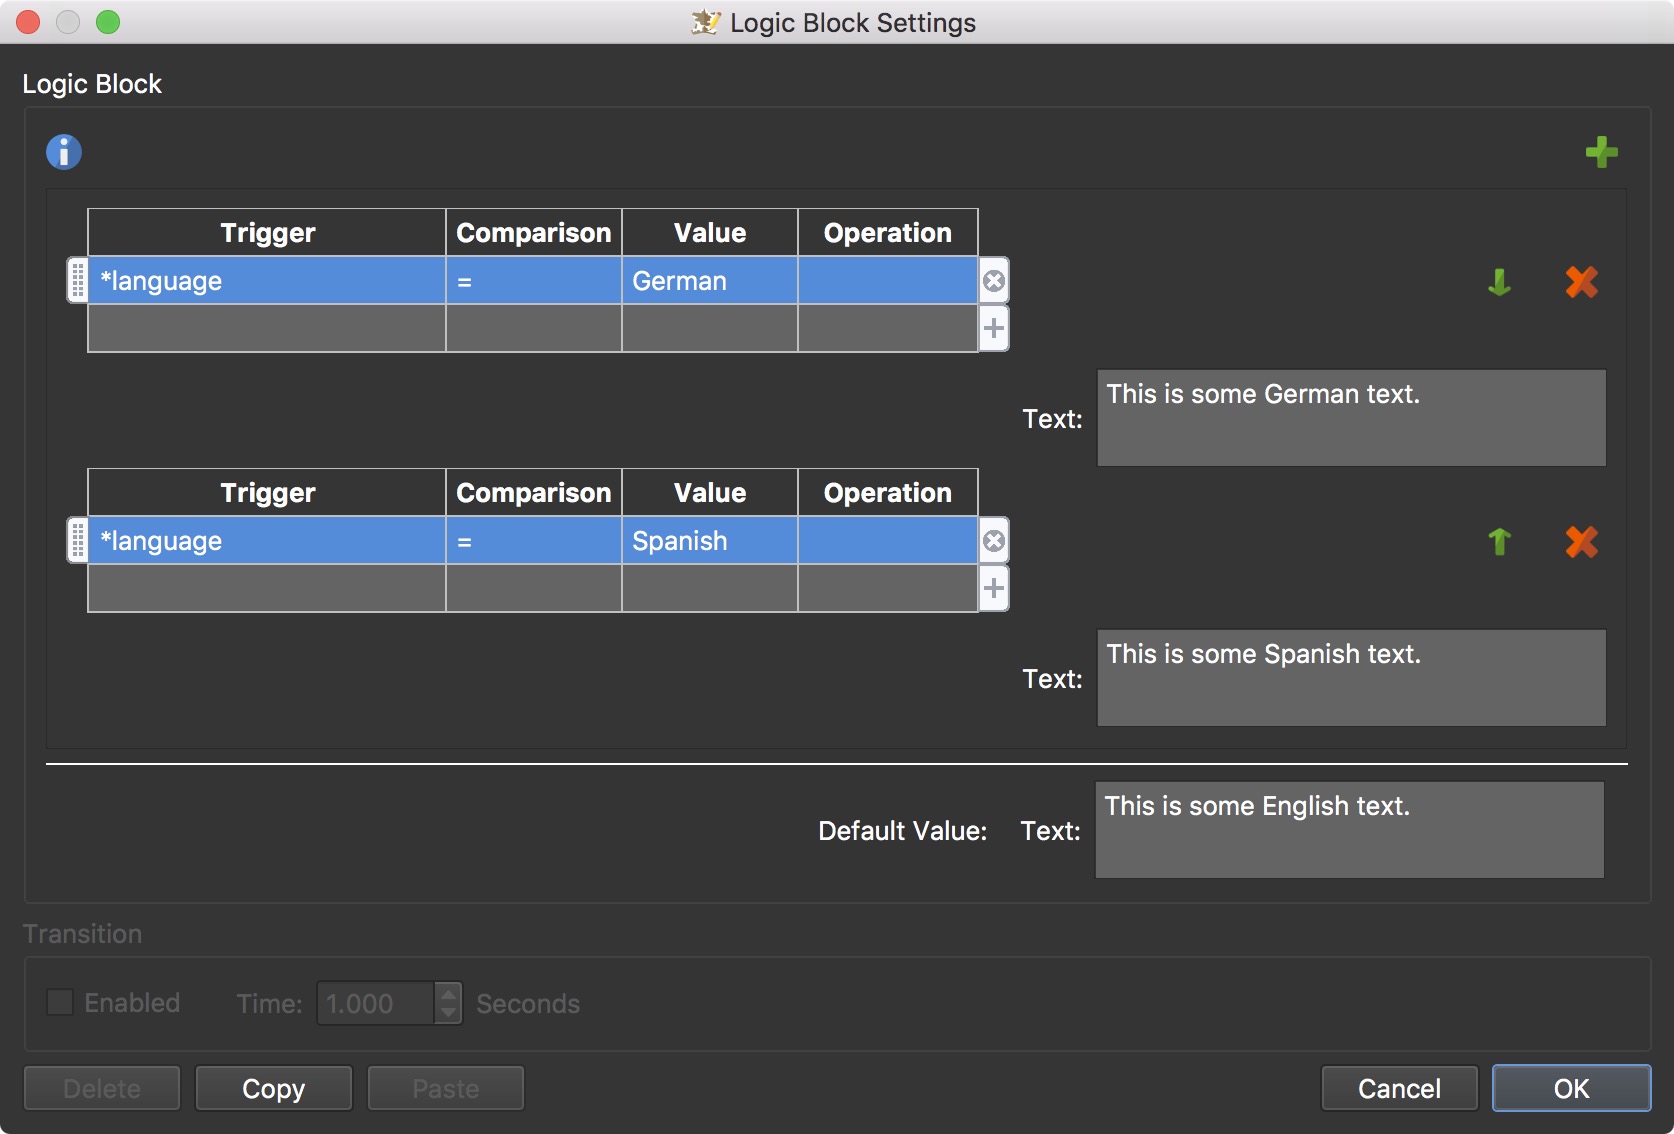
Add the following expressions:
This will set the correct text when the corresponding button is clicked. It has two expressions, each with one condition. The first expression says, if the variable, language, is used and the value is German, then use the text provided here in this text box. -
Open the Live View and test your skin!


