Using Action Filters
Action filters let you define conditions for the execution of actions assigned to an element. In this tutorial, Hopki shows us a few examples on how to use them.
Hide a Menu in a Specific Browser
-
In the Skin Editor, add a menu from the Components Toolbox or create your own.
-
Select the menu’s container.
-
Add a hide-on-start action.
- Source =
Start - Action =
Visibility - Type =
Hide Element - Target =
$self
- Source =
-
Open the Action Filter.
-
Add the following filter:
- Trigger =
Browser(Advanced > Browser) - Comparison =
= - Value = browser of choice (Chrome, Firefox, Safari, Edge, Internet Explorer, Unknown)
- Trigger =
This will hide the menu in the chosen browser.
Using Variables to Trigger Filtered Actions
In this example, 2 buttons will change a variable’s value. Then, based on the variable’s current value, a third button will open the selected panorama. In Hopki’s example above, he is using a TV channel changer to change nodes. There are buttons for tuning up and down and a button to change to selected node.
Here’s the basic workflow:
-
Add a number variable to the skin.
-
Add three text boxes (or rectangles) to represent buttons.
One will move up the channel numbers (1, 2, 3) and a second button will move the channels down (3, 2, 1). These two buttons will flip through a gallery of thumbnail images. The third button will open the selected panorama. -
Add an action to the buttons that will change the variable’s value. In Hopki’s example, these are the channel up and down buttons.
- Source =
Mouse Click - Action =
Set Variable Value - Variable Name =
var1(or whatever you named your variable) - Operation =
Add(+) - Value =
1(for the up) - Value =
2(for the down)
- Source =
-
Add a second action to the buttons to keep the variable moving in a loop. So that the up button counts, 0, 1, 2, 0, 1, 2, etc. and the down button counts 2, 1, 0, 2, 1, 0, etc.
- Source =
Mouse Click - Action =
Set Variable Value - Variable Name =
var1 - Operation =
Mod(%) - Value =
3(for both up and down)
- Source =
-
Add actions to the third textbox (button) that will select the node. Add an action for each node in the tour.
- Mouse Click > Open Next Panorama > node01
- Mouse Click > Open Next Panorama > node02
- Mouse Click > Open Next Panorama > node03
-
For each action, add a filter so that the action is only executed when the variable’s value is changed to a specified value. For example, the first action’s filter would be:
- Trigger =
var1; Comparison ==; Value =0
This means that node 1 would only be opened if the variable’s value is 0. Add filters to the other actions, but change the variable value.
- Trigger =
-
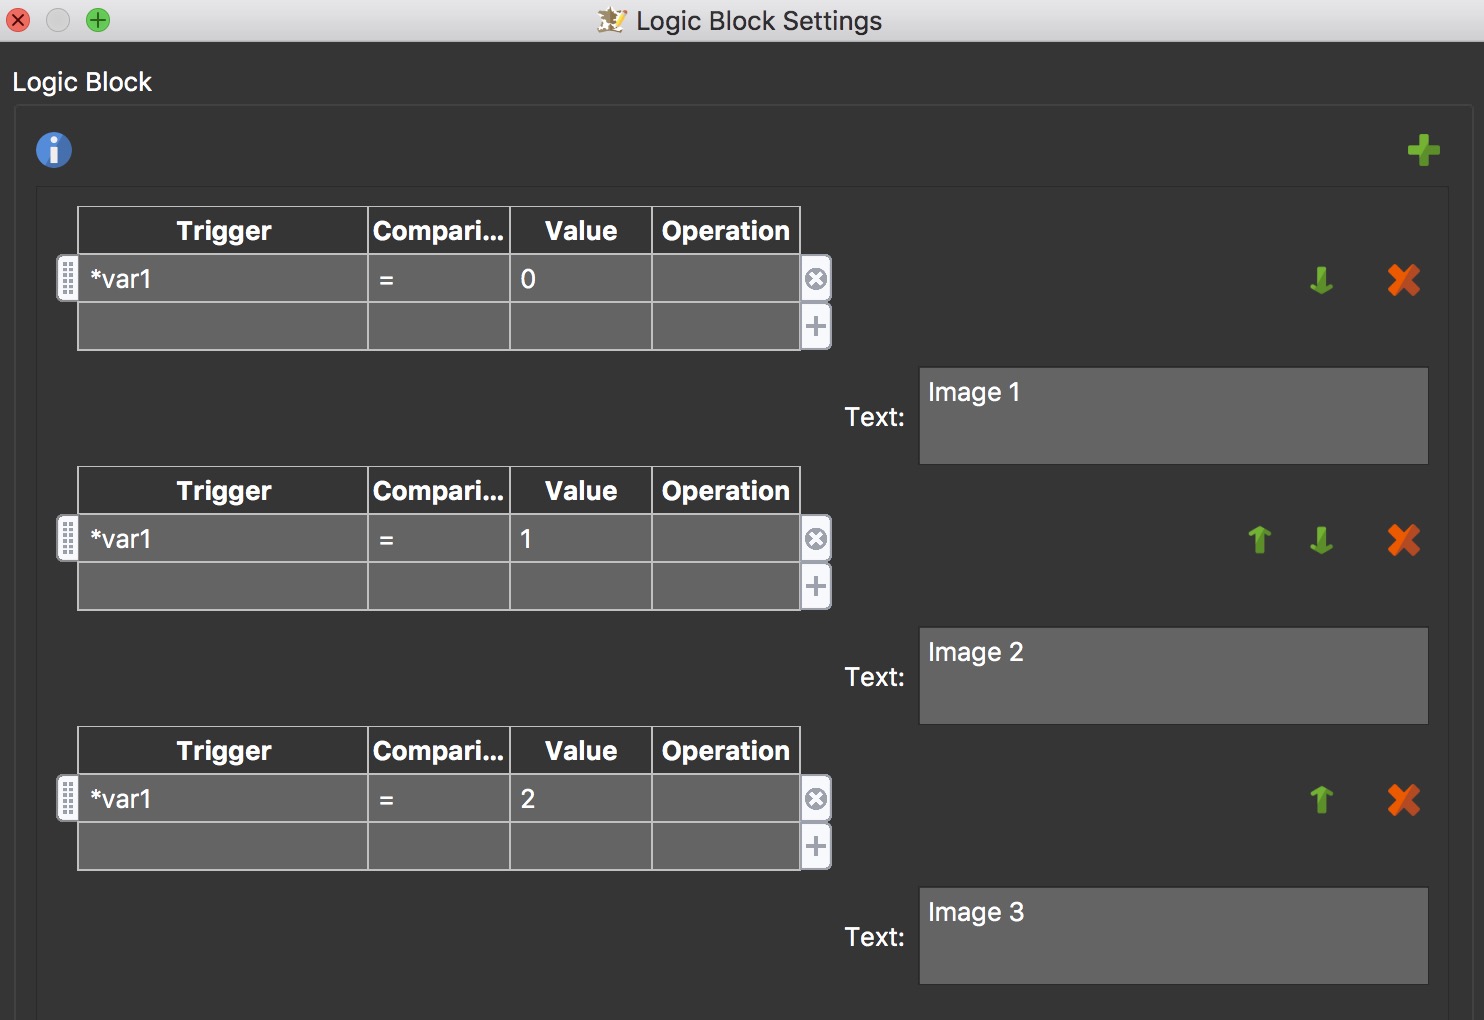
To change the text in the third textbox, to show which node is selected, expand the Text pane.
-
Add a logic block with the following expressions:

-
Add an External Image to the skin. This will hold the thumbnail image gallery.
-
Open the External Image pane and add a logic block. This will change the image in depending on the variable’s value.
✭ You can use the Assets feature in the HTML5 output to have Pano2VR consolidate the images in to the output folder. Your file path in the conditions would beassets/img.jpgorassets/myfolder/img.jpg, depdending on if you add a folder or a file to the assets. -
Check your positioning and anchoring of the elements with the help of Live Preview.
-
Save the skin.
-
If you haven’t already done so, add an HTML5 output.
-
Add the skin you’ve just built.
-
Save and output the project.