Legacy document. The hotspot editor was updated in the Object2VR 3.0. See the updated page.
Hotspots add extra interactivity to your object movie. They can be used in many ways, for example, for linking to a website or as tool-tips. But don’t let the creativity end there!
Contents
Adding Area Hotspots: No Hotspot Reuse
If you would like to add hotspots to separate images of your movie, you would choose to not reuse the hotspots. This means that your hotspots are unique to each image. You can call up each image that makes up your object movie and place hotspots on that image.
This is useful for when, for example, you only want specific portions of the object movie interactive.
To do this, simply call up the image to which a hotspot should be added.
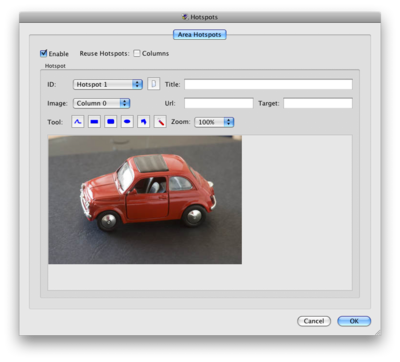
- Go to the Hotspots section and choose Modify to add an area hotspot.
- Select Enable.
- This allows you to edit hotspots. Notice that now all the fields are selectable.
- To add a hotspot that is not reused, make sure that Columns and Rows next to Reuse Hotspots are not selected and that Column 0 is the visible image.
NOTE: If a project is single-row, only Columns will be visible. If it is multi-row, both Columns and Rows will be visible.
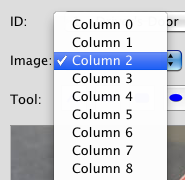
- From the Image menu, choose the image that should have the hotspot.
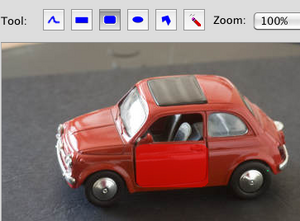
- Use any of the tools to draw a hotspot. Click on the shape and then draw on the image below.
- The hotspot you just drew should be the color red. This indicates that this is the current hotspot.
TIP:To delete a hotspot, click on this icon:
, plus the shape you used to draw the hotspot and simply draw over the hotspot. It should now no longer be visible. If part of it remains, redraw over that part. Don’t forget to deselect the eraser when you draw your new hotspot.
- The hotspot you just drew should be the color red. This indicates that this is the current hotspot.
- Give this hotspot a Title (in the Title field) (optional).
- Notice that the ID has now changed to reflect the title of the hotspot.
- The title is what the user will see when they roll over the hotspot.
- Simple HTML tags can be used in the title field.
- If outputting to Flash and/or HTML5, you can customize the title text (and the box it lives in) further in the Flash and HTML5 output settings.
- Enter a web address in the Url field to make the hotspot interactive (optional).
NOTE: Include the entire web address. For example, http://www.example.com. - Next, add a Target (optional).
- A target specifies where the linked document will open. For example, the target,
_blankwill open the document in a new browser window.
NOTE: If this field is left blank, it will default to_self, which will open the linked document in the same window (or frame) from which it was clicked.
- A target specifies where the linked document will open. For example, the target,
- To add a second hotspot (or more), click this button,
.
- The ID will change to, Hotspot 2 (or the next corresponding Hotspot number).
- Add the second hotspot to image in the same manner as in step 4.
- Give the hotspot a Title, a URL, and a Target if you wish.
- When all is good, click OK to return to the main project window.
Adding Area Hotspots: Reusing Hotspots
If you want a hotspot to remain visible and/or interactive throughout the rotation, you will need to reuse the hotspot. This means that the hotspot is or drawn (reused) on all images.
- Go to the Hotspots section and choose Modify, to add an area hotspot.
- Select Enable to turn on hotspot editing.
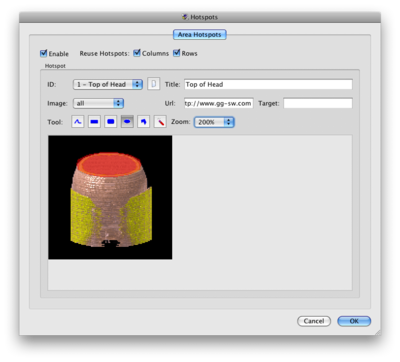
- Select Columns and Rows for the reuse of the hotspots. (If the project is single row, only Columns needs to be selected.)
- This means that the hotspots you will now draw will be visible on all images. Hence, each hotspot will be reused for each image.
- Notice that in the Hotspot editor, all is automatically chosen for Image.
- Follow steps 4-11 from above.
- Click OK when you’re done to return to the main project window.
See also
Project Window (Object2VR)
Hotspot Editor (Object2VR)
Flash Output Settings (Object2VR)#Hotspot Text Box
Formatting Text
Simulated Point Hotspots (Object2VR)
Hotspot
Adding Hotspots beta (Object2VR)


