The Hotspot Editor was updated in Object2VR 3.0 beta, adding polygon hotspots and a few changes to the interface. If you are working with version 2.0.2. you may want to read this article for help.
Hotspots in your object movies can be interactive or informative. You can use them give information about the product, or to simply have a way to move throughout the image. Below you’ll learn the basics of creating and adding these hotspots to your projects.
There are three types of hotspots available to add:
Point hotspots are single points of interactivity. You can create one hotspot and then duplicate them throughout the project. Meaning, you can add the same hotspot to multiple images (columns and rows). Use hints (Show hints) to see where those duplicates are located within the project.
If a skin with a hotspot template is added to the project, then the hotspot will take on the image of the template in the skin. If no template is being use, the point hotspots will use the default image (red circles).
After adding your images and saving your project, open the hotspot editor and select the Point & Polygon Hotspots tab, if not already selected.
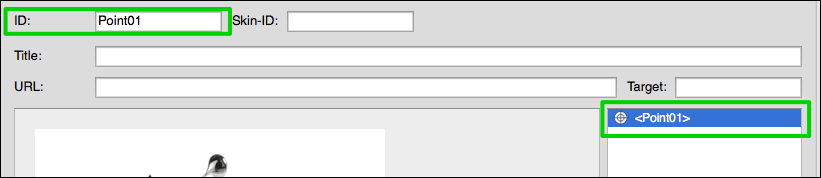
Choose the point hotspot, . The hotspot is given a unique ID and is listed in the right-most panel. ◊ TIP: This ID can be edited.
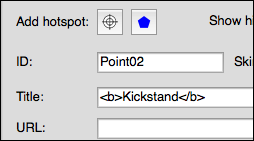
Give the hotspot a title. The title can be used simply as information text. If hotspot text boxes are enabled in the Flash or HTML5 output settings, the Title will appear in the hotspot text box. Simple HTML tags can also be used.
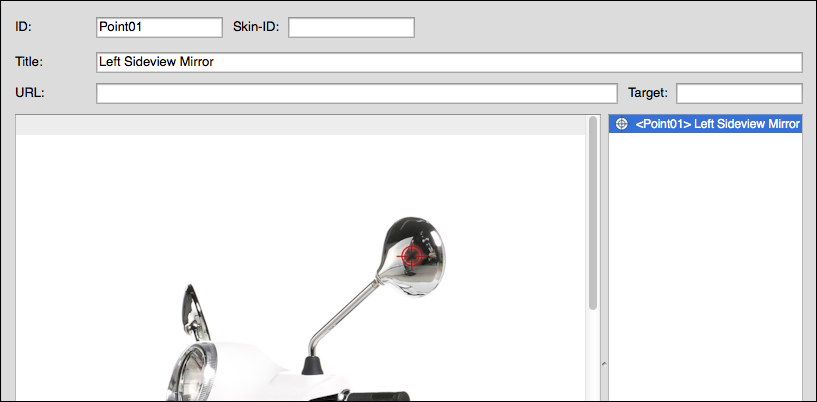
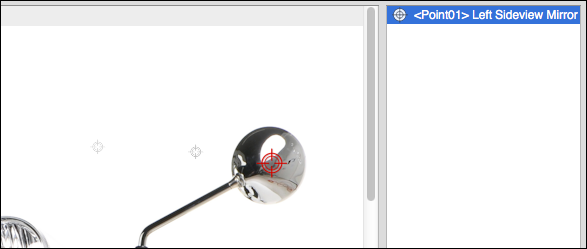
Double-click anywhere in the image (any column or row) to add the hotspot. The hotspot will be displayed as a red target, indicating it is the currently active hotspot. It will also be highlighted in the list to the right. ◊ TIP: Zoom in to the image for more precise placement using the zoom menu. To adjust its placement, click and drag the target.
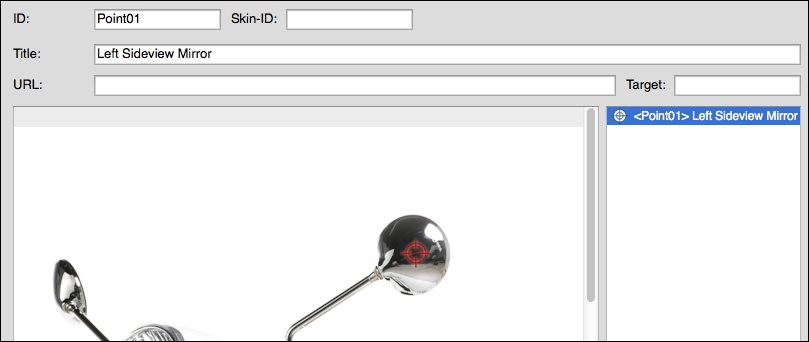
Add the next hotspot. Use the curser keys or dial in the image above to get to the next image. Double-click to add the hotspot. This is the same hotspot (Point01) although we’ve just added an new iteration of it on the next image. Continue adding the necessary hotspots for each image, especially if your movie spins. ◊ TIP: Select Show hints to see ghost images of the already placed hotspots.
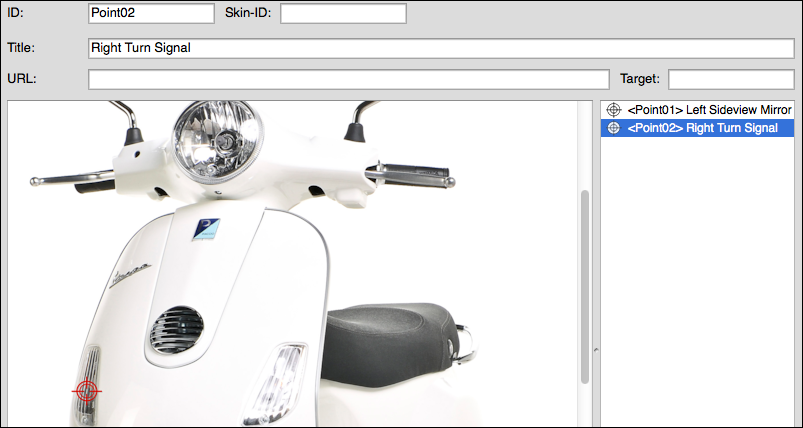
Add a new hotspot. Select the point hotspot again and the hotspot is added to the list.
Double-click to add the hotspot. Continue to add the hotspot to other images if needed.
Adding Polygon Hotspots
Polygon hotspots allow you to create a custom shape for the hotspot. These hotspots can be visible and interactive across the whole object (Reuse). Reusing the polygon hotspots on your object are probably the most useful if it does not spin. They are good when a hotspot is needed but the area of interest should not be covered by a hotspot image.
To draw a polygon hotspot, double-click on the image to start and add a first point, drag, click to set the next point. Continue until the shape is finished. At the last point, double-click to close the shape. To add a point after finishing the shape, simply click on the shape and then drag the point.
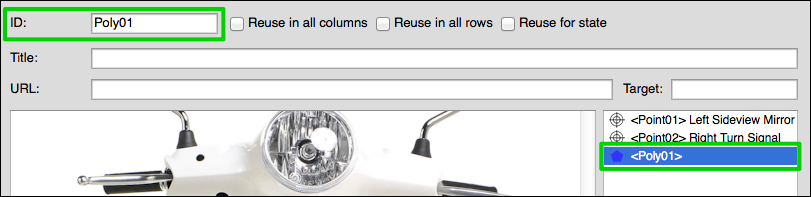
Select the polygon hotspot, . Immediately, the hotspot is given a unique ID and is listed in the right-most panel. This ID can be edited.
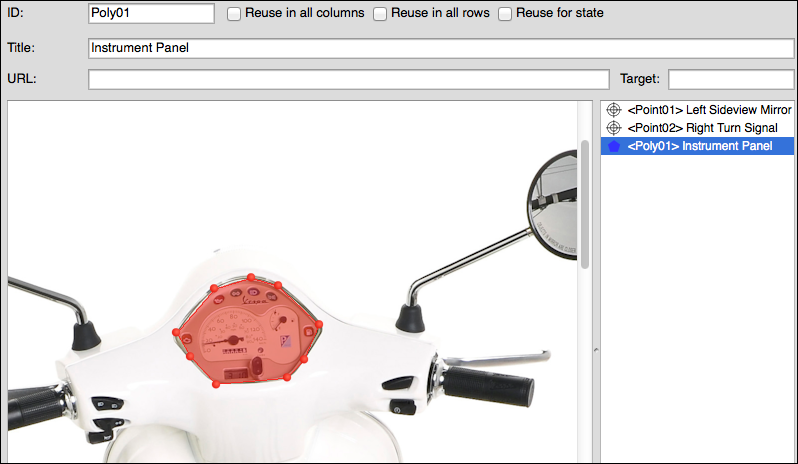
Give the hotspot a title. The title can be used simply as information text. If hotspot text boxes are enabled in the Flash or HTML5 output settings, the Title will appear in the hotspot text box. Simple HTML tags can also be used.
Optional — To make the hotspot link to a website, add a full web URL to the URL field.
Draw the hotspot. (See above for how this is done.) When you are finished, click, OK, to save your work.
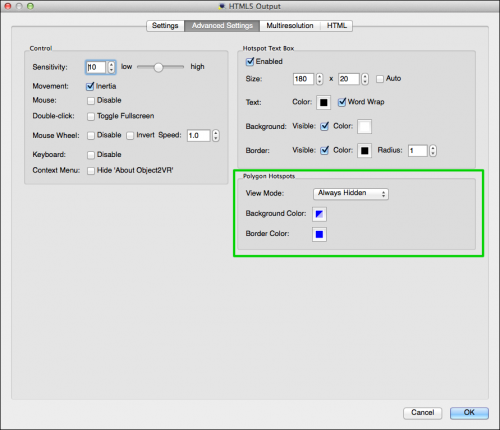
Customize the look of the hotspot. Add either a Flash or HTML5 output. In Flash, go to the Hotspots tab. In HTML5, go to the Advanced Settings tab. Both have a section called, Polygon Hotspots.
Choose a View Mode. The default is Always Hidden. This means that the hotspot is not seen until the mouse hovers over it and even then, only the hotspot text box is shown.
Customize the look by choosing background and border colors, if you are using a view mode other than Always Hidden.
When you’re finished, output the project to see how it looks.
Example of Always Hidden polygon:
Example of Show Current polygon with color customization:
Adding Area Hotspots
Area hotspots are similar to polygon hotspots. If possible, we recommend not using these and to switch to using polygon hotspots instead.
In the hotspot editor, make sure the Area Hotspot tab is selected and then select Enable. This allows you to add and edit hotspots. Notice now all the fields are now selectable.
Choose to reuse the hotspots by selecting the appropriate boxes. ◊ NOTE: If a project is single-row, only Columns will be visible. If it is multi-row, both Columns and Rows will be visible.
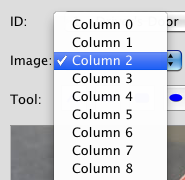
From the Image menu, choose the image that should have the hotspot. If the images are being reused you may not see the individual images. You will see the images change in the preview window below when selecting the individual images. ◊ TIP: Use the left and right curser keys to move through the images.
Use any of the tools to draw a hotspot. Click on the shape and then draw on the image below. The hotspot you just drew should be the color red. This indicates that this is the current hotspot. ◊ TIP: To delete a hotspot, click on this icon: , plus the shape you used to draw the hotspot and simply draw over the hotspot. It should now no longer be visible. If part of it remains, redraw over that part. Don’t forget to deselect the eraser when you draw your new hotspot.
Give this hotspot a Title (optional). Notice that the ID has now changed to reflect the title of the hotspot. The title is what the user will see when they roll over the hotspot (hotspot text box).
If outputting to Flash and/or HTML5, you can customize the title text (and the box it lives in) further in the Flash and HTML5 output settings.
Enter a web address in the URL field to make the hotspot interactive (optional). ◊ NOTE: Include the entire web address. For example, http://www.example.com.
Next, add a Target (optional). A target specifies where the linked document will open. For example, the target, _blank will open the document in a new browser window. NOTE: If this field is left blank, it will default to _self, which will open the linked document in the same window (or frame) from which it was clicked.
To add a second hotspot (or more), click this button, .The ID will change to, Hotspot 2 (or the next corresponding Hotspot number).
Add the second hotspot to image in the same manner as in step 4.
Give the hotspot a Title, a URL, and a Target if you wish.
When all is good, click OK to return to the main project window. Notice that in the Hotspots section, it indicates the amount of hotspots that have been defined.
Deleting Hotspots
To delete all instances of a hotspot, select the hotspot and either right-click on it in the right panel and choose, Delete hotspot, or hit the red “X” at the bottom of the panel.
To delete a single instance of a hotspot, select it in the image, and hit the delete key. Once a hotspot is deleted, it is gone forever. There is no undo for this, yet.
You can also delete all hotspots from the Hotspot List, by clicking the red X.


 .
.