Object2VR’s user preferences or settings can be found under File > Settings on Windows and Linux; and under Object2VR > Preferences on Mac OS.
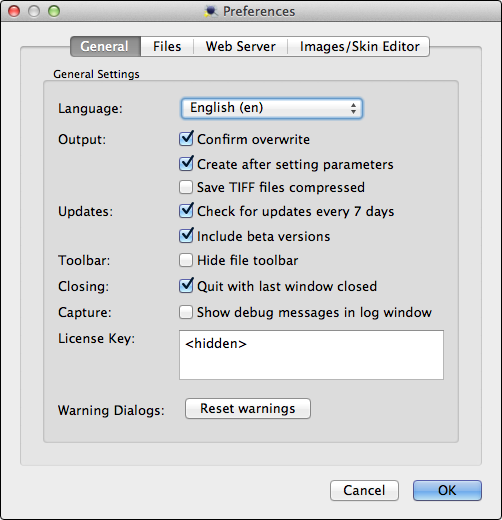
General
Language: Choose from the following languages:
- English
- Arabic
- German
- Greek
- Farsi
- French
- Italian
- Dutch
- Polish
- Portuguese
- Russian
- Swedish
- Ukrainian
- Chinese (PRC)
- Chinese (Taiwan)
Output: The following options affect the output.
- Confirm overwrite: Choose this if you want Object2VR to confirm that you will be overwriting a previously saved file.
- Create after setting parameters: Choose this to have Object2VR create the output file upon choosing OK in the QuickTime, Flash or HTML5 output settings.
- Save TIFF files compressed: Choose this if you want TIFF files to be compressed on output.
Updates: The following options refer to how to handle software updates.
- Check for updates every 7 days: When this option is selected, Object2VR will check for software updates every seven days. Deselect this option if you wish to not have Object2VR automatically check for updates.
- Include beta versions: If you choose to have Object2VR check for software updates, you can also choose to have Object2VR check for new beta updates.
Toolbar: Toolbar options. The toolbar is the top area of the project window that contains buttons for opening, saving, or starting a new project.
- Hide file toolbar: Select this to hide the toolbar.
Closing: This option affects closing behavior on a Mac OS system.
- Quit with last window closed: Closing the last open project window will quit the program. This option is set by default.
Capture: Object2VR studio
- Show debug messages in log window: Debug messages are useful bits of information that can help identify problems that might occur during capture. Select to see these messages in the Log tab of the Capture window.
License Key: This is where you paste your license key to register the software. If you clear the field, you will return to the trial mode.
Warning Dialogs: Throughout the software, there are windows that pop up to warn of a certain action that will take place or problems that can be foreseen, etc. Each window gives the option to keep it from popping up in the future.
- Reset warnings: Click this button to reset the warnings and to have them pop up again.
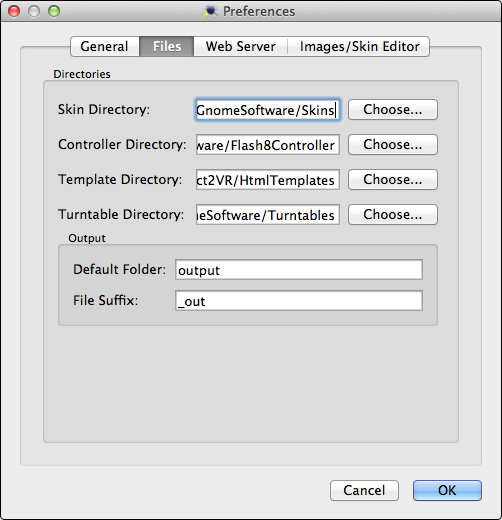
Files
Directories
This section provides directory information. Click Choose to change the directory location.
Skin Directory: This shows where the Skins are located.
Controller Directory: This shows where the Controllers are located.
Template Directory: This shows where the HTML Templates are located.
Turntable Directory: Found in Object2VR studio. This is the location for turntable specific files.
Output
- Default Folder: Object2VR places all the output files into one folder for better access and organization. The default name of the folder is output, and this can be changed here. If left blank, no output folder will be created.
- File Suffix: This option allows you to choose the suffix of the file name of your outputted files. The default is set to _out, but this can be changed to anything you prefer.
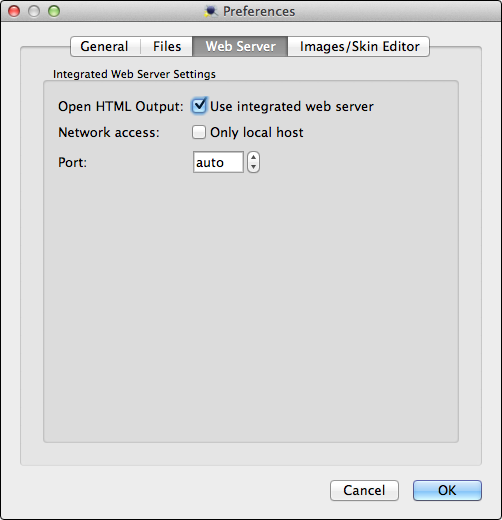
Web Server
The integrated web server lets you easily test the outputs locally.
Open HTML Output: Choose what happens when the HTML output is opened.
- Use integrated web server: Select this option to use the integrated web server for testing images locally.
◊ TIP: For testing the output in other browsers simply copy and paste the URL in the open outputs address bar to the browser to be tested.
◊ NOTE: Opening the HTML page directly from the output folder will not use the web server and local file restrictions may prevent the output from displaying properly.
Network access: Choose how the server uses the local network.
- Only local host: Keep this selected to ensure that the web server is using the current local host. This is helpful for testing on different machines and devices.
Port: Choose your desired port or leave it at auto.
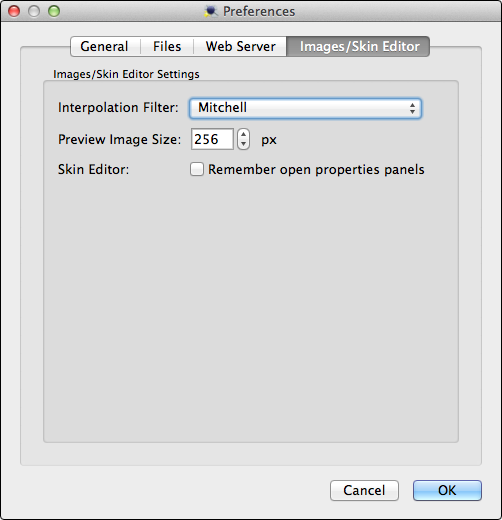
Images – Skin Editor
Interpolation Filter: Select the filter that is used for remapping operations. The different filters can sharpen or blur the image. Choose from the following:
- Box
- Triangle
- Hermite
- Hamming
- Blackman
- Gaussian Blurry
- Gaussian Sharp
- Quadardic
- Cubic
- Catmull-Rom
- Mitchell (default)
- Lanczos2
- Lanczos3
- Blackman/Bessel
- Blackman/sinc
Preview Image Size: This option allows you to change the resolution for the preview in the viewing parameters window. A higher resolution may slow down the interaction. The optimal value highly depends on the available memory on your graphics card.
Skin Editor:
- Remember open properties panels: Select to have the panels that were open last to be open when the Skin Editor is opened again.


