Once you have all your images for your object movie, you can immediately start processing them here. When you’re finished processing, you can then create a new project with your processed images using the Convert tool.
Contents
The Image Processing Window
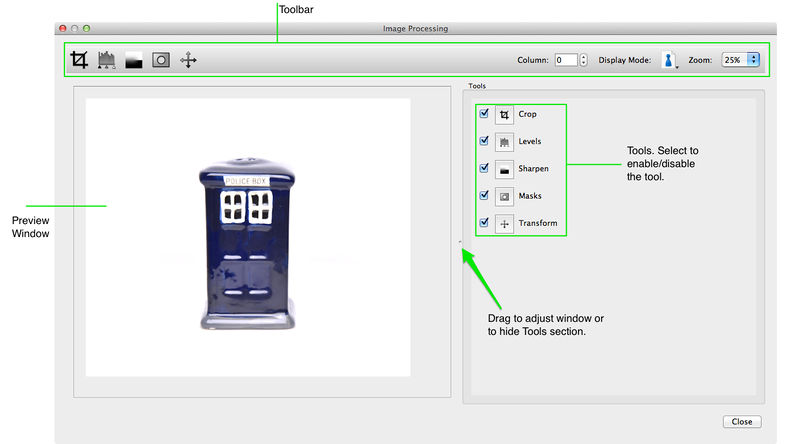
Toolbar: Here you can choose a tool, the image, display more and zoom.
Tools: Choose from Crop, Levels, Sharpen, Mask, and Transform.
- Select the tool in the toolbar to open their parameters.
- Deselect (so nothing is selected in the toolbar) to return to the Tools section.
- Enable the tool to edit its parameters.
Column and Row: Toggle between images of the object movie.
Display Mode: Use to view highlights within the image.
- Normal Mode: The image is shown without any overlay or colorization.
- Highlights Mode: This will display the highlights that are nearly blown out as red, while the blown out highlights will be displayed in white. If you’re using a white background and turntable, you might want the highlights blown out.
Rulers: Select show rulers in the Preview Window.
- Add guides to the window by double-clicking with in the ruler or by clicking the plus sign in the upper left corner of the preview window.
- Open the guides preferences by double-clicking on a guide or clicking the plus in the upper left corner of the preview window.
- Guides Settings
- Position: Set the guide’s location in pixels or percent.
- Mirrored: Select to add at a set of guidelines that will mirror each other. Drag the guides to separate.
- Project & Global: Select either Project or Global to set guides for the current project only (Project) or to set them as defaults (Global).
- Locked: Select to lock the guide in place.
- Remove the guides by dragging them out of the ruler strip
Preview Window: Here you can preview the movie and also draw masks and crops. To change the view, change the Column and Row above in the Toolbar.
Tools: Turn on and off the different parameters (selected = enabled), and go directly to the parameter by clicking on their icons.
Crop

Use the crop tool to remove any extraneous parts of the image, like turntable edges, etc.
- Click on the Crop settings button in the toolbar.
- Select, Enable, to activate the crop settings.
- Use the handles to drag and reshape the crop area. You can also dial in the specific coordinates and size in the crop area to the right.
- Hold the Shift key to crop with the original aspect ratio.
- Hold the Alt key to crop with a square aspect ratio.
- Click the reset button to reset the crop.
Crop
Here you can set the crop manually by adjusting the crop’s position the X and Y axes. You can also adjust the width and height of the crop.
Orientation
Rotate the image, if needed, to 0º, 90º, 180º, 270º.
Background
Choose the background color of the images. You can choose a color or use the eyedropper or choose a transparent background.
This is useful if you are using the Dewobble feature and the image ends up extending beyond its borders. You could, for instance, use the eyedropper to match the background with the image background for a seamless movie.
Levels

Levels, here, are useful when blending a white or black turntable and background together.
Select, Enable, to activate the settings. Click the reset button to clear the settings.
Adjust Exposure
- Click on the Adjust levels settings button in the toolbar.
- Select, Enable, to activate the levels settings.
- Click and drag the triangle handles below the histogram to adjust exposure levels.
Adjust White Balance
Do one of the following to adjust the white balance:
- Move the Temperature (Temp) and Tint sliders. If the image has a yellowish color to it, then move the Temp slider towards the blue. Likewise, if there is a green cast, move the Tint slider towards the magenta color.
- Use the eyedropper to identify white within the image. Click the eyedropper button and move to the image. Click within the image that is white or neutral gray.
Sharpen

Use the sharpen tool, to add sharpening to the image.
Select, Enable, to activate the settings. Click the reset button to clear the settings.
Amount: Adjust the overall amount of sharpening that is added to the image.
Radius: Adjust the size of details to sharpen.
Threshold: Specify at which point pixels are sharpened. A setting of “0” will sharpen all pixels.
Mask

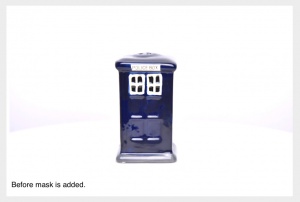
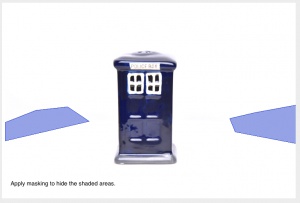
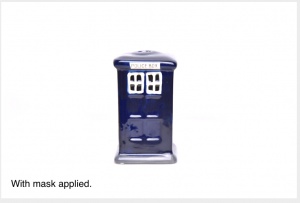
The mask can be used to smooth out the image’s edges, and to hide unwanted parts of an image or in the whole series. Use the border masks or double-click within the image to add polygon masks.
Select Enable, to activate the Mask tool.
Feather: Increase or decrease the edge softness. This will affect both the border and polygon masks.
Color: Choose the color of the mask by doing one of the following:
- Select a color from the color picker
- Click the eyedropper and select a color from within the image.
Mask from border: Select which border the mask should be applied. If none are chosen, then there will be no border mask.
Active Polygon: Once you’ve added a polygon mask, this section will be active.
- Reuse in all columns: Select to have the current (active) polygon used in all columns.
- Copy polygon mask: Click to copy the current (active) polygon to all columns. This draws the polygon on each image making the polygon editable (and unique) for the current image.
Add a polygon mask
- Double-click within the image and drag to draw a shape around the unwanted part. Double-click to finish the shape.
- Use the anchor points (red dots) to refine the shape.
- Click on the red border to add a new anchor point.
Transform

Use the Transform tool to make final adjustments to your image. A very useful parameter here would be Dewobble, which will help any drifting that may occur due to the object not being in the exact center of the turntable.
Select, Enable to activate the feature.
To activate the following individual tools, click on the pencil (you can only edit one parameter at a time).
Crop
If crop was adjusted in the crop tool, you’ll see the crop.
Use this to move the crop area. Line up the center of the crop with the center of the object. This is usually needed after adjusting the dewobble.
Individual Offset
Here you can adjust the offset for each image. For example, if your images were taken without the use of a turntable (ellipse), the images will need to be adjusted manually.
- Drag the overlay to match the center of the current image.
- Change the column (image) in the toolbar. The overlay image will show the object at 180º.
- Drag the overlay image again.
- Continue for all images.
Dewobble
Use this feature to offset any off-centered objects that were captured on a turntable. Use the following two settings as reference points and the software will correct the wobbling of the off-centered images.
- Activate the Offset Major setting. An overlay of the object at 180º is shown over the anchor image.
- Move the overlay to match that of the anchor image.
- Activate the Offset Minor. This will do the same as the Major Offset, but with images at 90º and 270º.
- Move the overlay to match that of the anchor image.
Display
- Helper Alpha: Use this to change the transparency of the overlay.


