With Object2VR studio, you can connect both your turntable and camera to the computer and let Object2VR do the work for you.
The following steps outline capturing images using the Capture Input tool.
- From the Main Project window, choose, Capture Input.
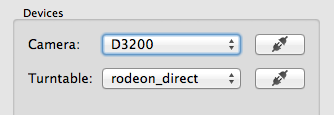
- Make sure all the devices (camera/turntable) you are using are plugged in and powered up. When they’re ready, they should appear in the Devices section of the Project tab. If they do not automatically appear, use the menu to search for them. It could be that your turntable needs a driver installed. Please check with the manufacturer.

- Click the Connect button (plug) to connect the devices.

- Go to the Settings Tab to do an initial set-up. If your hardware set-up is always the same, this will be a one-time set-up process. (If you have already done this set-up, move on to step 4.)
- Choose how the camera is triggered in the Trigger section. You can either connect your camera to the computer with a USB connection, or connect it to the turntable. You can also choose to trigger the camera manually.
◊ TIP: Manually triggering the camera is the best option when you need to change or move the object in between shots. - If needed, change the Delay between each Trigger. This helps to ensure that the object stops moving after the table rotates.
- Determine how the images will come in to Object2VR. They can be transferred directly from the camera via USB, or through a watched folder. Learn more.
- If needed, you can change the camera’s settings in the Camera Tab.
- For the turntable, choose the correct serial port in the Turntable Tab. For most tables, you can simple hit Auto Detect. Check the Log – it should say, connected. If it did not work, an error message will appear.
- Choose how the camera is triggered in the Trigger section. You can either connect your camera to the computer with a USB connection, or connect it to the turntable. You can also choose to trigger the camera manually.
- Back in the Project Tab, define the number of Columns and Rows that will be shot. (To see the Rows, click on More Options.)
- If the camera has Live View, go to the Preview tab and click the Live View button (second icon from left.) The live image will appear in the Preview window.
- Make some exposure adjustments if necessary, with the help of the Display Modes.
- Hit the Record button in the transport controls to start the shooting process. The first image will be taken, then the table will rotate. You will see an animation in the upper right corner depicting the angle of rotation of the table, and the corresponding image that was taken. You can also watch the process under the Log tab. When the process is finished, the Log will show, Finished and the animation will show, 100%.
- Use the Images Tab to check the sequence. If an image needs to be retaken, right-click on it and choose, Reshoot. The table will reposition itself and the camera will fire.
- Close the Input Capture window.

Optionally, when the process is finished, you can go to the Light Table to make final organizational changes and then to the Process Images tool to clean up any images.