
When you use a one-shot 360 camera, like an Insta360 or Qoocam, you’ll likely run into a situation where you, the photographer, do not want to be in the image. There are many ways to remove yourself from the image, including AI tools. But, when it’s a large area to remove, it can get tricky or at least time-consuming. So, here we present one method on how to remove larger objects using Pano2VR’s Patching feature.
The 2-shot Method
This method requires you to take duplicate images where you, the photographer, will move within the scene.
Here we have the lovely Martin, smack in the middle of the image, because he had no good place to hide. He has the 360 camera on a tripod, and he used his phone as a remote shutter.

He then walked to the opposite side where he had previously stood and took a second image of the scene.
This image is the donor panorama and will provide the area that Martin is covering in the first image.

Extract Patches
Patching in Pano2VR lets you extract a non-distorted portion of the image, making it easier to retouch images.
In the main image, you add a patch that covers the area you want to take out. In this case, Martin and a little bit of the background.
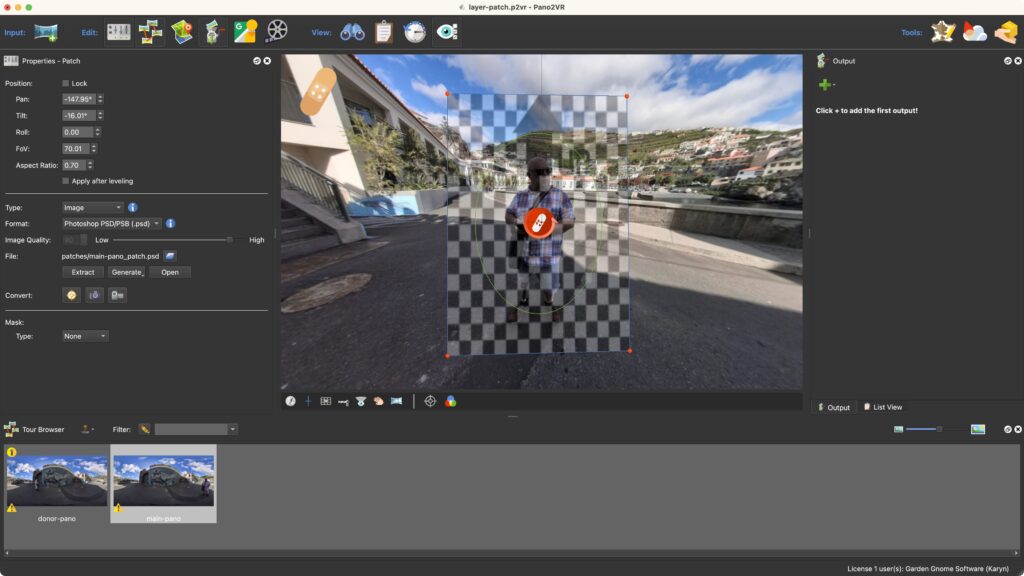
You then copy the patch to the donor image and then extract the patch from that image. This copies and pastes the exact area of the patch, so there are now two patches showing the same area, but one includes Martin, and the other does not.
Fuse the Patches
Next, use a photo editor to fuse the patches. In our example, we’re using Pixelmator Pro to fuse the patches.
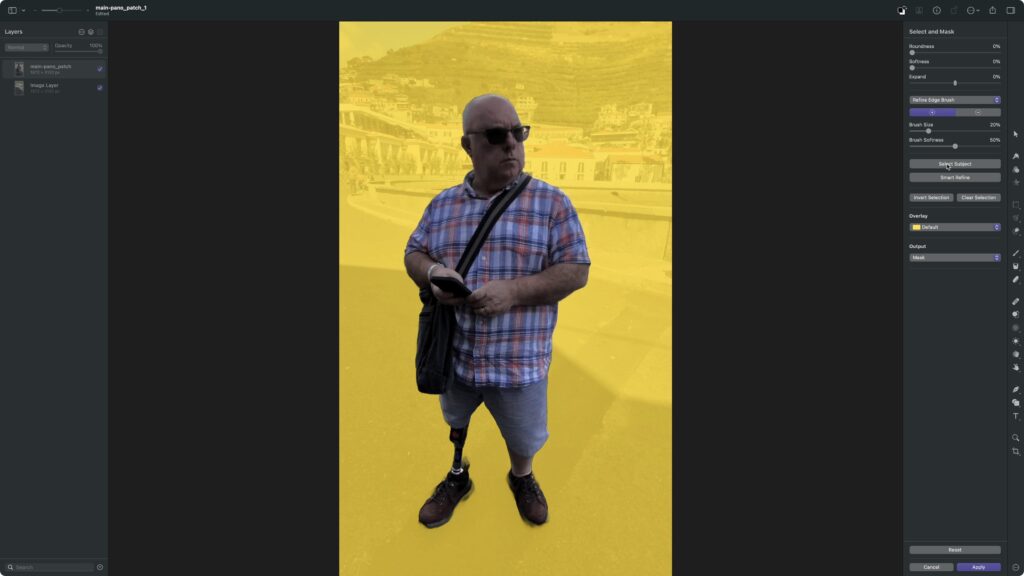
Save this new patch as the main patch, and it’ll be automatically updated with Martin removed.
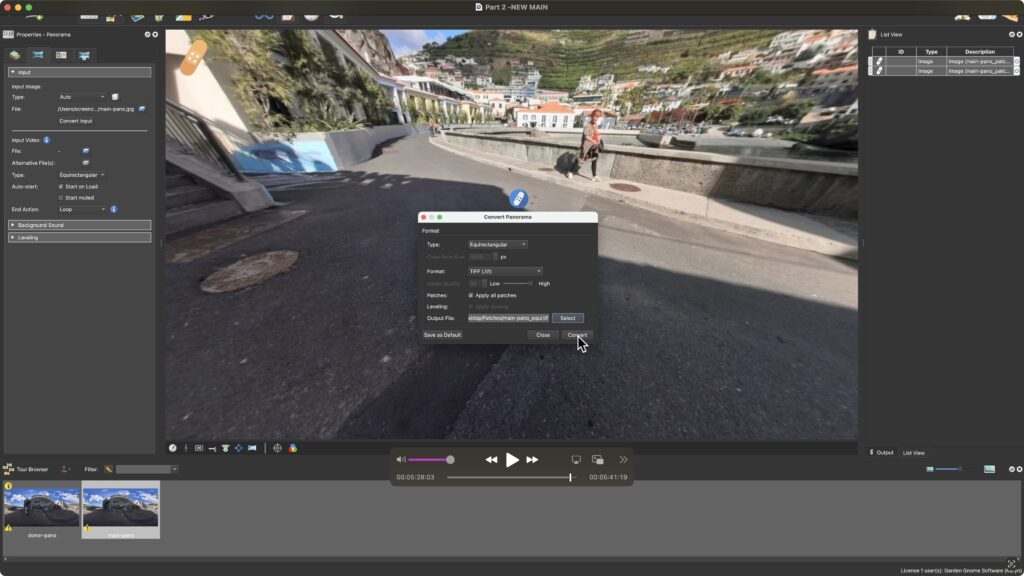
Save as a New Panorama
Finally, save the panorama as a new one with the patches using Convert Input.
Using the patching feature in Pano2VR can be extremely helpful, whereas other methods may become tedious. So, remember when shooting that you now have this method in your editing toolbox, and take a few extra shots.
Learn More
Be sure to check out the video tutorial below to see the details, plus the articles listed below to learn more.