This week we have something fun and we hope this tip inspires you to try it yourself. In this tip, Hopki, shows us how to create and blend 3D distorted hotspot images.
3D distorted hotspot images allow us to have perfectly aligned interactive images within the panorama. This way, we can create roll-over effects that give the user a more rich view of the panorama.
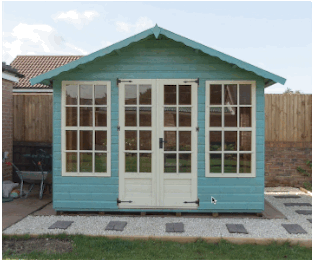
In the first part of this series, Hopki shows us how to add perfectly aligned hotspot images. In his example, he shows off his beautiful garden house with the doors shut and when the mouse enters the interactive area the house’s doors open. Once they are open we can now step inside the house and have a look around. We can also get a feel for what it’s like to have the doors closed.
In the second part, Hopki explains how to best blend those images in to the panoramas in order to make seamless transitions.
The basic steps go like this:
- Create two panoramas; one with the roll over effect and one without.
- Extract patches.
- Blend the patches in a photo editing software to get perfect matching when adding to the panorama.
- Add a point hotspot.
- Add the blended image to a hotspot template in the skin. (Or use external loaders.)
- Output the panorama and enjoy.