Pano2VR 8.0 beta 3 is out, and it adds a lot of improvements for working with 3D models, more camera points, optimization for viewing on mobile, 3D models in VR, and new Skin Editor actions. And as always, a lot of bug fixes, and even a new tutorial!
Setting up 3D Models
We know that working with 3D models is new to a lot of you, and even more so working with them inside Pano2VR. To help, we made a very comprehensive tutorial showing you how to add and set up models:

3D Model Improvements
3D Models in Immersive View
3D models are now viewable in Immersive View! We needed to find a good way to interact with the models in VR, so we came up with these gestures:
- Zoom In/Out: hold the paddle triggers or pinch the model and pull the model towards you to zoom in and push away to zoom out
- Rotate: hold the paddle triggers or pinch the model and move your arms like you’re opening a large valve
New Camera Points
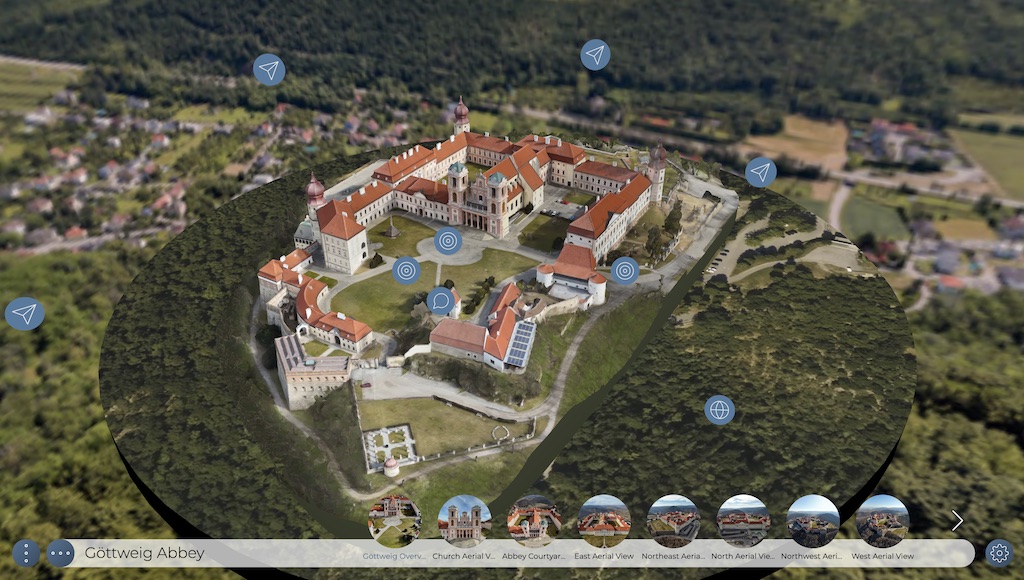
The Target Camera is a new Camera Point type. Unlike other Camera Points, it stores not just a position, but also viewing direction, field of view, and camera mode. It can be used as a hotspot target for model nodes, in skin actions that set the 3D camera view, or in motion paths to control the camera direction along the path.
Another new camera point type was added specifically for the Default View. This way, you can define motion paths when going from the default view of the model to other camera points in that model, making it possible to avoid going through the model geometry during transitions.
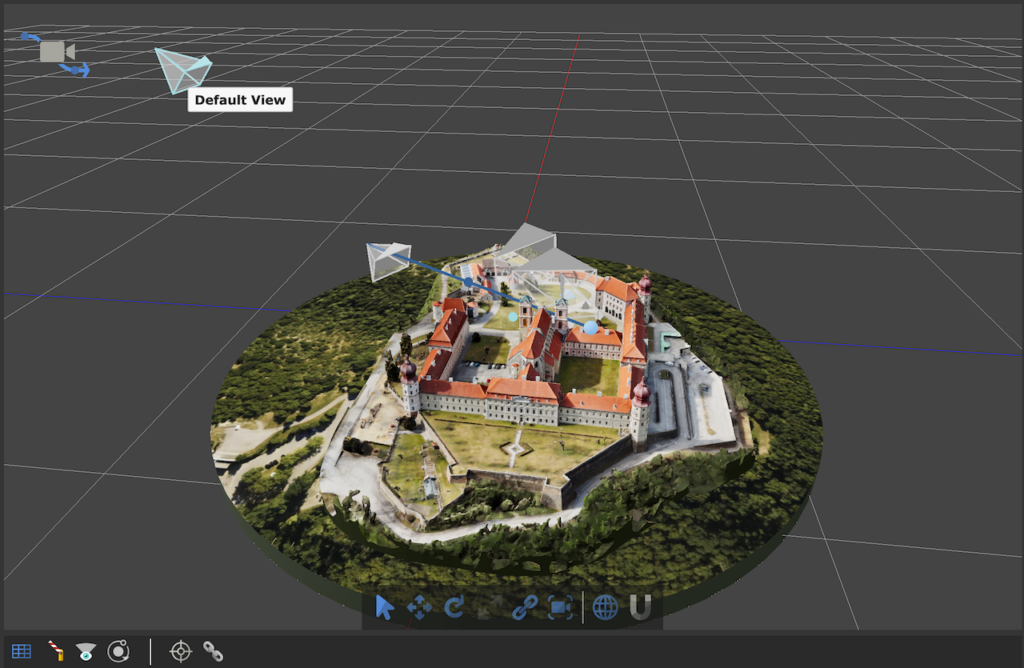
Here’s a recap on all the Camera Points and what they do:
- Tour Node – This camera point is used to align the model with the panoramas
- Waypoint – A waypoint lets you define multi-segmented paths between camera points
- Cluster Point – Can be used to group other camera points that should use a common motion path
- Target Camera – Used to create target views within a model
- Default View – Use to create motion paths to and from the model’s default view
Optimization and Other Features
3D mesh models can be a bit too resource-hungry to view on a device through a web browser. So to help with this, we added an option to have them optimized on output. You can let Pano2VR do the optimization for you or open the Optimization Settings to customize. When you deselect this option, you can add your own optimized file for mobile devices, which can be used for Gaussian Splats as well.
Navigation when viewing Gaussian Splats in Pano2VR’s Viewer and on output is much smoother.
We added an Input Type for 3D models so that you can choose the correct type in case Pano2VR recognizes it incorrectly.
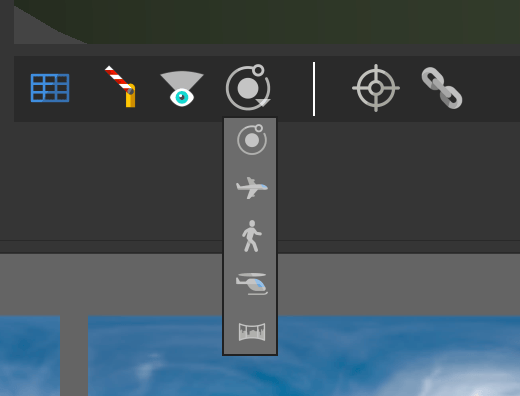
We renamed the old Fly Camera Mode to Panorama and created a new Fly Camera mode the uses dolly movement. And here’s a tip! Hold the Shift key as you change camera modes to keep the position in the model the same.
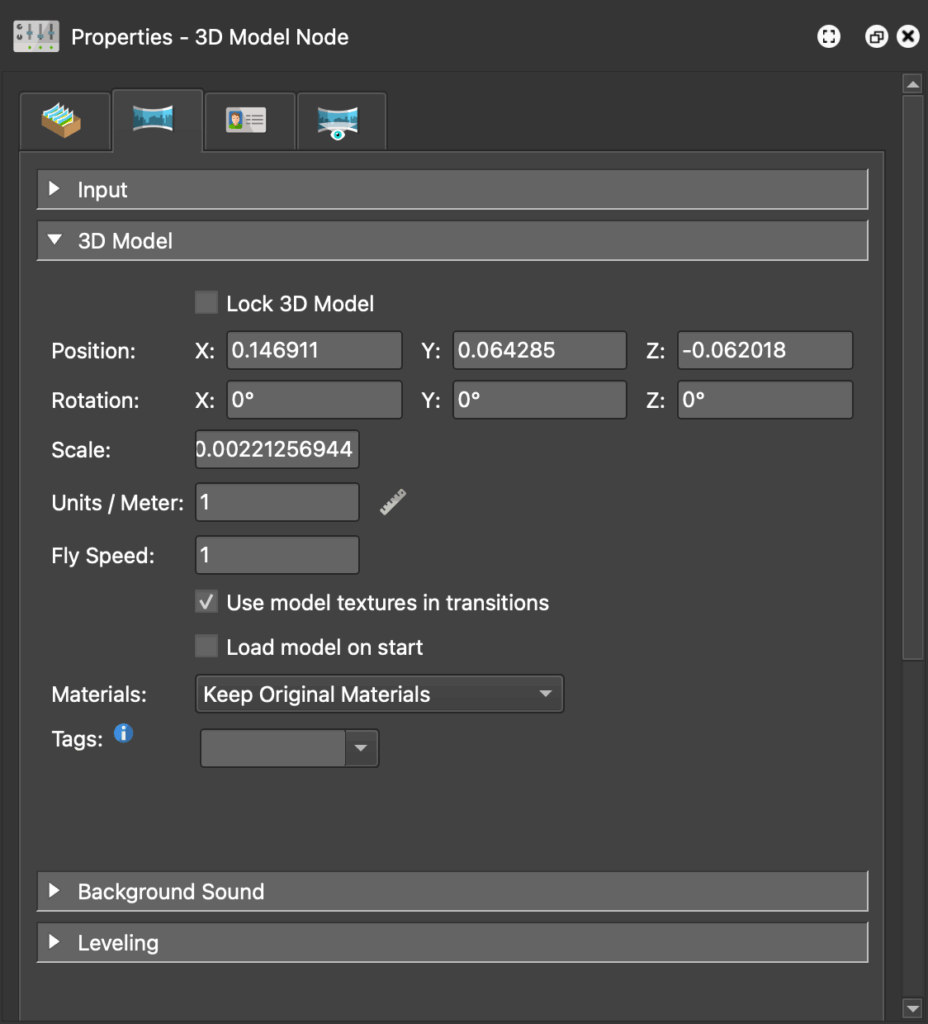
You’ll also find a few new settings in the 3D Model Properties:
- Lock 3D Model – Select to prevent accidentally manipulating the model
- Fly Speed – Sets how fast you move in the Viewer when using the Fly Camera Mode. The default is 1. A value of 2 doubles the speed, while 0.5 halves it
- Rotate camera into flight path – Select to always have the camera facing forward when traveling along a motion path
- Replace with Basic Materials – Select to just show the textures of the model without any lighting or shading
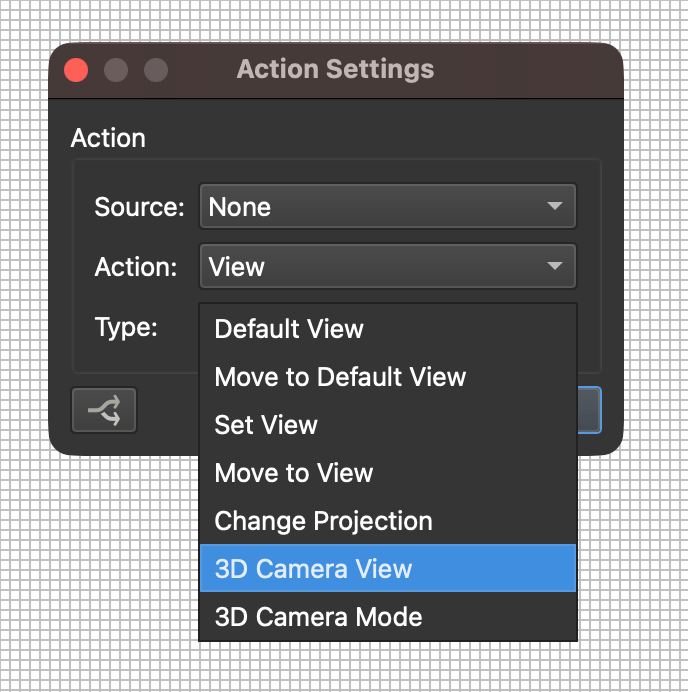
New Skin actions for 3D projects
The Skin Editor gets two new actions for 3D model workflows. One moves to a camera point in a 3D model and one sets the camera mode. Both are found in the View category of the skin actions:
- 3D Camera View
- 3D Camera Mode
There’s also a new Logic Block Trigger to let you react to 3D camera modes. You’ll find it in the Trigger’s View category.
More Features
- Save As dialog when saving a write-protected or a new skin that gives you an option to save to the Project or Skin Directory
- Target View for point hotspots linking to a model’s camera point let’s you define the view of the destination
- Pick Landmark in the Tour Map now has increased accuracy when finding North
- Use Capture Preview Image from the Edit menu, 3D model properties, or the Viewer’s context menu to capture 3D Models preview to set thumbnail images and the
- The Web Output can now scramble the tile’s filenames to make it harder to scrape your images
Fixes from beta 2
And as always, we made a ton of fixes, here is just a sampling:
- preview images now appear correctly in single-resolution output
- animated PNG files now animate correctly
- the Show/Hide Media action now works correctly
- WebP files can now be selected as pinned images
- the Viewing Limits copy buttons now work correctly
- the Type copy button under panorama properties no longer copies the file path or replaces panoramas
- model background images have been updated
- pinned video now appears in Immersive View
For the complete list of changes, see What’s New in the Pano2VR 8 beta documentation. Download and learn more about Pano2VR 8.