
Today we released a few tutorials for using patches. There is also an update for Pano2VR 7.0.3 that addresses several issues and adds a few features.
Patching Tutorials
There are two new Patches tutorials for Pano2VR 7.
Getting Started with Patches is a general introduction to using Patches.
Layered Patches and Removing Objects is a little more advanced. You’ll learn how to patch an area using multiple patches without using photo editing software. And you’ll learn a fun technique to remove yourself in one-shot images using patches.
Pano2VR 7.0.3
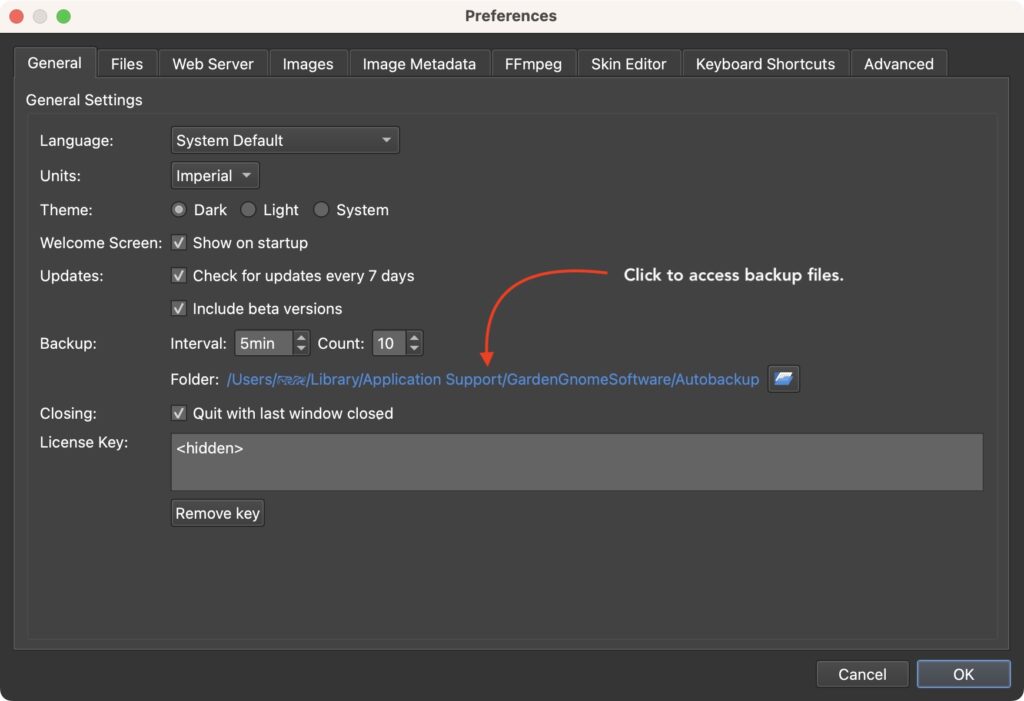
This release is mainly a bug fix release with a few minor features sprinkled in there, like a clickable file path for Autobackup and a new Keyboard Shortcut to move quickly between the Skin Editor and Main Window.
To access the Autobackup files, you can now click on the file path.
A keyboard shortcut already exists to open the Skin Editor, Ctrl-K, or Cmd-K. But, what was missing was a way to quickly move back to the Main Window from the Skin Editor. So, we added Ctrl-Alt-K (win) or Cmd-Opt-K (macOS) to bring Pano2VR’s main window back to focus when in the Skin Editor. You’ll also find this as a menu item in the Skin Editor’s View Menu.
Notable fixes:
- Node images in the skin were not using the default view FoV; this is fixed
- Missing leveling information from Theta X images sometimes caused images to not be visible in the Viewer; this is fixed
- Fixed an issue where Pano2VR would crash for some when removing links between map pins in the tour map
- Fixed another crash issue when converting a Patch to a Point Hotspot
- Some preview images were not loading with “Unload image to save memory” selected, fixed
- Fixed an issue where the Mouse Over action was not triggering correctly
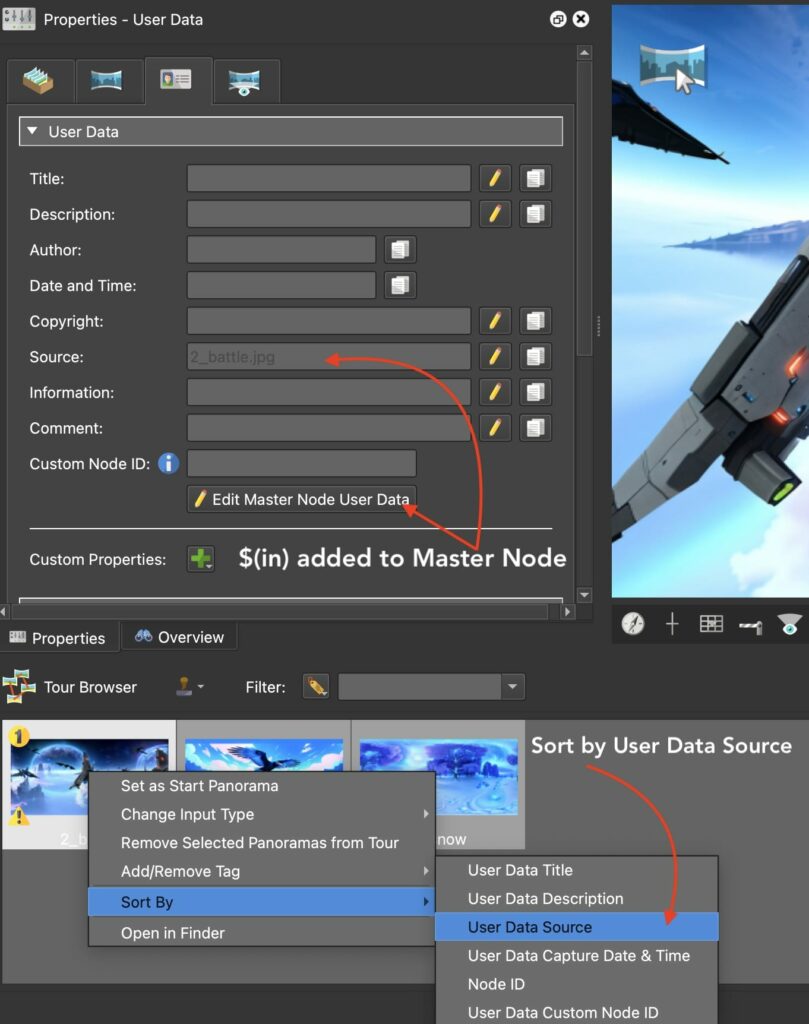
- User Data using placeholders was not being sorted in the Tour Browser, fixed
The nodes in the Tour Browser can be sorted by User Data content and Node IDs. But, if placeholders were used, those fields were not sorted. Now they are! And it’s a good time to remind you about this feature especially since the Cloner Element uses the sort order of the Tour Browser.
For example, to sort the Tour Browser by the node’s filename, open the Master Node. Add $(in), which will show the image’s filename, to the Master Node‘s Title, Description, or Source fields. Then select all or a group of nodes in the Tour Browser. Right-click on a node in the Tour Browser and choose Sort by and choose the User Data field.
To update, go to Help > Check for Updates in Pano2VR 7. Or download the update directly and install it manually.