The HTML5 output format allows you to create object VRs for use with mobile devices, like the iPhone, which do not support Adobe Flash. This page will explain the steps needed in order to output and display your HTML5 object VR.
- Import your project either via the Light Table or with Select Input.
- Adjust viewing parameters and add user data, and hotspots if you wish.
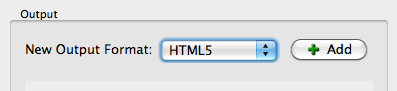
- In the output section, choose HTML5 from the output format list and then click Add.
- Starting with the Image Settings, set the width of the image or select auto to use to the original width of the image.
- Choose your image format, JPEG or PNG.
- Choose the JPEG quality from the Image Quality slider or dial it in.
A quality setting of 90 is almost lossless, while a quality of 10 will very clearly show artifacts. See a comparison. - If your sequence contains empty images – or images that hold no photographic content – select this option to repeat the previous image.
- Next, in the Display section, define the size of the window in which the movie will play.
- Notice that when you enter in one value the other value will automatically update. This is because Keep aspect ratio is selected.
- Choose a background color or choose to hide the background altogether.
- The next option, Scaling, lets you choose how you want your movie to scale within the movie window.
- If you want your movie to rotate automatically or Auto Play, set Mode to either Rotate or Ping-Pong.
- Choose the speed of the rotation plus the how long after interaction the movie will continue to auto rotate (Delay).
- To make the movie zoom-able, select Enable Zoom to turn on the Zoom parameters. Keep everything at their defaults or adjust the following:
- Keep the Default zoom level at 1.00 (100%) or if you would like the movie to already be zoomed-in once it is opened, then set this to a higher percentage.
- Choose the Maximum level of zoom.
Don’t forget to think about clarity when zooming in. If you want the user to zoom in with good quality at the maximum zoom level, be sure that, 1) your image width is larger than the window width, and 2) the quality of the image is high to begin with. - Adjust the center of the zoom.
- Auto move mode allows the image to be moved while zoomed in.
- If you like, add a skin to the project by selecting one from the list, or by clicking Edit and building your own.
TIP: The skin, simplex.ggsk, which is pre-installed, uses scalable vector graphics.
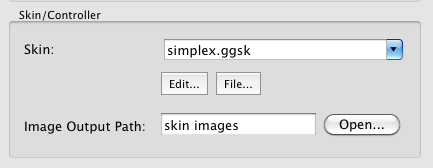
- For Image Output Path, choose a folder (or create new one by simply typing the folder name in the text field) to keep the skin images in or leave it at the default which is the same folder that holds the individual object images.
- Go to the HTML tab to export an HTML template. Enable the output by selecting, Enable HTML file. This should be selected by default.
- Choose an HTML template. The ggpkg.ggt will create a Garden Gnome Package that can be viewed offline on the desktop using the Garden Gnome Package Viewer.
- Then adjust the template parameters. The normal.ggt template will allow you to change the text and background colors and allow for fullscreen. You can also choose to show the User Data table and embed XML.
- Hit OK to output the object movie.
TIP: If you’ll be adding this to a web server, make sure to copy over the XML, HTML, javascript player, javascript file for the skin, and the images folder (including the skin images folder if you made a separate folder for it).


See also
Cache Manifest File
HTML5 Output Settings (Object2VR)
CMS Plugins