| Welcome |
|
This is a short introduction to the series of smaller tutorials that will introduce you to the Skin Editor found in both Pano2VR and Object2VR. |
| Introduction to the Interface |
|
The interface has three main parts: the Tree, Editor and Properties. The tree is your browser and organizer for elements, the editor is your workspace or canvas, and the properties is where you edit the elements. |
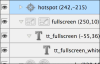
| The Tree |
|
The tree is where the skin elements are organized and layered. |
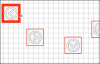
| The Editor |
|
Here you can change the attributes, and actions and convert images to buttons. |
| The Properties |
|
Here you can change the attributes, and actions and convert images to buttons. |
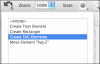
| The Toolbar and Menu bar |
|
The toolbar hold all the available tools for creating your skin. The menu bar includes some features not found anywhere else, like showing guides. |
| The Basic Workflow |
|
The skin editor is a powerful tool and there are many ways to work and create within it. The following tutorials will show you the basic workflows for editing and creating skins. |
| Edit an Existing Skin |
|
The most basic workflow is to simply choose a default skin from the list in both the Flash and HTML5 outputs and to edit it to your needs. |
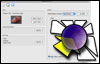
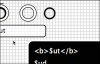
| Add a Clickable Logo |
|
For some projects, only a simple logo or simple interactive image is needed. In this tutorial we add a logo and link it to a website. |
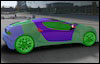
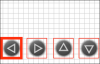
| Create a Custom Controller |
|
On-screen controls let the user move the panorama or object movie with out clicking within the image. A controller can be complex or simple, depending on the project’s needs. In this tutorial we’ll build a simple one from scratch. |
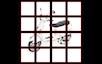
| Build a Simple Loading Bar |
|
Loading bars are a way to let the user know that the panorama or object is loading. |
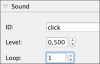
| Add Sounds to Buttons |
|
In this tutorial, we add sounds to buttons to help give user feedback to the controller. |