Setting Location
If location data was not captured to the image while shooting, then you can add coordinates using the Tour Map.
Add Coordinates
If your images do not include Longitude and Latitude coordinates in their Exif data, then you can add them in the Tour Map.
-
Open the Tour Map.
-
Search in the map or use the search field. Double-click in the map to set the position and add a pin.
When using the search field, a green flag will appear in the map marking the searched location. Click the flag to use this location. It will turn into a pin.
To reposition, drag the pin.
To reset the position, double-click in the map again or do a new search.
Once the location is set, you’ll see the coordinates added to the Longitude and Latitude fields in the User Data.
Set GPS Using Measure Distance and Geolocate Map
The Geolocate Map Mode is found in the Tour Map and is useful for indoor tours that did not have any GPS data applied during shooting, and where a floor plan is used. Using this mode will give the nodes location data.
- Add a floor plan to the Tour Map.
- Measure the floor plan. This will provide a more accurate position. It requires knowing the measurement of a part of the floor plan (i.e. wall, window, etc.). Make sure the floor plan you added is selected in the Tour Map and choose Measure Distance mode from the Positioning and Orienting Tools menu. The mouse pointer will change to a cross-hair. (If you do not have known measurements, you can skip this step and go to step 4, Geolocate Map.)

Choose, Measure Distance - Trace a line over a known distance, like a wall. Click to add the start point, then click once more to add the end point. A window will appear, add the distance.
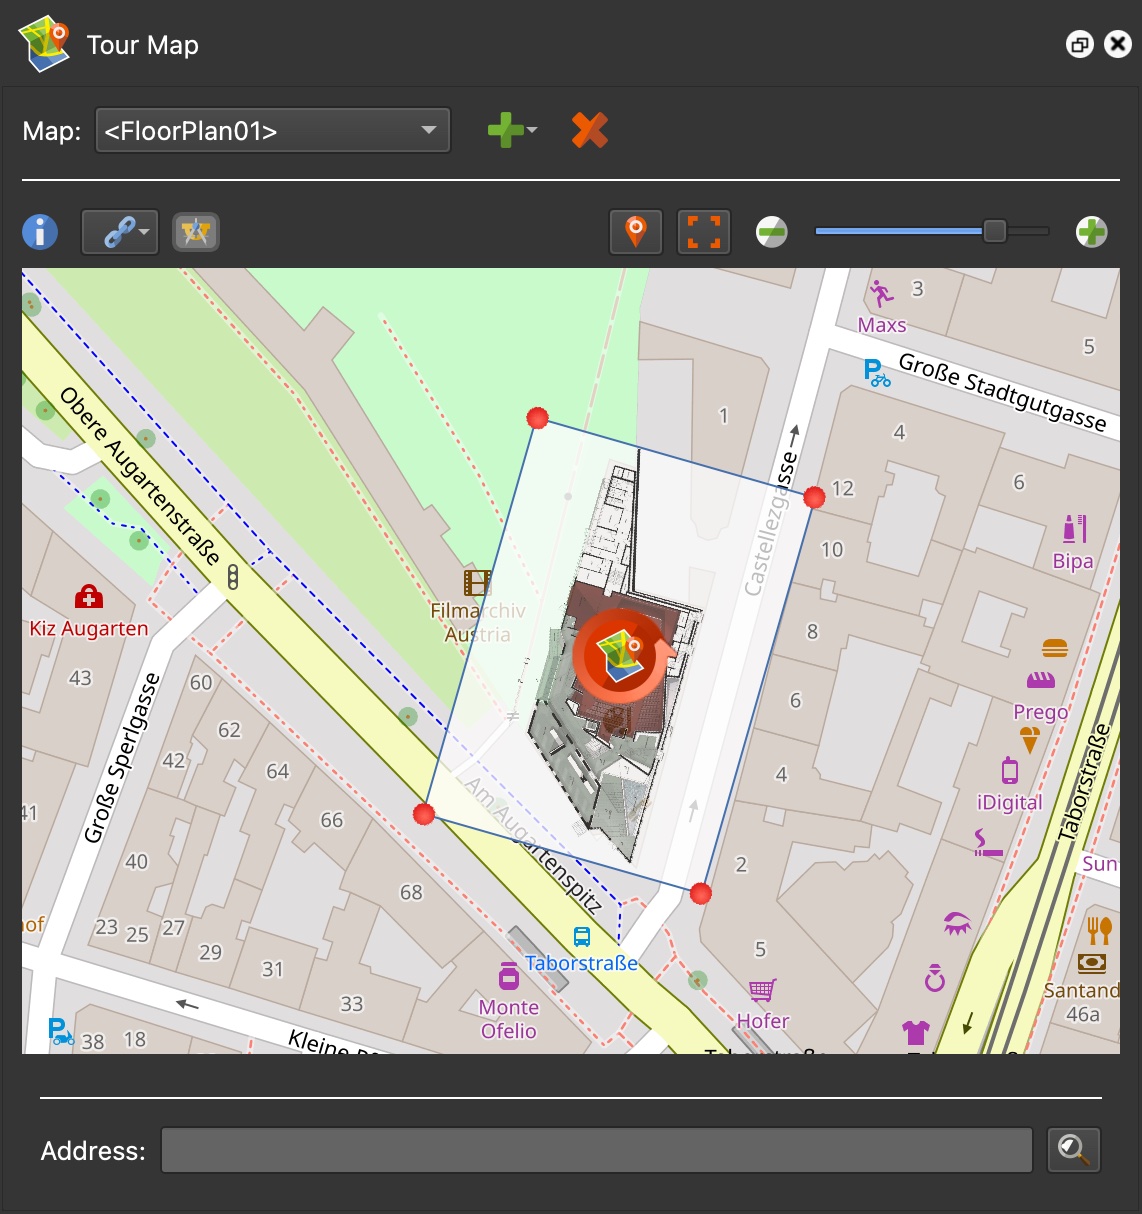
- Choose Geolocate Map from the Positioning and Orienting Tools menu. The map will appear with the floor plan laid over the map.

Choose Geolocate Map 
Floor Plan overlaid - If needed, use the Address search bar to find the location of the floor plan.
- Double-click in the map to place the floor plan at that location.
- Using the red handles and center rotation tool, resize and rotate the floor plan to match the building on the map.
- Exit the Geolocate Map Mode by either pressing Escape, or clicking the Positioning and Orienting Tools button again.
- Drag a node to the floor plan. The node now has Geolocation data applied. You can check in the User Data properties to see the coordinates.


Setting the Heading
There are a few ways to set North.
Bring the Viewer in focus by clicking in it. Hold the N key down and drag the panorama in the Viewer to the correct heading. You’ll see direction markers in the Viewer and the radar in the Tour Map move.
You can also use the radar beam in the Tour Map to set North. Click in the Tour Map to bring it in focus. Hold down the N key and spin the radar beam to correct view.
Set North with Pick Landmark
Use Pick Landmark mode if North is not known. It finds North by matching landmarks in the image to the ones on the map.
-
Set the position of the image.
-
Rotate the image to a specific landmark, centering it in the Viewer.
✭ Tip: Open the Viewer Settings and turn the Center Marker on to line up the landmark.
-
Select, Pick Landmark, from the Positioning Tools menu in the Tour Map. The curser image will change indicating you are now in Pick Landmark mode.
✭ Tip: Switch the map to Google Maps – Satellite.
-
In the map, find the matching landmark and double-click on it. North will be automatically set.
Remove Location
Sometimes you might find you want to remove the location information entirely. This is useful for when you have a map in the skin and you don’t want specific panoramas to appear in the map.
- Select the node in the Map.
- Right-click and choose, Remove Node from Map, or simply hit the Delete key.