Creating Components
Components are predefined skin elements that can be saved to the Components Toolbox and then reused in skins and shared.
To create a component from the entire skin, go to the Edit menu and choose Create Component from Skin.
To create a component from a group of elements, first make sure they are all selected and do any of the following:
-
Go to the Edit menu and choose Create Component from Selection.
-
Right-click on any selected element(s) in the Canvas or Tree and choose Create Component from Selection.
The Create Component dialog will appear.
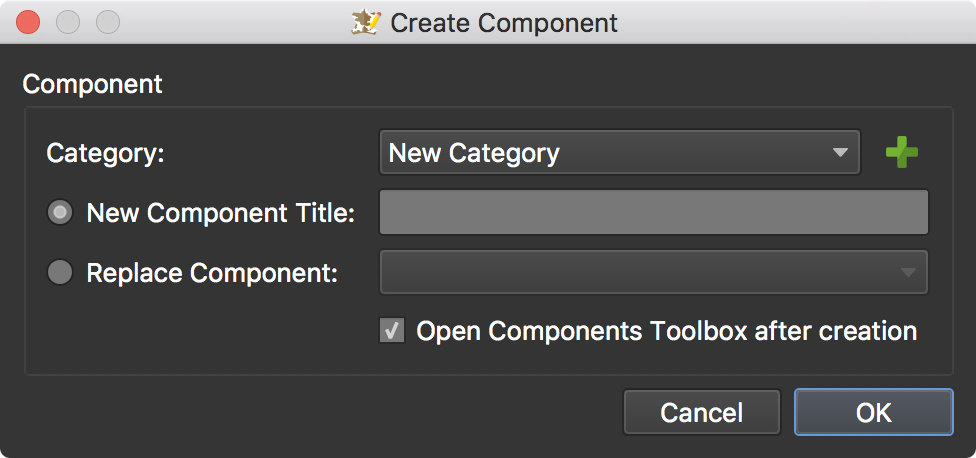
Choose a category or create a new (green plus) category for your new component.
You can now choose what to do next:
- Give the component a name. The components’ name must be unique within a category.
or
- Replace an existing component.
Click OK to save or replace the component.
Using Components
Add a component to a skin by doing one of the following:
-
Right-click the component and choose Insert Component into Skin or Insert Component as Child of Active Element.
-
Double-click the component.
Sharing Components
-
Right-click a category in the Components Toolbox and choose, Open Category Folder in Finder/Explorer.
-
Navigate to the component you wish to share.
-
Select the component and share. On our forum, Hopki has opened a place for everyone to share skin components. There are already a few there with detailed how-tos on how to use and build them.
Adding a Component to the Toolbox
Components and icons can be added to the toolbox by dragging them in or by adding them to the category folders manually in Finder or Explorer. Right-click any Category and select, Open Category Folder in Finder/Explorer. Add the component or icon to the appropriate folder. Components and Icons cannot be added to the Built-in Categories.
Add a component
-
Select a user-defined category.
-
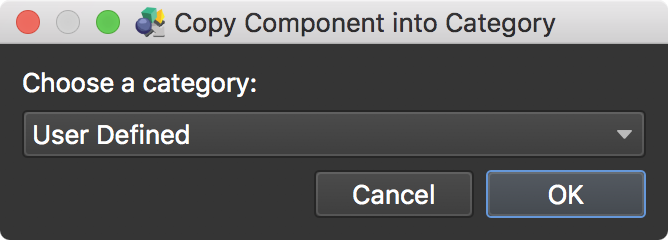
Drag the GGSKC file to the Toolbox’s Grid View/Content section or to Pano2VR’s icon, or to the Canvas. Or double-click the GGSKC file. A dialog will appear.
-
Choose a category in the dialog that appears.
Add and create a new category
-
Double-click the GGSKC file or drag it onto the Pano2VR logo. A dialog will appear.
-
Select, New… to create a new category.
-
Enter a title. Click OK to add.

Add a new icon
-
Select a user-defined category.
-
Drag icons to the Icon’s grid view to import them.
Icons that have multiple states can be treated as a single icon. Use the file suffixes, _o or _over for mouse over states and _a or _active for the active state:
my_icon_o.svgormy_icon_overmy_icon_a.svgormy_icon_active.svg
See also…
-
Forum: Skin Components