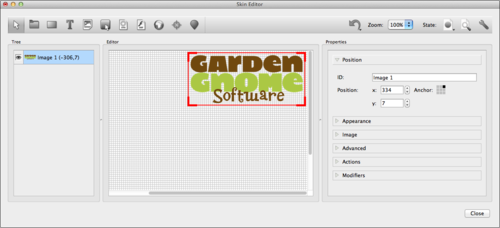
For some projects, you might want to include an interactive logo. These can be quickly and easily added in the skin.
Add an interactive logo to a skin
- Open a pre-installed, custom, or empty skin via the menu bar or Flash and HTML5 output settings.
- Import the logo or image either by:
- Dropping it onto the Editor’s canvas, or
- Click the Add Image button, in the toolbar, locate the image, and choose Open.
- From the menu, choose Elements > Image.
- Place the image somewhere within the canvas. For example, in the upper right corner.
- Anchor the image to its correct location. With it selected (has a red border), click Position in the Properties and select its anchor location.
- To make it clickable and direct the user to a website, for example, add an action to it. Staying in the Properties section, click to open the Actions panel (you might have to scroll down to see it) and double-click the table to open the Actions Settings.
- For the Source, choose Mouse Click, and for the Action, choose Go To URL.
- Enter the full web address (for example, http://www.example.com) in the URL field.
- Click OK to add the action.
- Test the skin, by opening the Live Preview.
- When all is working as expected, click Close to exit the Skin Editor.
- Choose, Save to save the skin. If editing a pre-installed skin, an error message will appear alerting you that the file is protected. Click, OK and give the skin a different same.
- Output the project and the image should be clickable and direct the user to a website.
★ NOTE: In the Flash Parameters, choose None for Scaling if you do not want the movie to scale to the window size, and to keep your logo within the movie window rather than floating with the browser window.
Learn more:
See also
The Interface (Skin Editor)
Add Hotspots (Object2VR)
Using the Skin Editor
| Previous: Edit an Existing Skin | Next: Build a Custom Controller |
